Get Your Bat On with Our Easy Origami Tutorial!

Who says bats are only for Halloween? 🦇 Unleash your creativity and make a delightful origami bat with our newest YouTube tutorial! Whether you’re a paper-folding pro or a newbie, this step-by-step guide will have you crafting your own flying friend in no time.

Why Fold an Origami Bat?

Origami isn’t just about folding paper—it’s a magical journey! It’s a fantastic way to unwind, spark your imagination, and make something cool. Plus, who wouldn’t love a cute little bat hanging out on their desk or wall? 😄

What You’ll Need:

  • A square sheet of origami paper (any color you fancy). Tant paper is our top pick for its perfect folding finesse.
  • Sharpie or similar
  • A sprinkle of patience and a dash of creativity

I hope this post gets you excited to create your own origami bat. Dive into the fun, and let’s get folding! For a detailed walkthrough, don’t forget to check out our YouTube tutorial here and subscribe for more fun and easy origami projects!

Happy crafting! 😊
Unleash Your Inner Dragon: A Complete Origami Tutorial

Ready to unleash your inner dragon? 🐉 Creating a majestic origami dragon is easier than you might think! For a comprehensive, step-by-step guide, be sure to check out our YouTube tutorial here! Whether you’re a seasoned paper folder or just starting your origami journey, our video tutorial will walk you through the process.

Why Make an Origami Dragon? Origami is more than just a hobby; it’s a form of mindfulness and creativity. Folding paper can be incredibly relaxing and rewarding. Plus, creating a mythical creature like a dragon is an exciting challenge! 🧩

What You’ll Need:

  • A square sheet of origami paper (any color). Preferably tant paper for texture and sturdiness.
  • Patience and a little bit of imagination 🌟

I hope this blog post has inspired you to embark on your origami dragon adventure. Remember, practice makes perfect! For a more in-depth guide, head over to our YouTube channel and follow along with the tutorial here. 😊

Paper to Petal: Easy Origami Flower Bookmark Tutorial

Are you a bookworm with a creative side? Then you’ll love our new origami flower bookmark tutorial inspired by the magical world of Brian Selznick’s “Kaleidoscope”! This enchanting collection of interconnected stories, filled with wonder and mystery, will transport you through time and space. Let the beauty of “Kaleidoscope” inspire your own creative journey as you learn to craft a delicate origami flower bookmark. If you want to grab a book of your own, click here! 🌌

Our step-by-step YouTube tutorial breaks down the process, making it easy for beginners to create a stunning floral masterpiece.

What You’ll Need:

Not only is the finished bookmark a charming and personalized addition to your reading experience, but it also makes for a thoughtful and unique gift for book lovers of all ages. Whether you’re marking your place in a favorite novel or gifting it as a special token, this origami bookmark adds a touch of creativity to any reading journey. 📚

Ready to dive into the world of origami and storytelling? Check out our tutorial here! Or, if you prefer a pre-made bookmark, you can purchase one here. 😊

How to Make an Easy Origami Rose: Step-by-Step YouTube Tutorial for Beginners

Hello, rose lovers!

I’m excited to share a brand-new YouTube tutorial where you’ll learn how to make an elegant and easy origami rose! 🌹 Whether you’re new to origami or looking for a quick yet beautiful project, this rose is perfect for all skill levels. It’s a delightful way to add a touch of nature to your craft projects or gifts, and you can customize it with different colors and paper styles.

Why You’ll Love This Project

Simple and Beautiful: This origami rose has a graceful design but is easy enough for beginners to enjoy.

Perfect for Gifts: These paper roses make lovely handmade gifts, and you can create a bouquet or add one to a wrapped present for a personal touch.

Customizable: Use solid-colored paper for a classic look, or get creative with patterned origami paper for a unique twist. You can even experiment with different paper sizes to create roses of various dimensions!

What You’ll Need

To make your origami rose, gather these materials:

Watch the Tutorial

Head over to my YouTube channel for a step-by-step guide! In the tutorial, I’ll walk you through each fold, ensuring your rose comes out looking stunning. Don’t forget to experiment with different paper styles and colors for your own creative touch. You can find the full tutorial here! 😍

Learn to Make Adorable an Origami Dog Face with Easy-to-Switch Ears!

Hello, origami enthusiasts!

I’m thrilled to announce a new YouTube tutorial that will have you folding and personalizing an adorable origami dog face! This project is perfect for all skill levels, whether you’re a beginner or a seasoned origami artist. What makes this origami dog face so special is its interchangeable ears. You can choose to have them down, perked up, or even with one up and one down, allowing you to create a variety of expressions for your paper pup. 🐶

Why You’ll Love This Project

  • Versatility: With interchangeable ears, you can create different looks with a single model, offering endless possibilities for customization.
  • Easy and Fun: This tutorial is designed to be straightforward and enjoyable, making it a great activity to do alone or with family and friends.
  • Perfect for All Ages: Whether you’re making it as a fun craft project with kids or as a creative stress-relief activity for yourself, this origami dog face is sure to bring a smile to your face.

What You’ll Need

To get started, gather your materials:

  • Origami paper: You can use any color or pattern you like. Consider using a square piece of tant paper for best results. If you would like floral designs, I recommend Japanese washi-inspired paper shown in the tutorial.
  • Markers or colored pencils (optional): These are optional but great for adding eyes, a nose, or other details to personalize your dog face.

Watch the Tutorial

Head over to my YouTube channel for the full step-by-step tutorial. I’ll guide you through the entire process, showing you how to fold the base of the dog face and then create the interchangeable ears for a customizable finish. Tutorial here!

Don’t forget to subscribe to my channel for more fun and easy origami tutorials. 🙏

Happy folding! 😊

Origami Cat Face for Beginners: A Step-by-Step Guide

Fold a Cute Origami Cat Face with Our New YouTube Tutorial!

Are you ready for a fun origami adventure? Our new YouTube tutorial shows you how to make an adorable cat face that’s super easy and quick to fold!

What You’ll Need:

  • Square origami paper. I prefer to use tant paper for its high-quality texture and sturdiness. If you prefer a patterned paper, check out this pack here!
  • A flat surface
  • A bit of creativity

In just a few steps, you’ll have a charming paper cat face ready to brighten your day. Perfect for beginners and great for all ages, this project is a fun way to unleash your creativity.

Why You’ll Love It:

  • Easy to Follow: Our tutorial makes it simple to fold along, even if you’re new to origami.
  • Fun for Everyone: Whether you’re crafting with kids or on your own, this project is a delightful way to spend some time.
  • Personalize Your Cat: Customize with different colors and expressions to make your cat face unique!

Check out the tutorial here and create your own origami cat face!

Happy folding! 😊

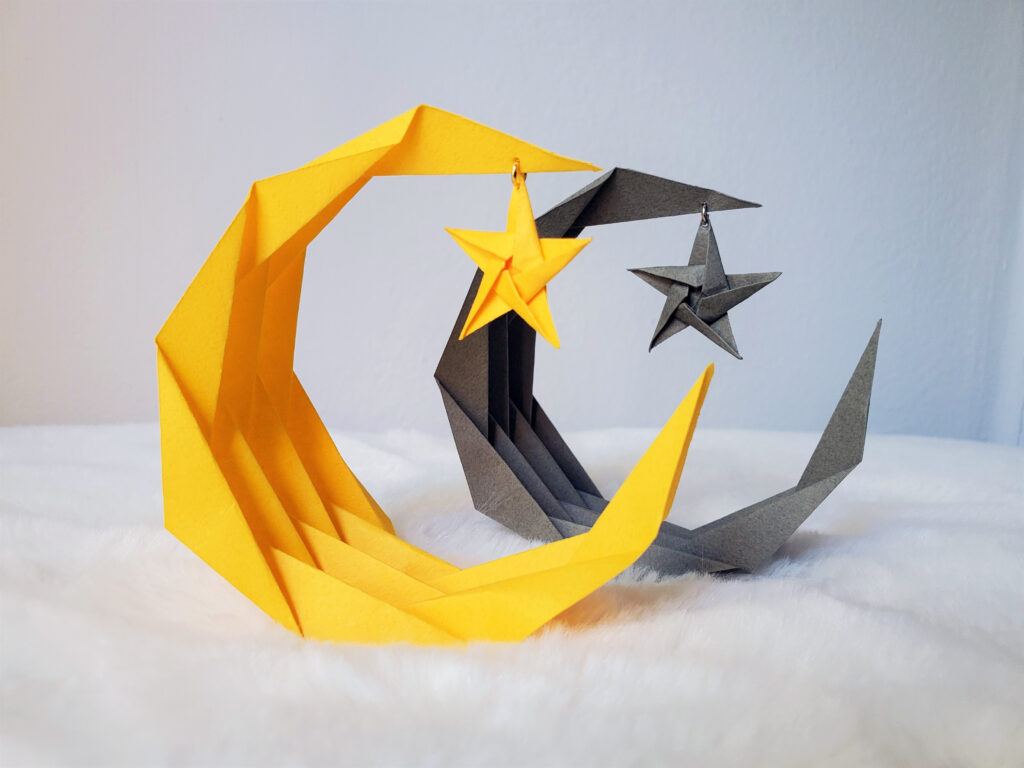
Celestial Papercraft: Crescent Moon and Star Tutorial

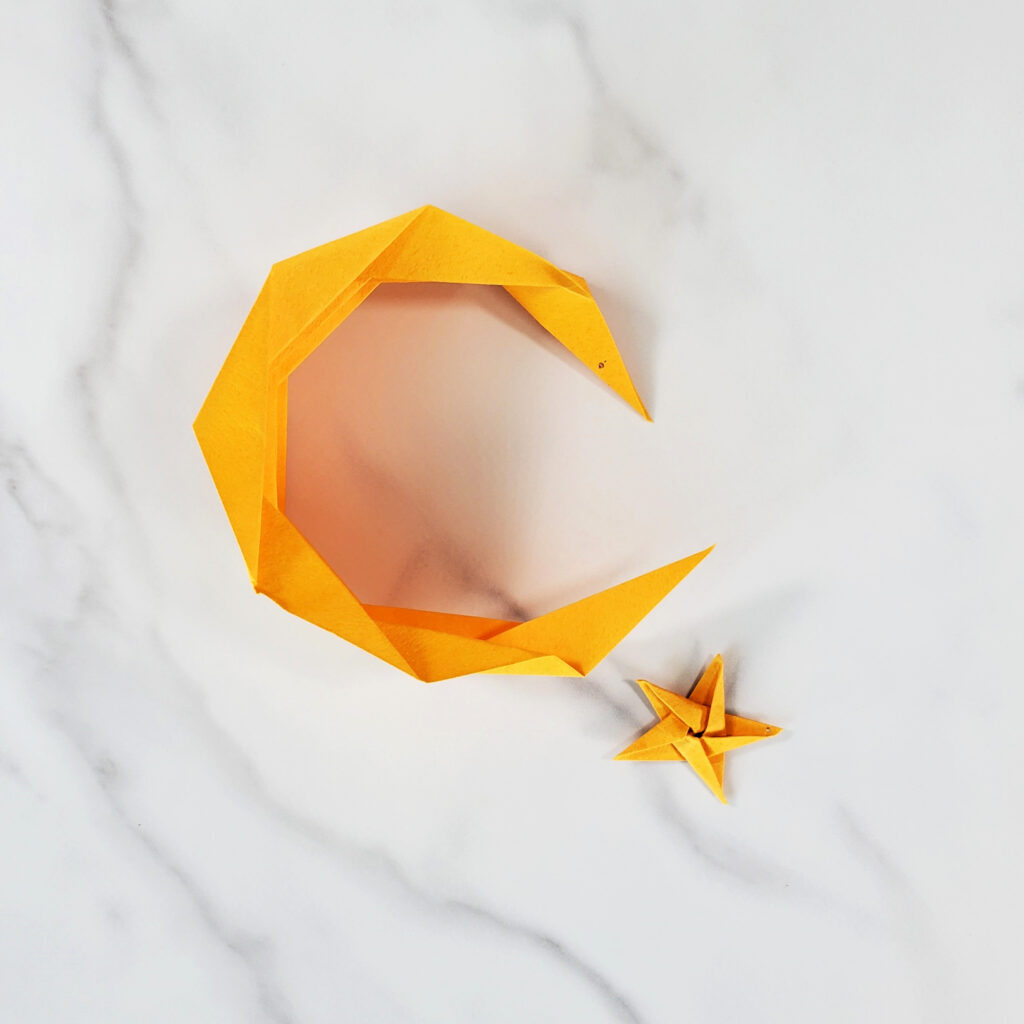
Origami Crescent Moon and Star 🌌

Inspired by the endless allure of space and everything sci-fi, I’ve always been fascinated by the cosmos. To bring a piece of that wonder into my world, I decided to create my own celestial bodies – with paper! Whether you’re a seasoned space explorer or just starting your cosmic journey, let’s embark on a paper-folding adventure to create a cool origami crescent moon and star. 🌟

Ready to blast off? Scroll down for easy-to-follow instructions and helpful video tutorials. Or, if you prefer a shortcut to starry-eyed decor, check out this link here for pre-made origami moon and star sets. Let’s begin our cosmic crafting adventure!

Steps on How to Make Your Crescent Moon & Star 🌙⭐

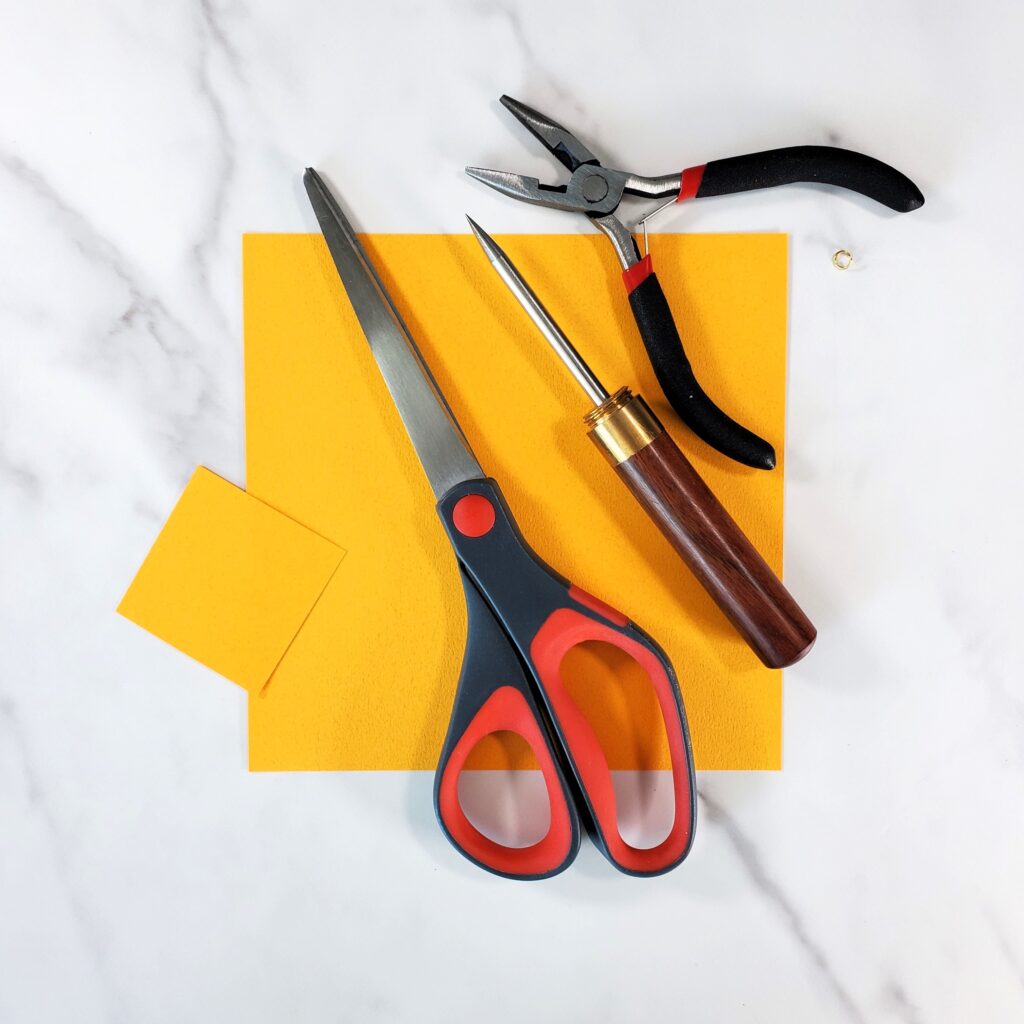
Essential Supplies:

Step-by-Step Instructions:

➡️ Check out this tutorial on how to put together your crescent moon and star!

The first step is to create your origami crescent moon and star. Follow these easy and simple tutorials to get started: here and here!

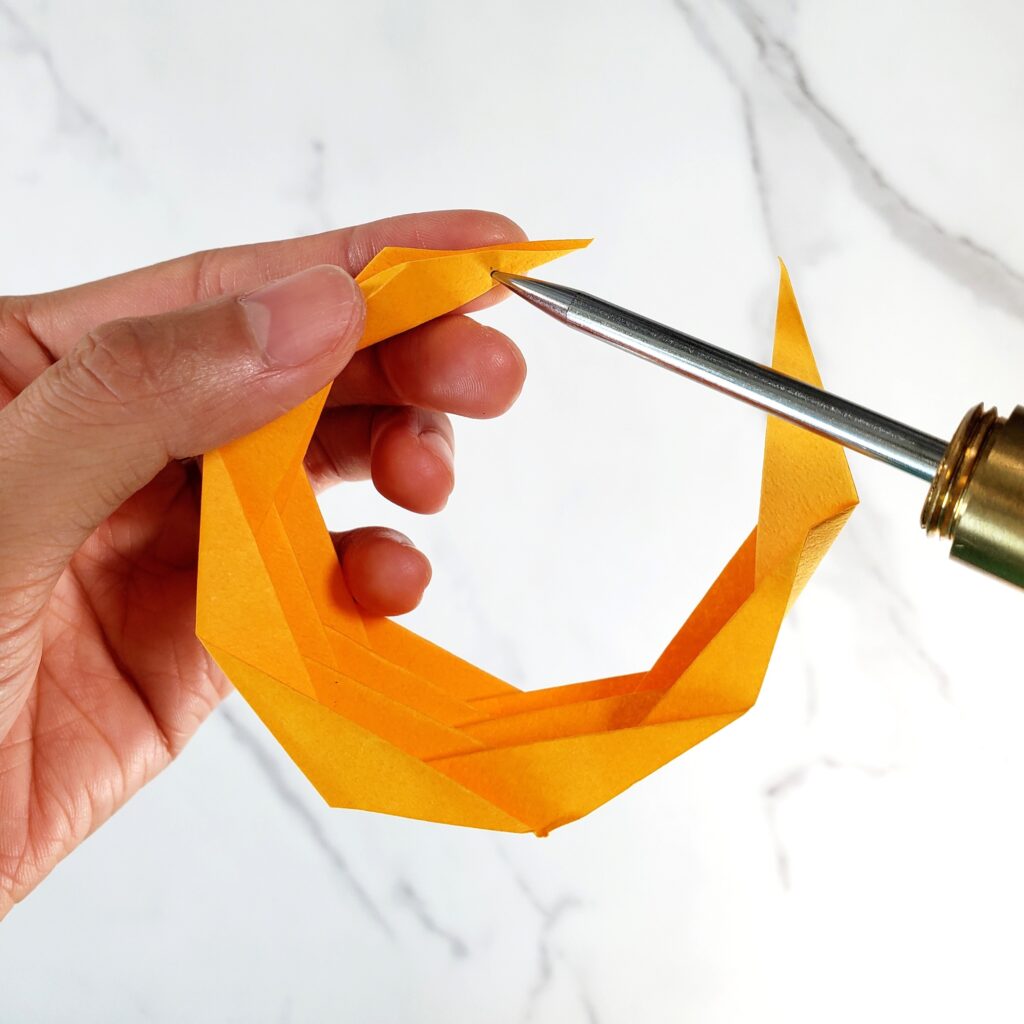
Using an ice pick, carefully puncture a hole near the tip of the top portion of the crescent moon.

Repeat the above step by puncturing a hole near the tip of one of the star’s points.

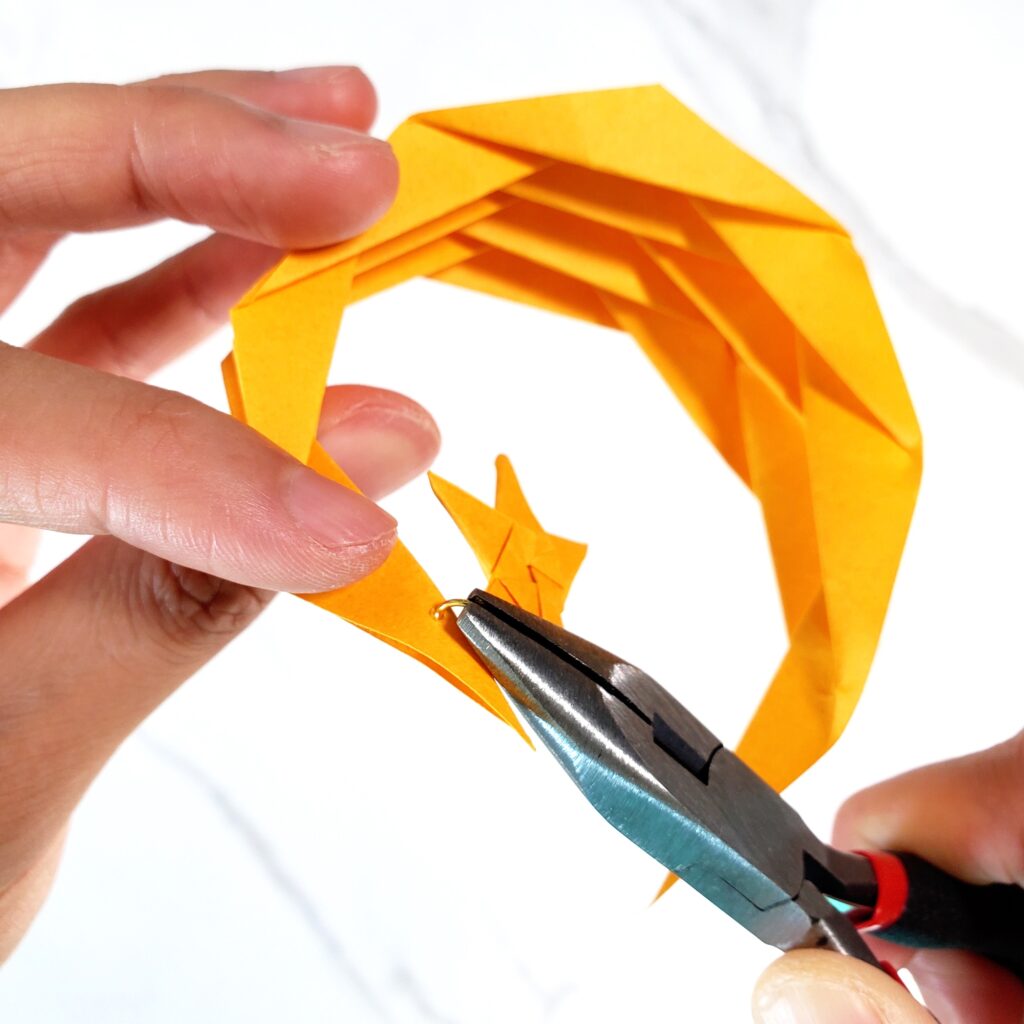
Use pliers to open a jump ring slightly. Insert the jump ring into the punctured hole of the star.

Attach the jump ring containing the star to the punctured hole of the crescent moon. Ensure the jump ring is securely closed with the pliers.

Reshape and adjust the crescent moon and star so that the assembly can balance on its own.

Ta-da! You’ve crafted your very own crescent moon and star! 🥳🎉

These supplies can be found on my Origami Supplies page.

Easy Origami Ghost for Beginners | Paper Folding Tutorial

Hey there, fellow craft enthusiasts! While it’s still August and not quite spooky season yet, I couldn’t resist getting into the Halloween spirit a little early this year. I’m thrilled to share my latest YouTube tutorial on how to make an easy origami ghost!

These little ghosts are super simple to fold, making them perfect for all ages, whether you’re a seasoned origami pro or just getting started. And the best part? You can have loads of fun drawing on silly, spooky, or even adorable faces to give each ghost its own personality!

Why You’ll Love This Project:

  • Easy to Follow: The tutorial is straightforward and beginner-friendly.
  • Customizable: Once you’ve folded your ghost, grab a pen and let your imagination run wild with the faces you can draw. The sillier, the better!
  • Perfect for Halloween Decor: These origami ghosts make fantastic decorations for Halloween parties, trick-or-treat night, or just to add a bit of spooky fun to your home.

What You’ll Need:

  • A square piece of origami paper in any color you like. Tant paper is a great choice because of how smoothly it folds.
  • A little patience and a lot of imagination!

So, if you’re ready to get a head start on your Halloween crafts, grab some paper and join me over on my YouTube channel for this fun and easy tutorial.

👉 Watch the Tutorial Here

Happy crafting! 🎨👻

How to Make a Super Easy Origami Butterfly

Have you ever wanted to create a delicate, fluttering creature from just a piece of paper? Today, I’ll guide you through the simple process of folding an origami butterfly using the vibrant and versatile tant paper. 🦋

To get started, you’ll need:

  • A square piece of tant paper or if you prefer a patterned paper, check out this pack here!
  • A bit of patience

Follow the step-by-step tutorial on my YouTube channel here to learn how to fold this graceful butterfly. It’s a surprisingly easy project, even for beginners. Once you’ve mastered the technique, experiment with different colors and sizes of tant paper to create your own unique butterfly designs.

Happy folding! 😊

Hop to It! A Fun and Easy Origami Jumping Frog Tutorial

Are you ready for a leap into the world of origami? I’m excited to introduce our latest YouTube tutorial on how to make an origami jumping frog! This project is not just a paper-folding adventure—it’s interactive, easy to make, and perfect for all ages. Whether you’re looking for a fun activity with the kids or just want to relax and create something playful, this jumping frog will bring joy to everyone. 🐸

Why You’ll Love This Tutorial 😍

  • A Classic: The origami jumping frog is a timeless project that’s been enjoyed for generations.
  • Fun and Interactive: The best part about this origami frog? It jumps! Fold it up, press its back, and watch it hop. Challenge your friends to a jumping contest or create a whole family of frogs.
  • Easy to Make: We’ve designed this tutorial to be beginner-friendly, so even if you’re new to origami, you’ll find it easy to follow along.
  • Great for All Ages: Whether you’re a kid or just a kid at heart, this project is a fantastic way to spend some creative time.

What You’ll Need

  • A square piece of origami tant paper (or any square paper you have on hand)
    • If you don’t have tant paper on hand, no worries—you can grab a pack here! The paper’s vibrant colors and sturdy texture make it ideal for this project.
  • A flat surface to fold on
  • A little bit of patience and a whole lot of enthusiasm!

Get Started Now

Ready to start folding? Watch the tutorial here, follow along, and you’ll have a jumping frog in no time! 😊