Don’t miss your final opportunity to snag incredible deals on our unique handmade creations!
Our 20% off sale on selected items in our Etsy shop is coming to a close. Today is your last chance to enjoy significant savings on our one-of-a-kind shadowboxes, stylish acrylic cases, stunning metal art, and more.
Whether you’re looking to revamp your home decor or find the perfect gift, our shop offers a variety of pieces to suit every taste. From minimalist designs to bold statements, you’re sure to discover something that catches your eye.
So what are you waiting for? Head over to our Etsy shop now and take advantage of this limited-time offer.
Hey there, fellow craft enthusiasts! While it’s still August and not quite spooky season yet, I couldn’t resist getting into the Halloween spirit a little early this year. I’m thrilled to share my latest YouTube tutorial on how to make an easy origami ghost!
These little ghosts are super simple to fold, making them perfect for all ages, whether you’re a seasoned origami pro or just getting started. And the best part? You can have loads of fun drawing on silly, spooky, or even adorable faces to give each ghost its own personality!
Why You’ll Love This Project:
Easy to Follow: The tutorial is straightforward and beginner-friendly.
Customizable: Once you’ve folded your ghost, grab a pen and let your imagination run wild with the faces you can draw. The sillier, the better!
Perfect for Halloween Decor: These origami ghosts make fantastic decorations for Halloween parties, trick-or-treat night, or just to add a bit of spooky fun to your home.
What You’ll Need:
A square piece of origami paper in any color you like. Tant paper is a great choice because of how smoothly it folds.
A little patience and a lot of imagination!
So, if you’re ready to get a head start on your Halloween crafts, grab some paper and join me over on my YouTube channel for this fun and easy tutorial.
Have you ever wanted to create a delicate, fluttering creature from just a piece of paper? Today, I’ll guide you through the simple process of folding an origami butterfly using the vibrant and versatile tant paper. 🦋
To get started, you’ll need:
A square piece of tant paper or if you prefer a patterned paper, check out this pack here!
A bit of patience
Follow the step-by-step tutorial on my YouTube channel here to learn how to fold this graceful butterfly. It’s a surprisingly easy project, even for beginners. Once you’ve mastered the technique, experiment with different colors and sizes of tant paper to create your own unique butterfly designs.
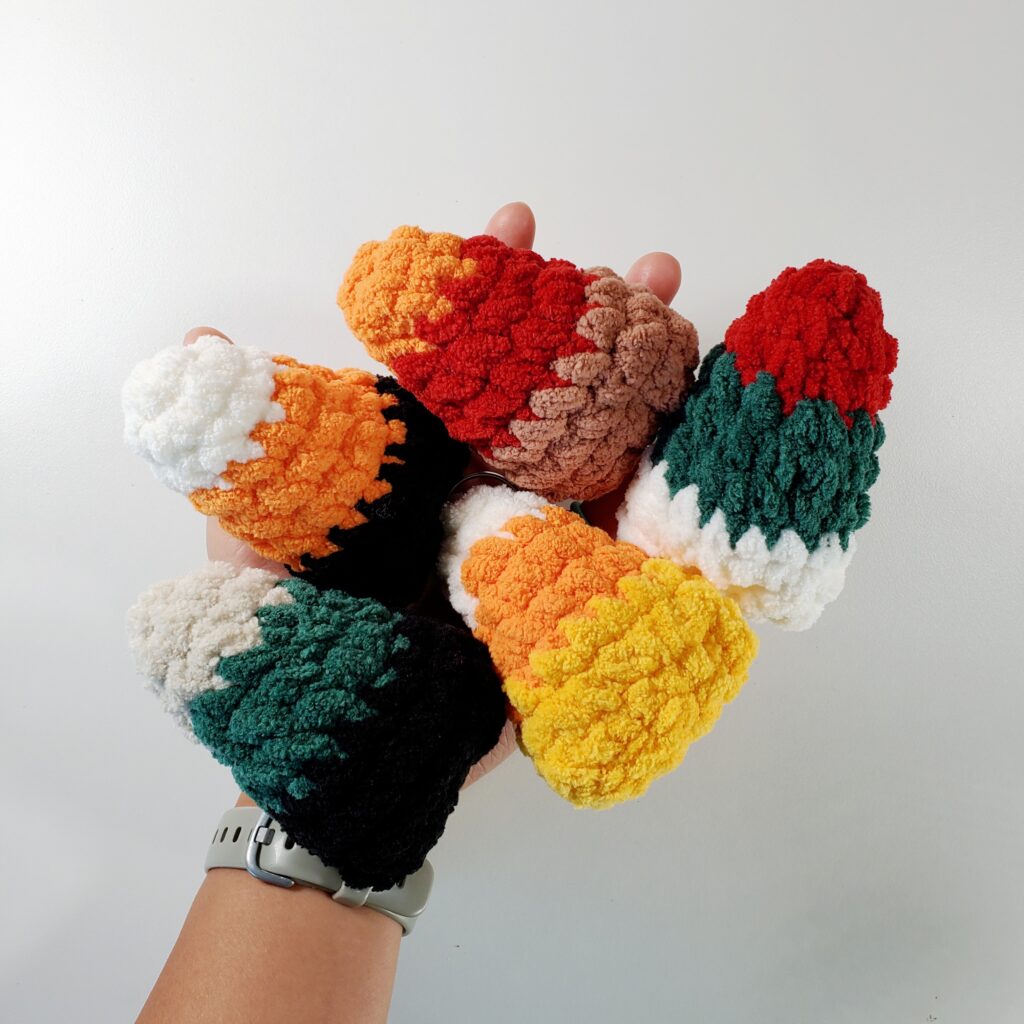
Candy corn crochet plushie. 😍Available in 5 color combos!
Candy corn, Halloween, Fall, Zombie, and Christmas
August may still be here, but the excitement for spooky season is already creeping in! 🎃 As you start planning for Halloween, why not get a head start with some adorable and unique treats? My new Candy Corn Crochet Plushies are just the thing to get you in the festive spirit early!
Available in five festive colors, these plushies are made with Bernat Blanket Super Bulky yarn (#6) using an 8mm hook, giving them a soft, squishy feel that’s irresistible. The pattern is from momsstitchchetti and it’s free! They’re perfect for trick-or-treaters, gifts, stocking stuffers, and more. Imagine surprising little ones with these cute candy corn triangles instead of—or alongside—the usual candy! 🍬
Halloween: Vintage White, Carrot Orange, Coal Black
Fall: Carrot Orange, Crimson Red, Sienna
Zombie: Almond, Deep Sea, Coal Black
Christmas: Crimson Red, Deep Sea, Vintage White
If you’re into crafting, head over to my Crochet Supplies page to see exactly what I used to create these plushies. And for those who want to grab one without the crochet work, check out my Etsy shop here. Plus, there’s a keychain option available, so you can carry a little festive spirit with you wherever you go! If you’d like to add a keychain to your plushie, don’t forget to check out my YouTube tutorial on how to attach it here—super simple and fun to do!
Materials
Yarn: Bernat Blanket Super Bulky yarn (#6) – see above colors
Halloween might still be a couple of months away, but it’s never too early to add some festive fun to your life. Get your Candy Corn Crochet Plushies now and be ready for the spooky season when it arrives! 😊
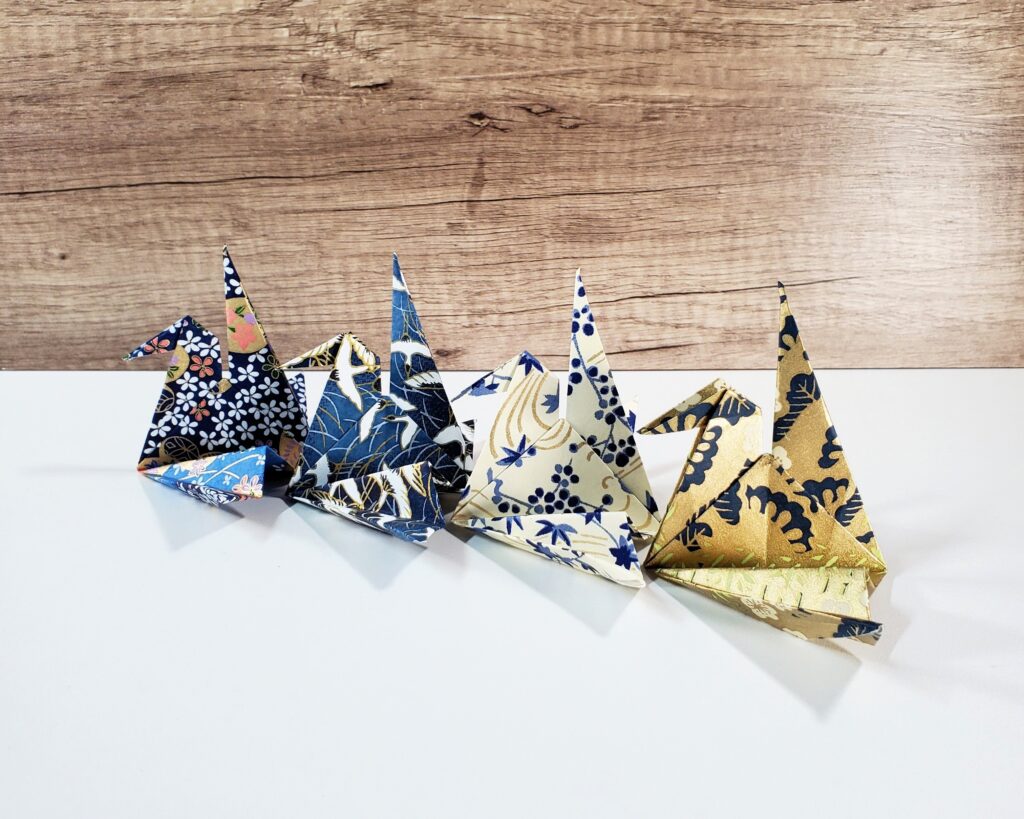
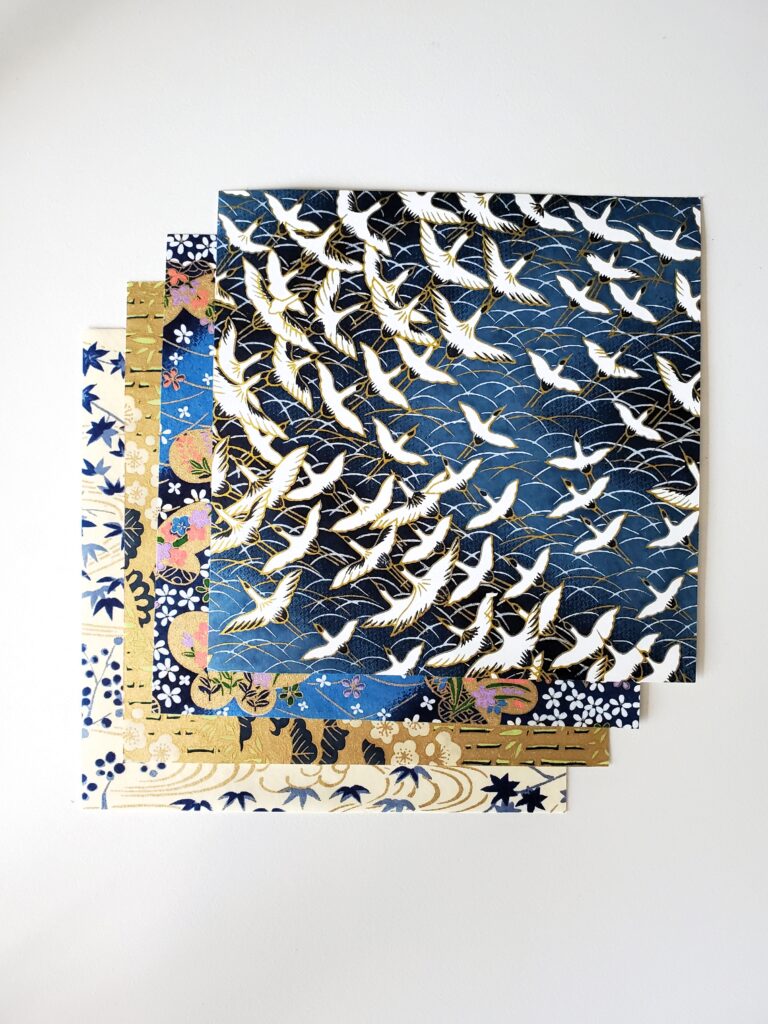
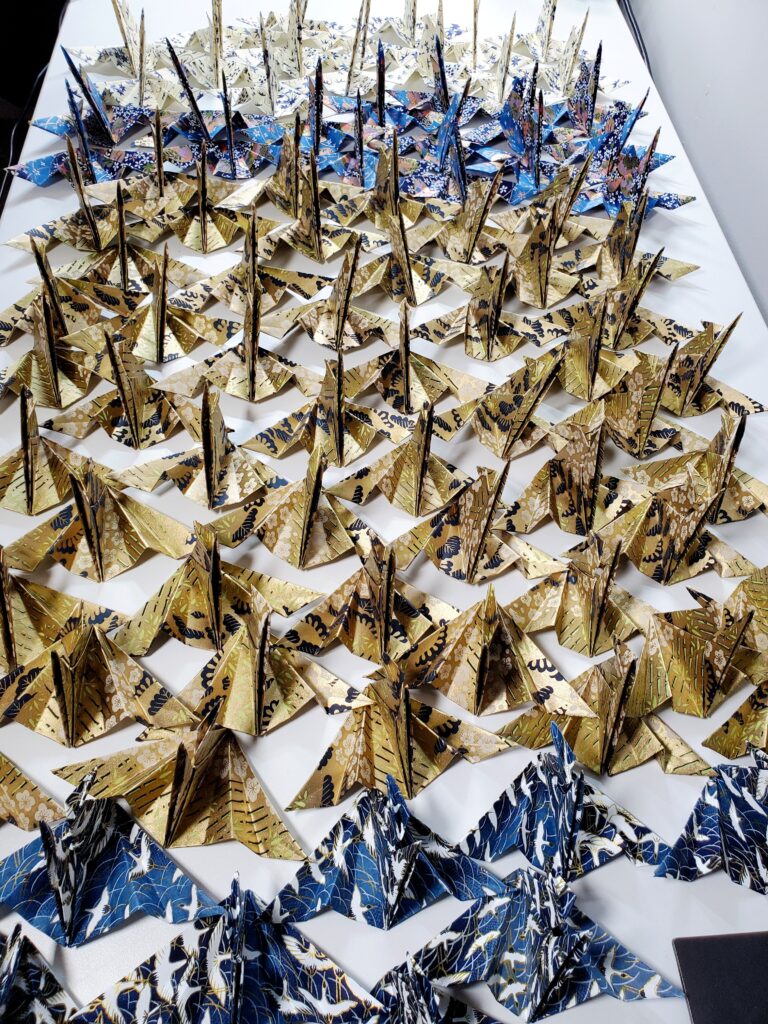
I had such a great time making these beautiful origami crane name card placeholders for a special custom Etsy order! The cranes are made from chiyogami paper from ChibiJayShop, and I’m completely in love with the textures and intricate Japanese-inspired patterns—they’re just amazing. 🕊️
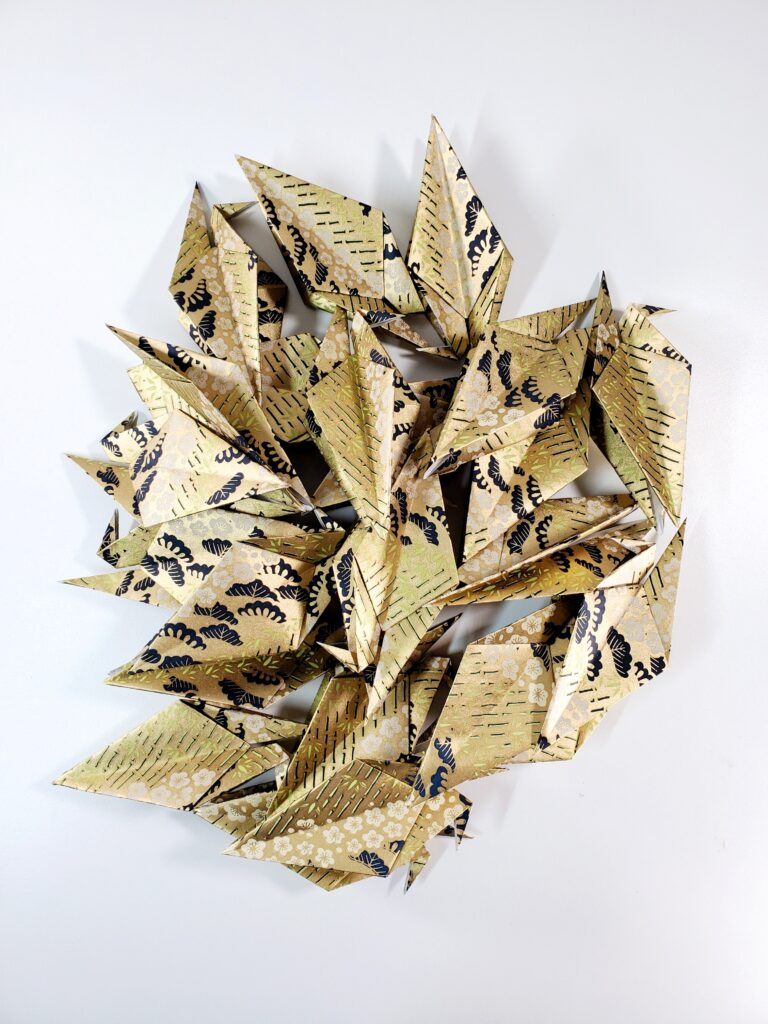
The customer requested 92 cranes (+3 extra 😊) in cool tones of blue and gold, with a variety of patterns for an upcoming event. They even sent a reference photo, which made it so much easier to pick the perfect designs! I carefully selected four patterns that fit the cool-tone theme, featuring delicate flowers, elegant leaves, graceful cranes, and more.
Folding all 95 cranes did take a bit of time, but honestly, I enjoyed every single fold. The chiyogami paper was a dream to work with—it’s so smooth, and the textures are simply delightful. ✨ The shop has a variety of beautiful patterns to choose from, and the paper is incredibly durable, so it doesn’t rip easily. The patterns are just astonishing!
If you’d like to see the process, I even filmed an ASMR YouTube video of me folding a few of these cranes—watch here! Big shoutout and thank you to ChibiJayShop for their gorgeous paper! If you’re into origami or any kind of paper craft, I can’t recommend them enough. Check out their shop here!
If you like to learn how to create your own origami crane name card placeholders, check out my blog post here!
And if you’d like to purchase origami crane name card placeholders in a cherry blossom pattern or place a custom order, check out my Etsy shop and feel free to message me! 😍
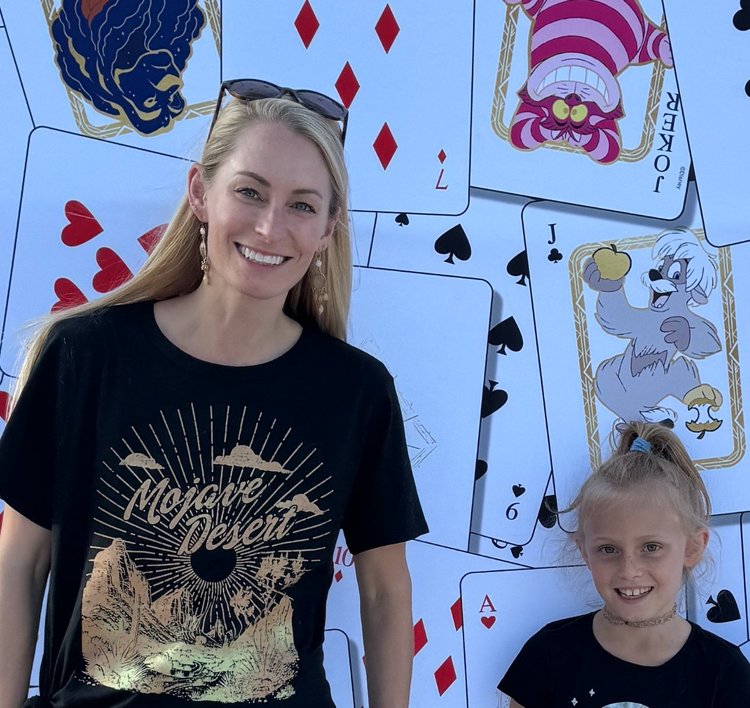
👋 Meet Chelsea, the talented founder of Put A Balloon On It, who has transformed her love for balloon art into a celebrated venture in Monrovia, CA. What started as a hobby decorating for her daughter’s PTA events has blossomed into a renowned balloon artistry business, known for creating stunning and memorable decorations.
We’re thrilled to announce our collaboration, which has resulted in the unique and elegant Origami Balloon. 🎈 This special creation combines Chelsea’s beautiful balloon designs with intricate, handmade origami pieces, creating a captivating centerpiece for any event. The Origami Balloon adds an extra touch of surprise and artistry, making it perfect for birthdays, anniversaries, and other celebrations.
To discover more about this exciting fusion and explore how it can elevate your next event, check out our Collab Friends page. We’re excited to share this unique offering with you! 😊
Are you ready for a leap into the world of origami? I’m excited to introduce our latest YouTube tutorial on how to make an origami jumping frog! This project is not just a paper-folding adventure—it’s interactive, easy to make, and perfect for all ages. Whether you’re looking for a fun activity with the kids or just want to relax and create something playful, this jumping frog will bring joy to everyone. 🐸
Why You’ll Love This Tutorial 😍
A Classic: The origami jumping frog is a timeless project that’s been enjoyed for generations.
Fun and Interactive: The best part about this origami frog? It jumps! Fold it up, press its back, and watch it hop. Challenge your friends to a jumping contest or create a whole family of frogs.
Easy to Make: We’ve designed this tutorial to be beginner-friendly, so even if you’re new to origami, you’ll find it easy to follow along.
Great for All Ages: Whether you’re a kid or just a kid at heart, this project is a fantastic way to spend some creative time.
What You’ll Need
A square piece of origami tant paper (or any square paper you have on hand)
If you don’t have tant paper on hand, no worries—you can grab a pack here! The paper’s vibrant colors and sturdy texture make it ideal for this project.
A flat surface to fold on
A little bit of patience and a whole lot of enthusiasm!
Get Started Now
Ready to start folding? Watch the tutorial here, follow along, and you’ll have a jumping frog in no time! 😊
I posted a new YouTube tutorial on how to make an origami penguin! This charming little project was inspired by a recent Etsy order for a shadowbox featuring a pair of origami penguins with a red heart. You can create your own penguin now! 🎉
In this easy and relaxing tutorial, I’ll guide you step-by-step to fold your very own penguin. It’s a delightful activity that’s perfect for everyone, from beginners to seasoned origami lovers.
Watch the tutorial here! But the fun doesn’t stop there! If you’d love a pair of these adorable penguins but prefer to skip the folding, check out our Etsy shop, Orikim. I offer a lovely shadowbox featuring two origami penguins holding a red heart, perfect as a gift or a cute decoration for any room which can be found here!
Happy folding, and enjoy every moment of creativity! 🌟
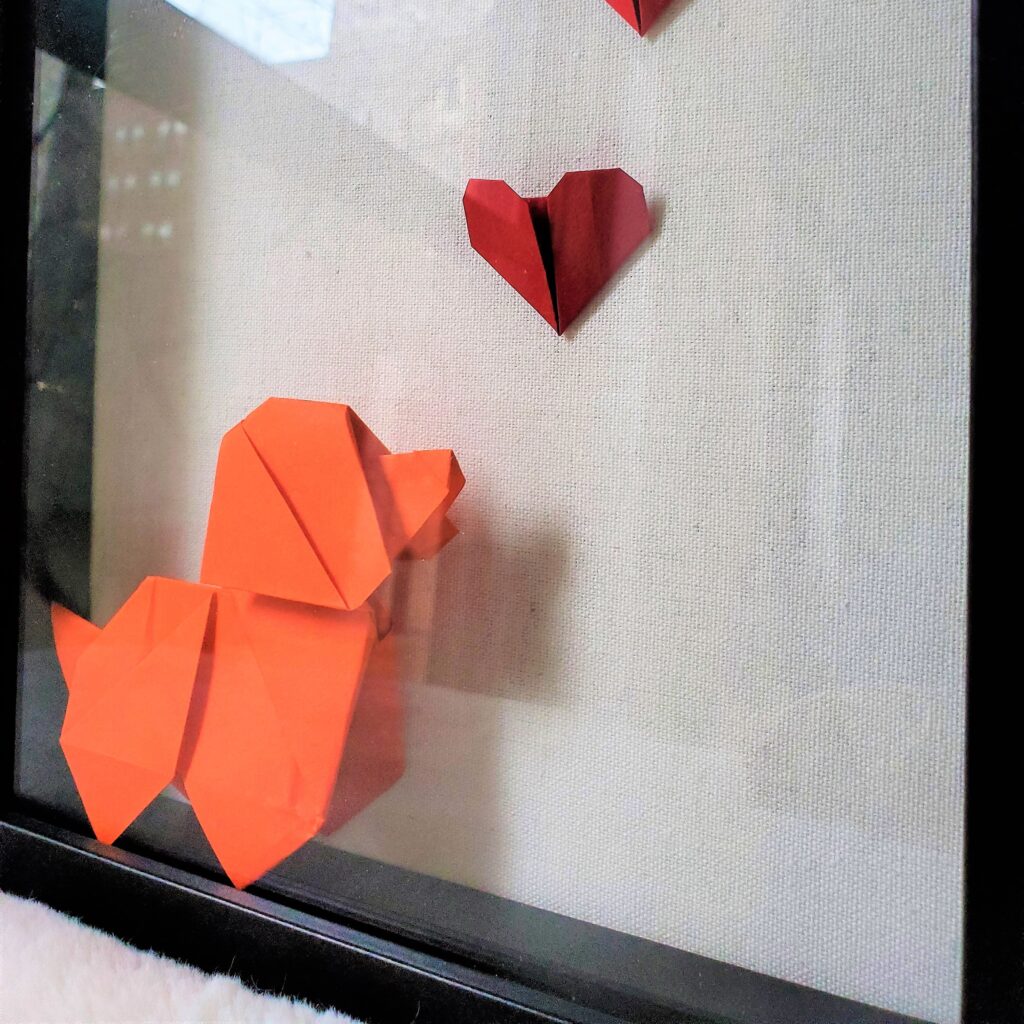
Origami Dog with Red Hearts – Handcrafted Wooden Shadow Box (8×10 inches) 🐶
Dogs are more than just pets; they are family members who fill our lives with joy, loyalty, and unconditional love. Whether your beloved canine has crossed the rainbow bridge or is still your faithful companion, creating a dog shadowbox can be a heartfelt way to celebrate their presence in your life! 🐾
Inspiration Behind the Dog Shadowbox
The inspiration for the dog shadowbox comes from my love for dogs and the special bond we share with them. These shadowboxes have become a common purchase for those wishing to memorialize their furry friends. Each shadowbox tells a unique story, capturing the essence of your dog’s personality and the cherished moments you’ve shared.
For those who love to embrace their creativity, making your own dog shadowbox is a perfect way to honor your dog’s memory or celebrate their life. You’ll have the opportunity to personalize every aspect, from selecting the background to arranging the elements that best represent your pet.
How to Make Your Own Dog Shadowbox
Creating a dog shadowbox is a rewarding project that allows you to commemorate your furry companion in a unique and personal way. Keep scrolling for step-by-step instructions on how to create your own! ⬇️
Prefer a Custom-Made Shadowbox?
If you’d rather have a custom dog shadowbox made for you, check out my Etsy listing here! I would be honored to create a special piece that captures the unique spirit of your furry friend. ❤️
Whether you choose to create your own or have one made, a dog shadowbox is a beautiful tribute to the dogs that bring so much joy to our lives. Embrace your love for your canine companion with this heartfelt project!
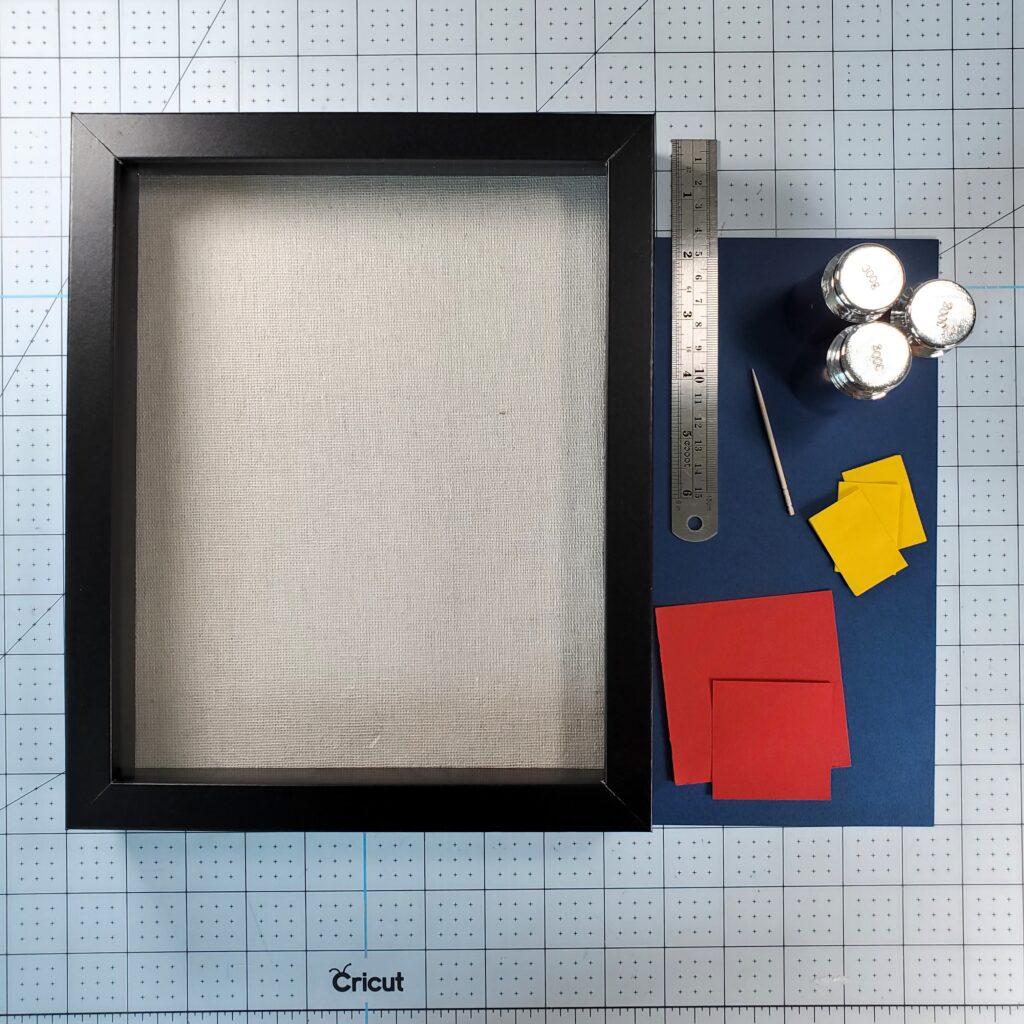
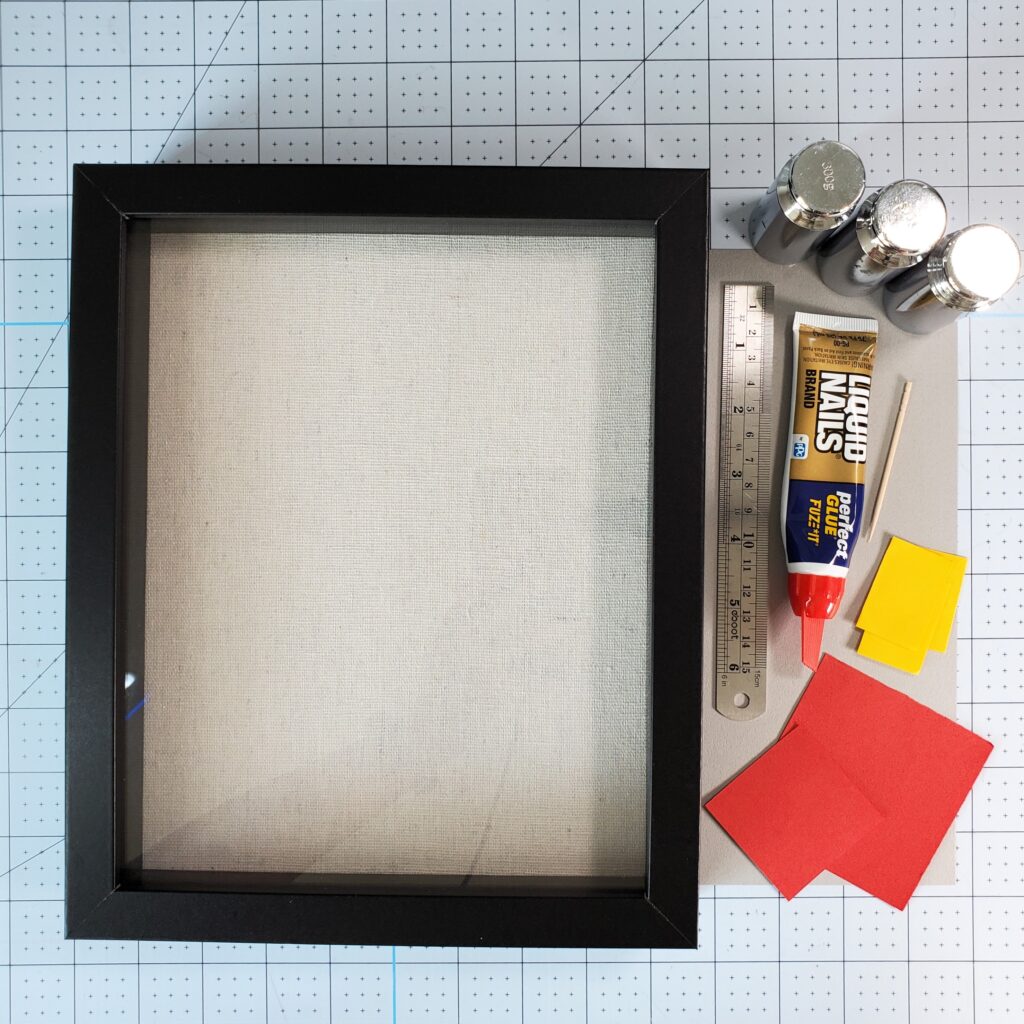
My crafting tools are essential. Liquid Nails glue ensures the pieces stay securely in place. I use toothpicks for precise glue application and sticky notes to protect the paper from the weights I use—individual calibration weights perfect for holding down the paper without damage. My ergonomic X-acto knife makes precise cuts, and my self-healing Cricut crafting mat ensures clean, accurate cuts.
Step-by-Step Instructions:
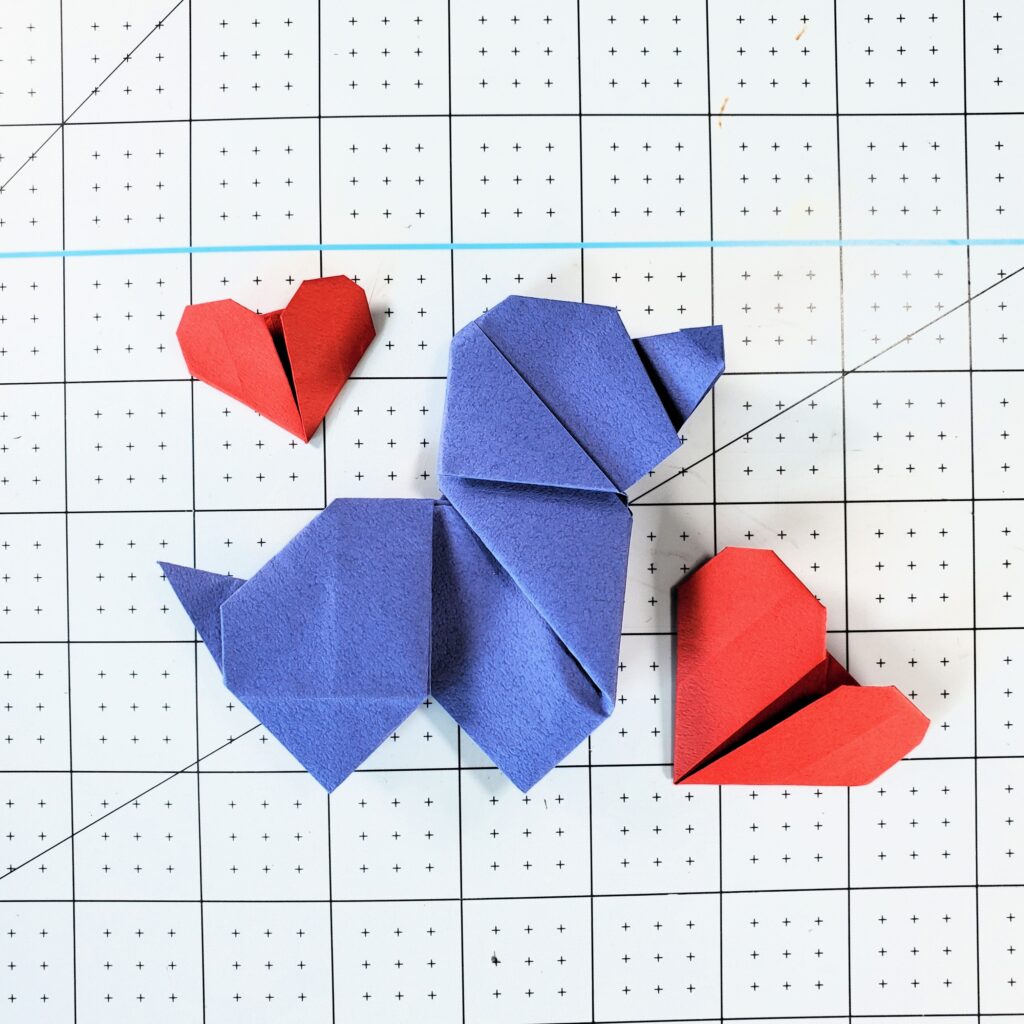
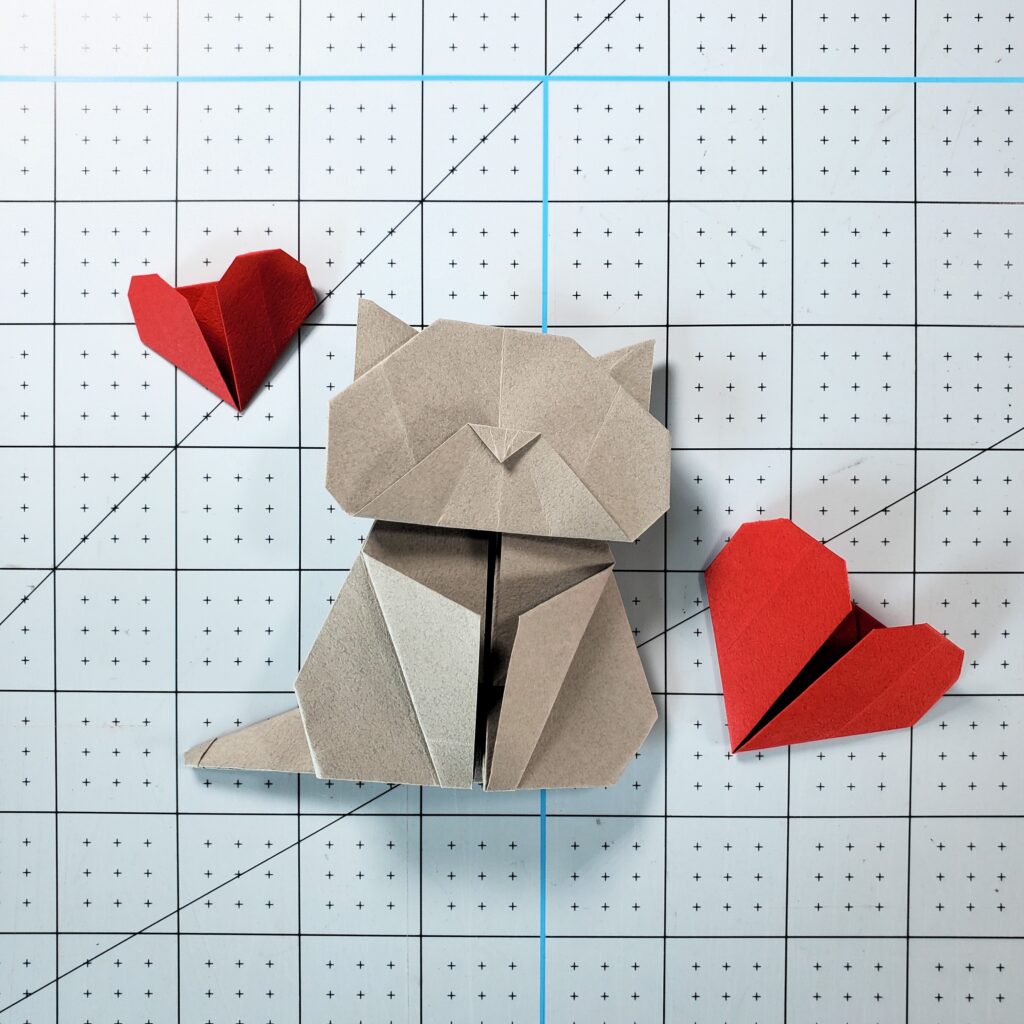
The first step is to create your origami cat and heart. Follow these easy and simple tutorials to get started: here and here!
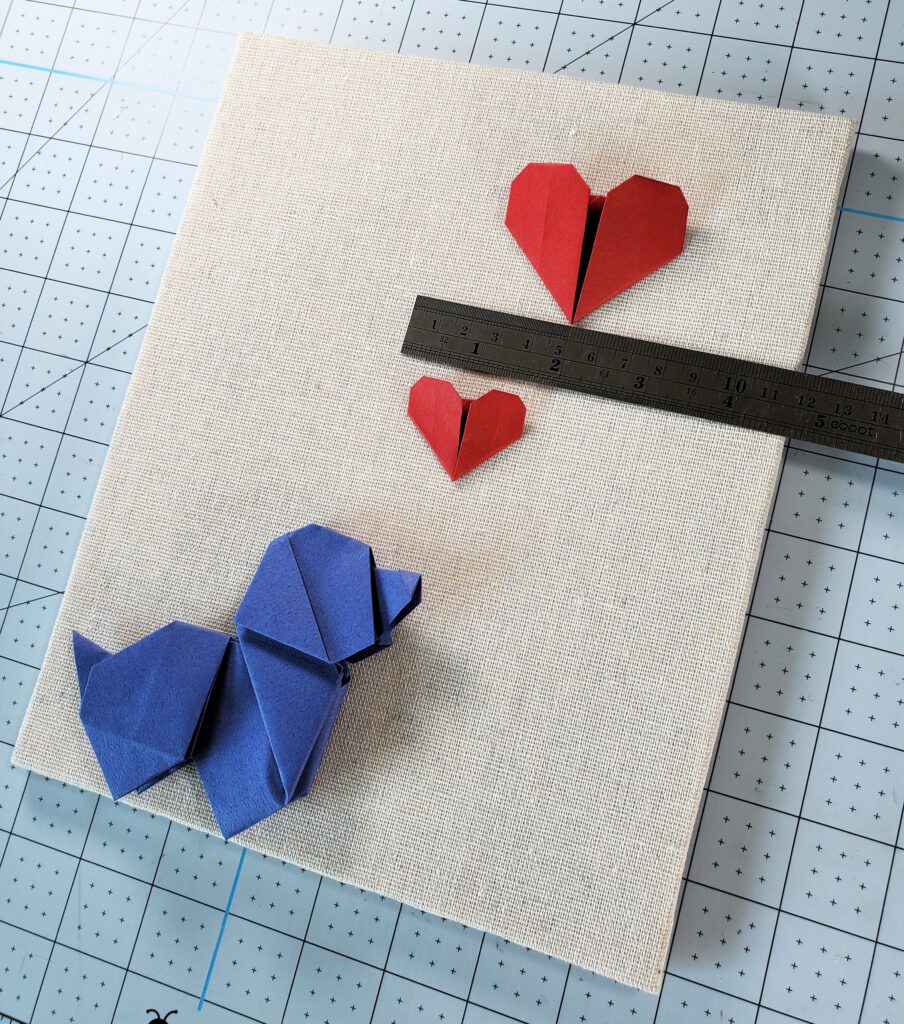
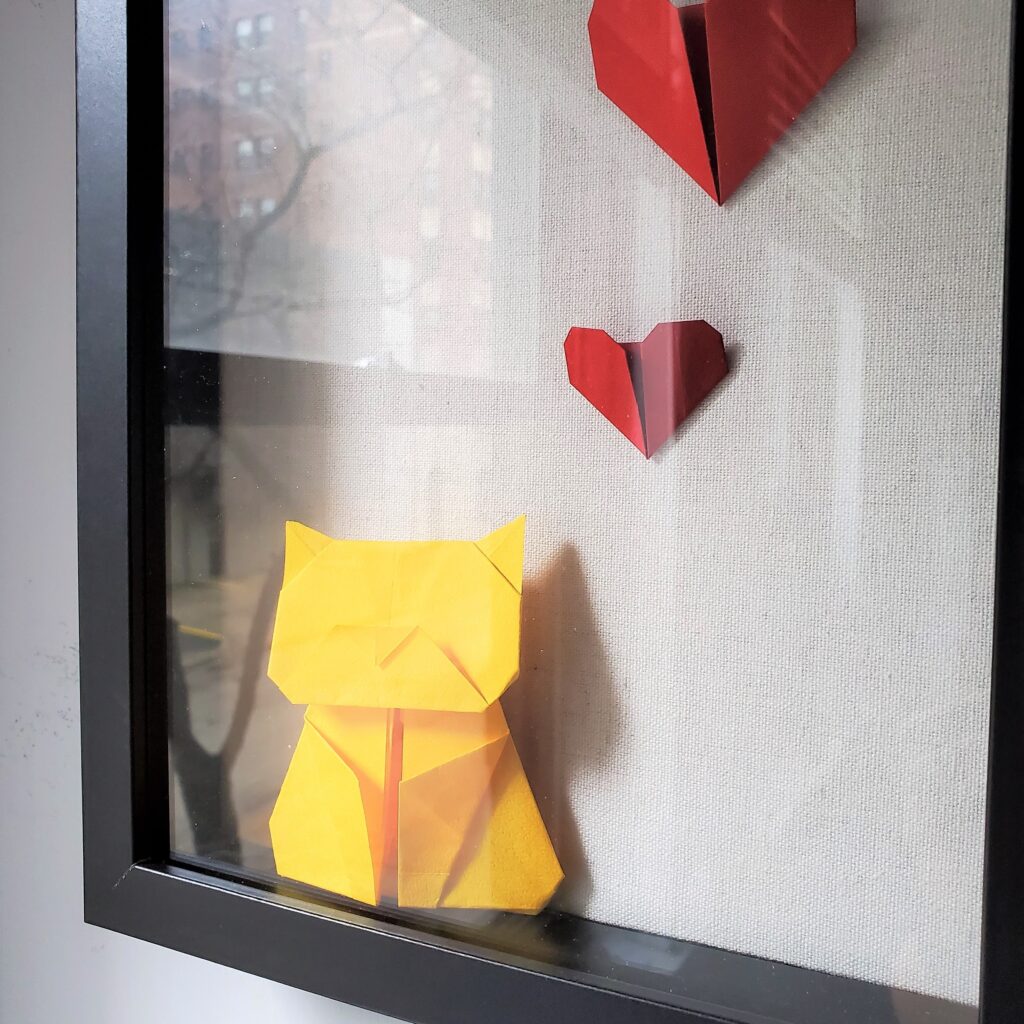
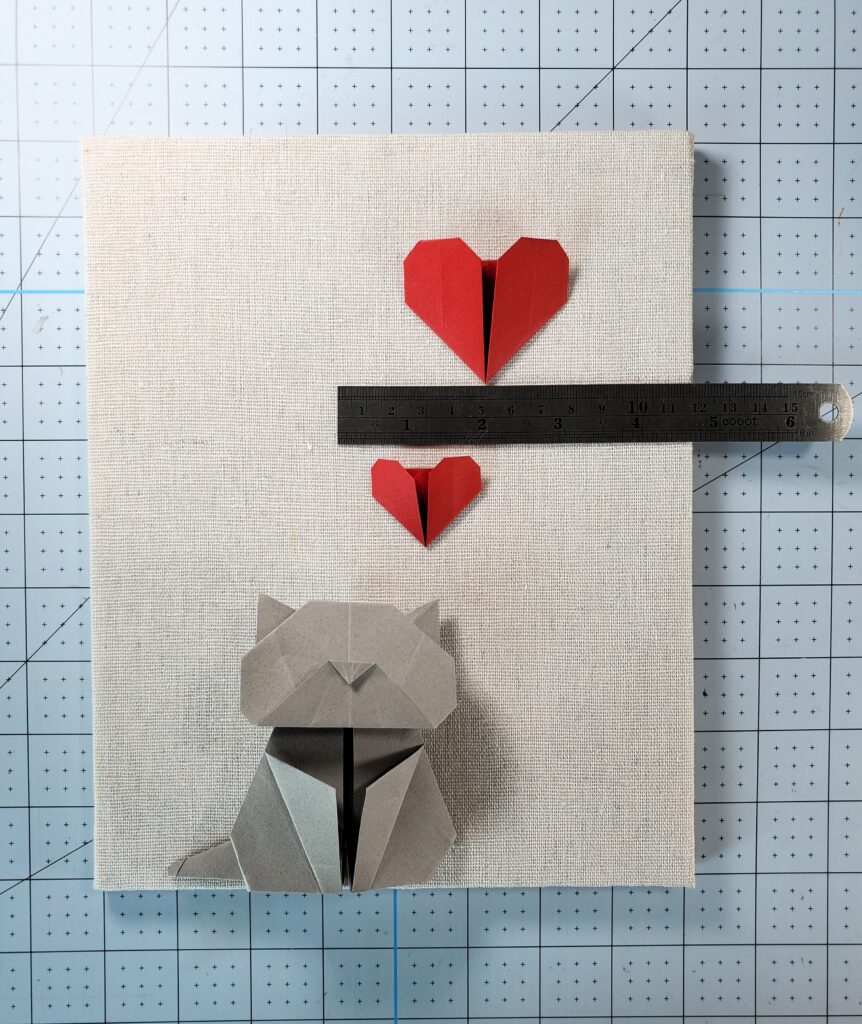
Open the shadowbox and remove the backboard. With the backboard, position the large heart slightly in the top right corner, the small heart just underneath on the left side of the large heart, and place the cat near the bottom left corner, as shown in the nearing and below pictures. I typically guesstimate their placements, but ensuring they are equal in length. 😅
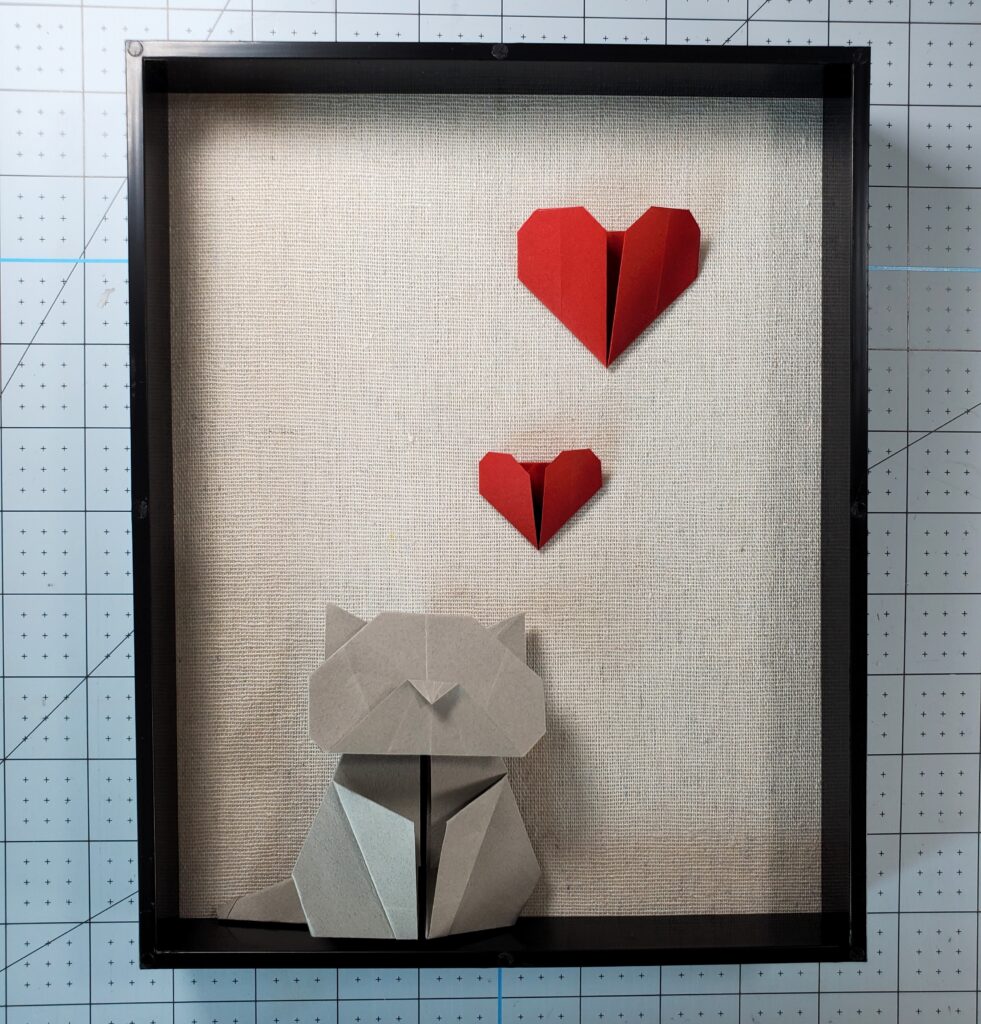
To create the illusion of the dog standing on a ledge within the shadowbox, position the inner border on top of the backboard as shown in the left picture. Carefully place the dog at the bottom of the inner border, making it appear as if it’s perched on the ledge.
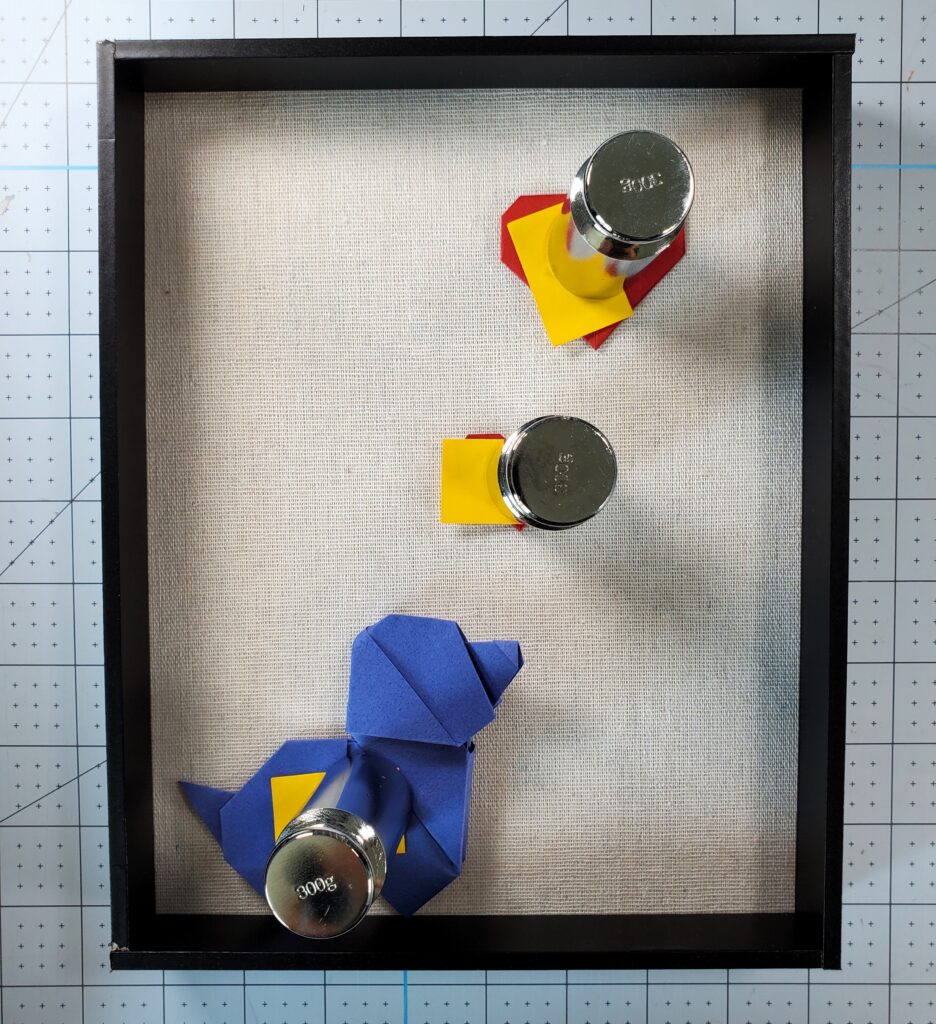
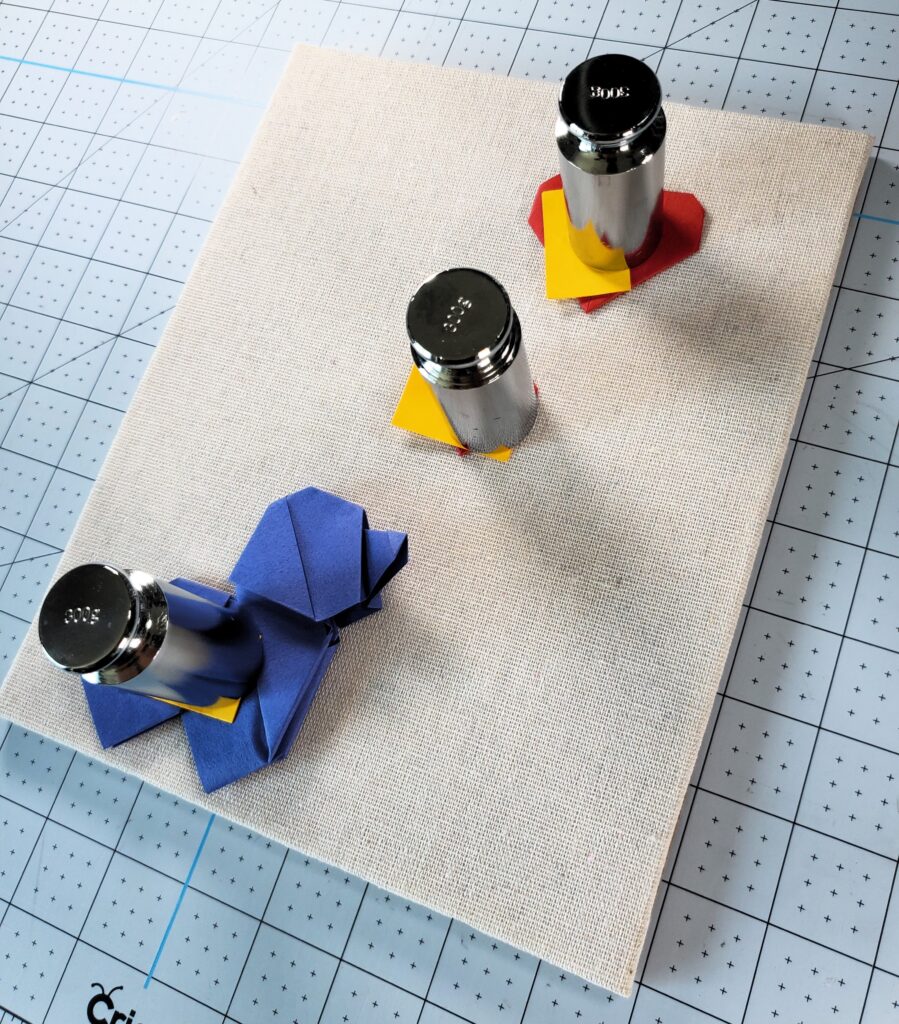
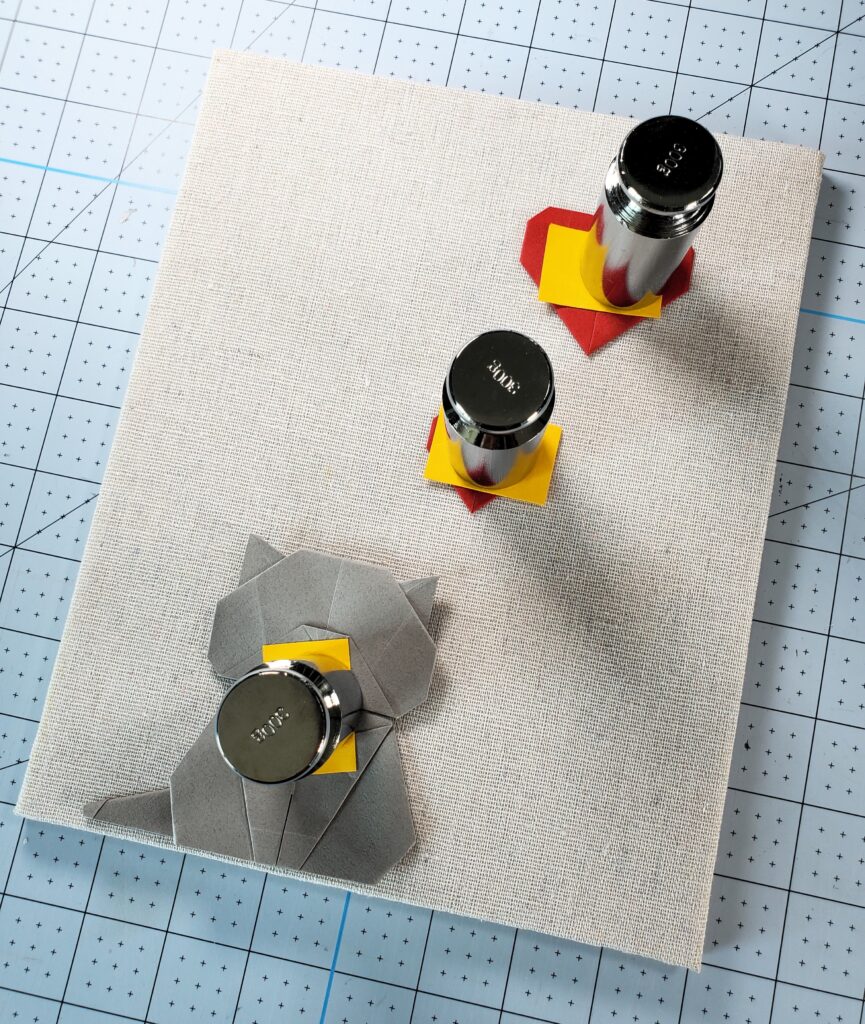
Using a toothpick, apply a small dab of Liquid Nails glue under the hearts. Cover the hearts with a sticky note and place a weight on top to hold it in place while it dries. Repeat this process for the dog: apply glue behind it, cover with sticky notes, and place weights on top. Allow the glue to dry completely. I typically wait 1 hour minimum.
Once the glue is dry, reattach the backboard to the shadowbox frame and secure it.
Ta-da! You’ve crafted your very own dog shadowbox! 🥳🎉 Please be sure to share your creations with me at @orikim_creations on Instagram! I can’t wait to see all the beautiful dog shadowboxes you make. 🐶
If you’re a cat lover, check out this blog post on how to create your own cat shadowbox! 😺
Origami Cat with Red Hearts – Handcrafted Wooden Shadow Box (8×10 inches) 😺
If you’re a cat lover and a DIY enthusiast, making your own cat shadowbox can be a heartwarming project that celebrates your furry companions! Shadowboxes are a beautiful way to capture the essence of your beloved pet and create a personalized keepsake that tells their story. 😻These shadowboxes are not just pieces of art; they are a way to honor and remember our feline friends. Many people choose to create or purchase these shadowboxes in memory of their furry companions, capturing their unique personalities and special moments shared together.
Creating your own cat shadowbox allows you to infuse it with personal touches and memories. It’s a perfect project for those who want to embrace their love for cats and channel it into something creative. Whether you want to display a cherished photo, include a small toy or collar, or add some decorative elements that remind you of your cat, the possibilities are endless. Keep scrolling for step-by-step instructions on how to create your own! ⬇️
Not a DIY Enthusiast?
If you’d rather have a professionally made cat shadowbox, I offer custom-made options in my Etsy shop. These shadowboxes are crafted with care and attention to detail, making them a perfect tribute to your beloved pet. You can check out my Etsy listing here!
Watch the Magic Happen
Curious about how these shadowboxes come together? Check out this YouTube short where I put together a custom order for a beloved kitty! 😍
Whether you decide to create your own or purchase a ready-made one, a cat shadowbox is a wonderful way to keep your furry companion close to your heart. Embrace your love for cats and let your creativity shine!
My crafting tools are essential. Liquid Nails glue ensures the pieces stay securely in place. I use toothpicks for precise glue application and sticky notes to protect the paper from the weights I use—individual calibration weights perfect for holding down the paper without damage. My ergonomic X-acto knife makes precise cuts, and my self-healing Cricut crafting mat ensures clean, accurate cuts.
Step-by-Step Instructions:
The first step is to create your origami cat and heart. Follow these simple and calming tutorials to get started: here and here!
Open the shadowbox and remove the backboard. With the backboard, position the large heart slightly in the top right corner, the small heart just underneath on the left side of the large heart, and place the cat near the bottom left corner, as shown in the nearing and below pictures. I typically guesstimate their placements, but ensuring they are equal in length. 😅
To create the illusion of the cat sitting on a ledge within the shadowbox, position the inner border on top of the backboard as shown in the left picture. Carefully place the cat at the bottom of the inner border, making it appear as if it’s perched on the ledge.
Using a toothpick, apply a small dab of Liquid Nails glue under the hearts. Cover the hearts with a sticky note and place a weight on top to hold it in place while it dries. Repeat this process for the cat: apply glue behind it, cover with sticky notes, and place weights on top. Allow the glue to dry completely. I typically wait 1 hour minimum.
Once the glue is dry, reattach the backboard to the shadowbox frame and secure it.
Ta-da! You’ve crafted your very own cat shadowbox! 🥳🎉 Please be sure to share your creations with me at @orikim_creations on Instagram! I can’t wait to see all the beautiful cat shadowboxes you make. 😺
If you’re a dog lover, check out this blog post on how to create your own dog shadowbox! 🐶