I’m thrilled to announce that I’ve welcomed a little one into the world! This is such a magical time, and I’m truly committed to cherishing her entire first year.
To fully immerse myself in this precious experience, my Etsy shop is currently closed until further notice. I’m stepping away from orders for a bit.
You’ll also see that new blog posts will be delayed. I’ll be taking a much-needed break from regular content creation.
Thank you for your patience and all your amazing support. I’ll definitely be back, and I look forward to sharing more with you when I reopen the shop and resume blogging!
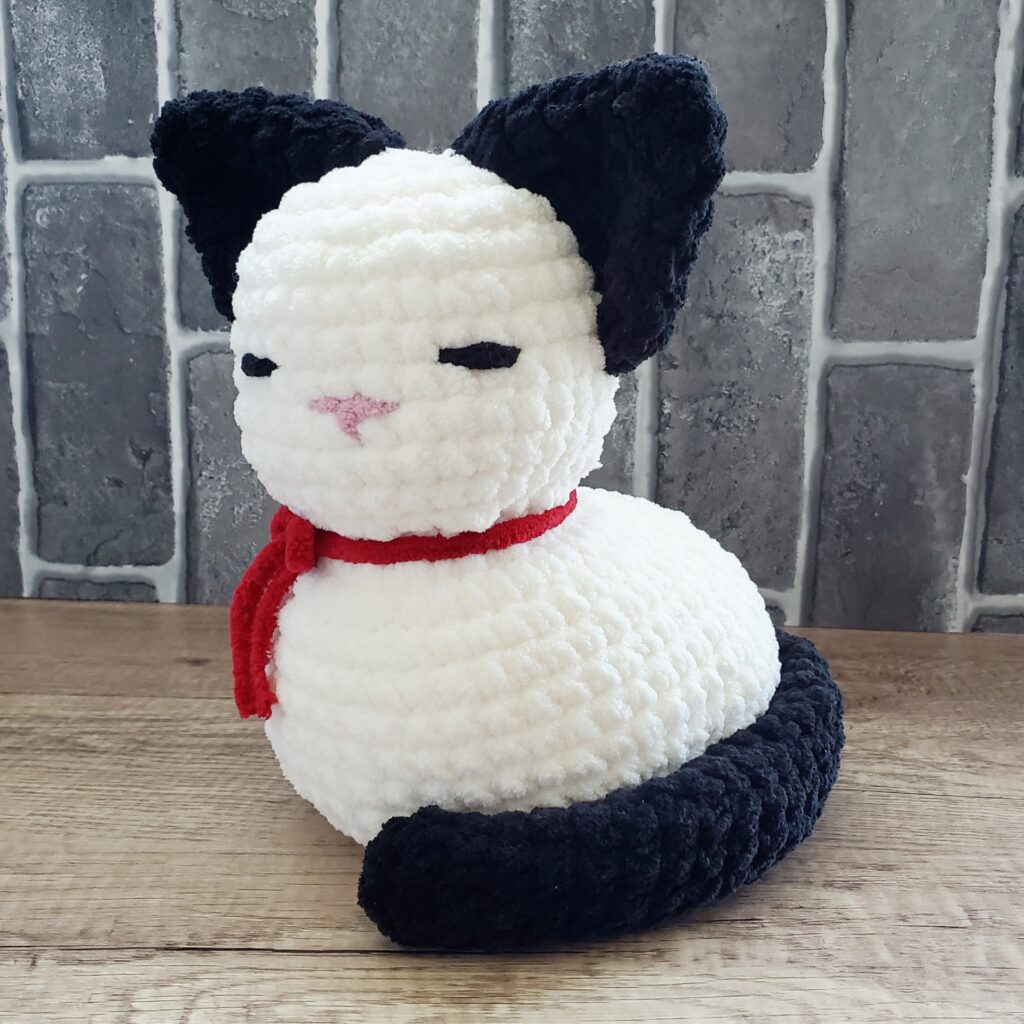
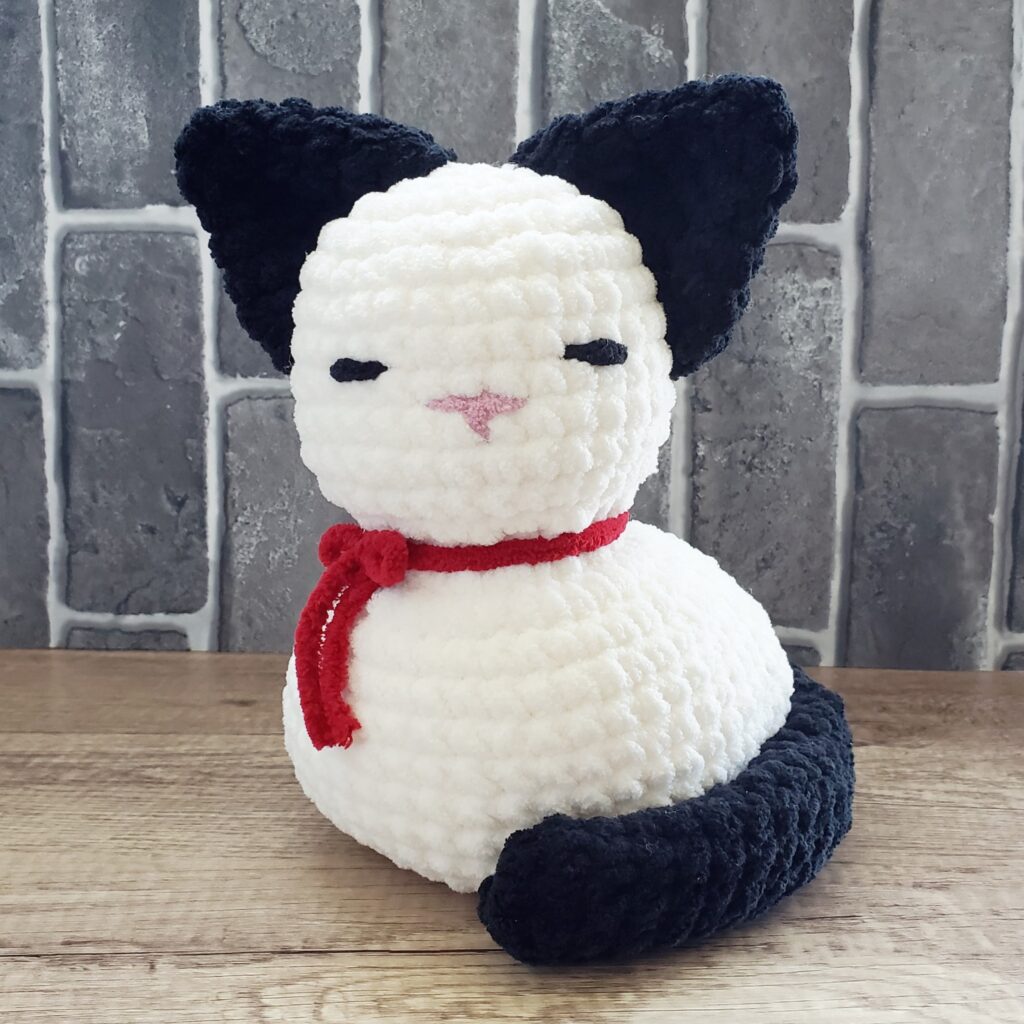
Kitty Cat crochet plushie with a cute bow tie collar 😺
There’s a new cat on the block—and it’s curled up, cozy, and ready to steal your heart. Meet my latest handmade creation: the Kitty Cat crochet plushie! With its soft texture, serene embroidered expression, and bold red bow tie collar, this little kitty is the perfect snuggle buddy for the season.
Meet the Chillest Cat Around 🐱
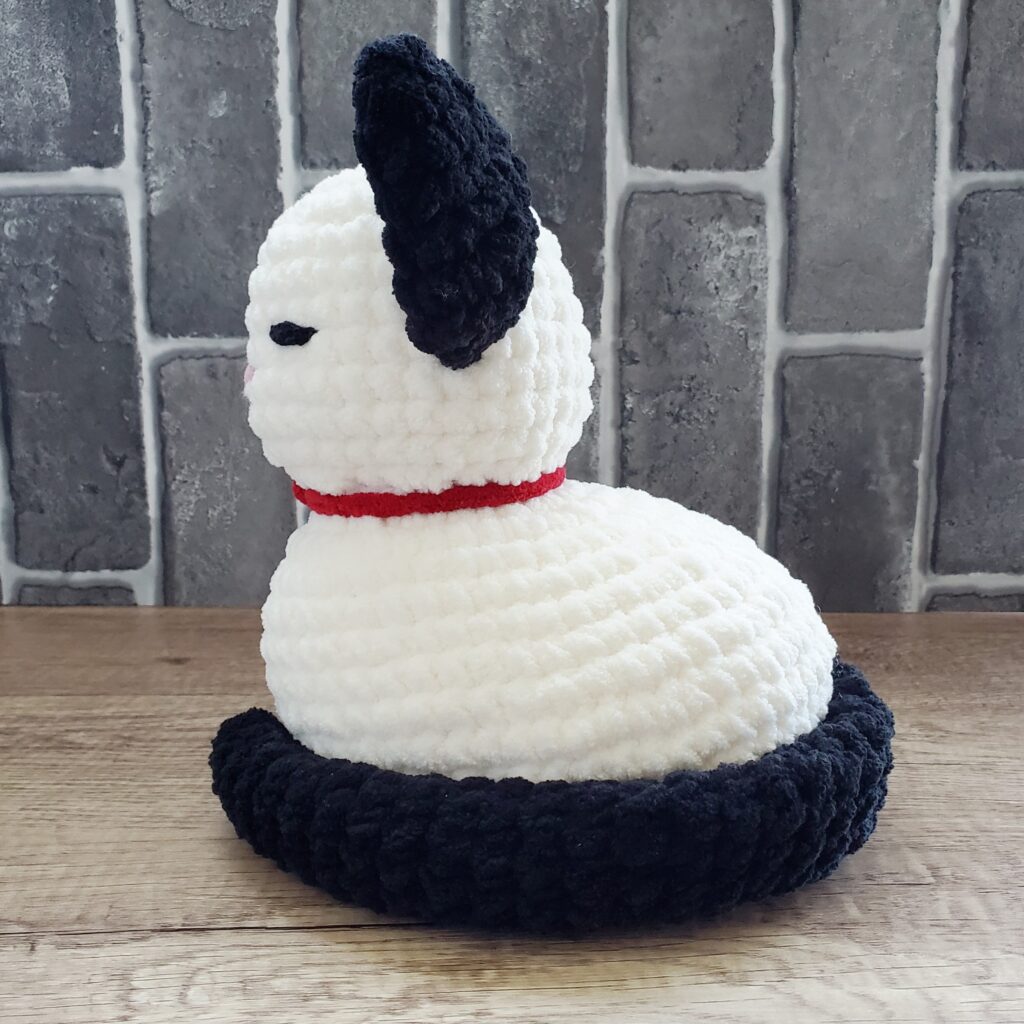
Crocheted with Bernat Blanket Super Bulky yarn (#6) and an 8mm hook, this plushie is as squishy as it is stylish. The off white-colored body is accented with coal black details on the ears and curled tail, giving it a classic cat look. And that red bow tie collar? A pop of cozy flair that ties it all together.
Instead of plastic eyes, this kitty features hand-embroidered sleepy eyes and a pink little nose — bringing out a peaceful, almost meditative vibe. It’s the kind of plushie that makes you want to curl up with a blanket, a book, and a hot drink.
Materials
Here’s everything I used to create these sweet bees:
Yarn: Bernat Blanket Super Bulky yarn (#6) in Vintage White for the body, Coal Black for the ears and tail, Lotus Pink for the nose, Crimson Red for the bow tie collar
Pattern Credit: This plushie was made using the free “Hi there, Kitty” pattern by @cutestuffbylumy on Instagram
Handmade, Cozy, and Full of Character
Each kitty is handmade with love, so no two are exactly alike. Whether you’re a cat lover, a plushie collector, or just in need of a little comfort, this sleepy friend is here to add a calm, cuddly vibe to your space.
They’re now available in my Etsy shop found here—ready to curl up in their forever home. Don’t wait too long… this kitty’s already found a cozy spot and might just nap there forever. 🐾💤
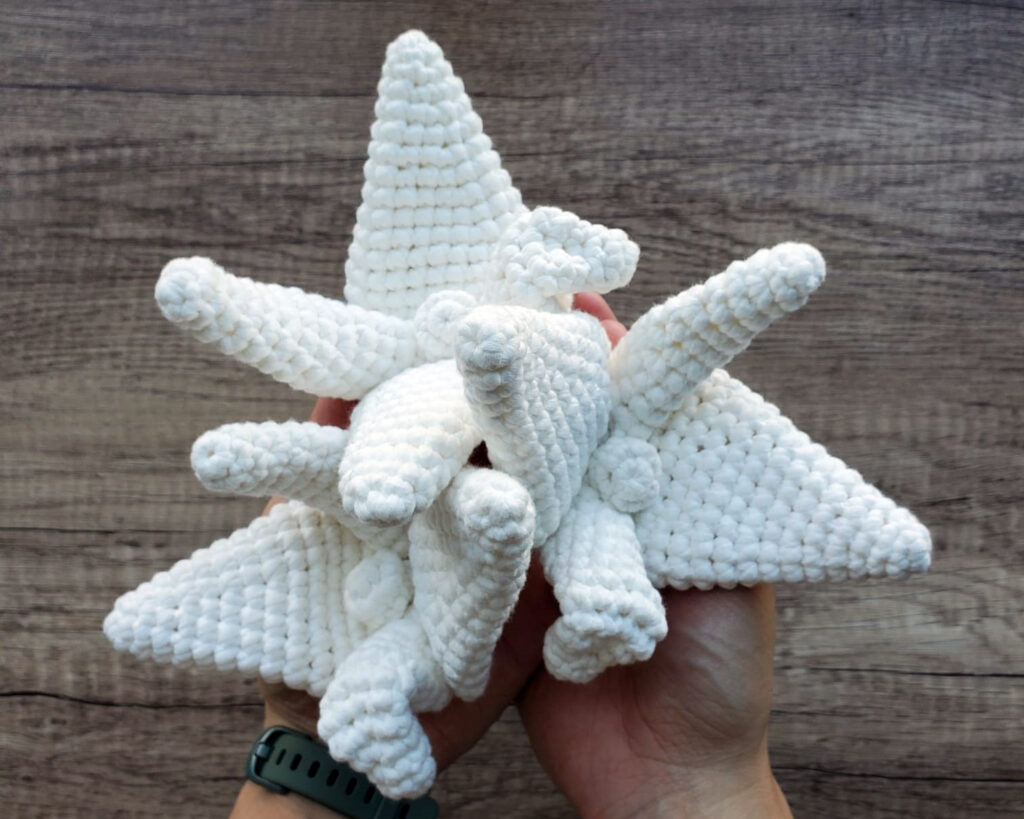
For the past few weeks, I’ve been receiving a surge of orders for white crochet cranes, and I’m so grateful for the support! ❤️ It’s been exciting to see how they connect to something truly out of this world—Droog, the zero-gravity indicator for the SpaceX Crew-10 mission.
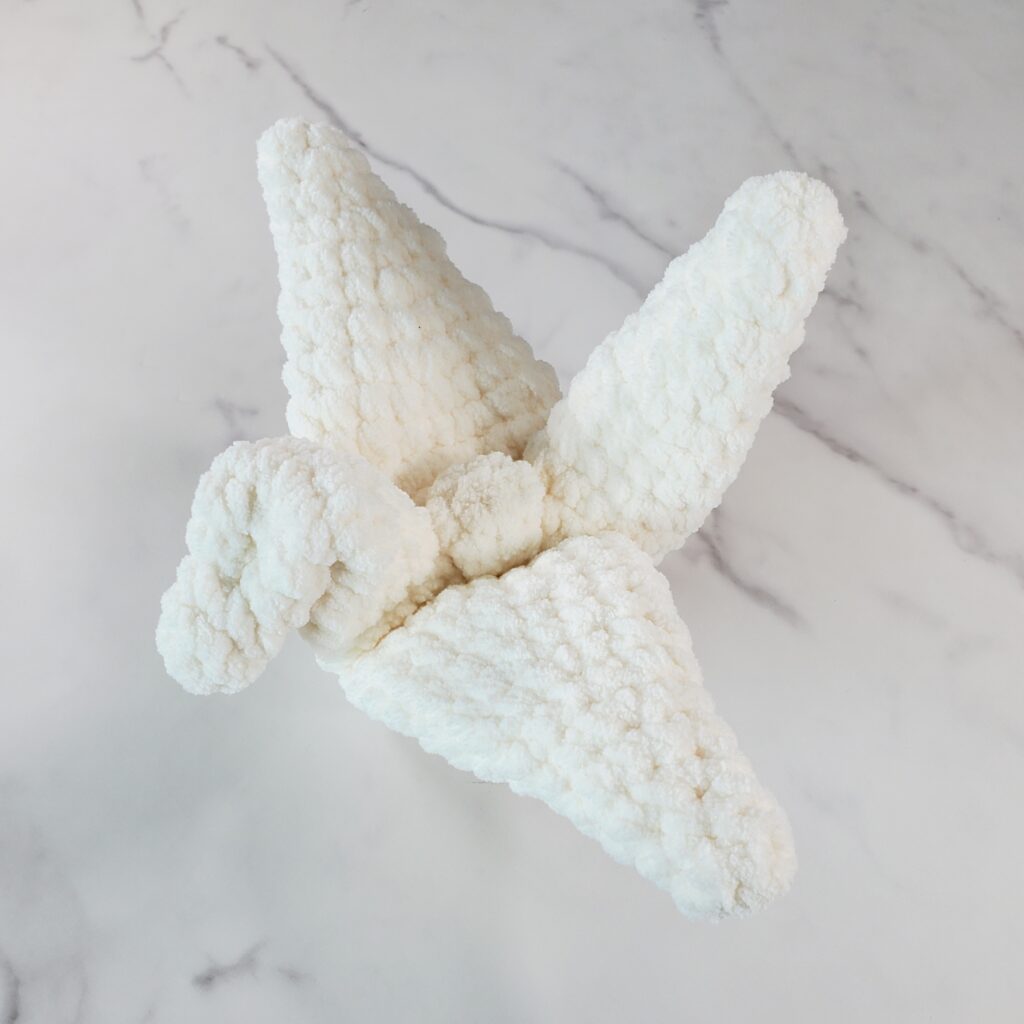
For those who missed it, Droog is a small, white origami-style crane plushie that accompanied the astronauts on their journey, floating gracefully in microgravity as a symbol of their transition from Earth to space. The choice of a crane is both poetic and meaningful, representing peace, resilience, and hope—values that resonate deeply with space exploration. 🌌
While I’m not the original creator of Droog, I love that my crochet cranes can be a part of this story in their own way. I’ve been making them in different sizes, like small and medium, and even adding personal touches, such as embroidering “10” on each wing for those who want a special tribute to Crew-10. I’m especially grateful that they’ve found a place in the collections of space fans who appreciate the significance of this mission. 🚀 It’s always a joy to know my creations are going to people who share a passion for exploration and discovery.
If you’d like to learn more, check out my previous blog post where my crochet cranes were featured in a collectSPACE article! And if you’d love to add a white crochet crane to your own collection, you can find them on my Etsy shop here (solid color) and here (multicolor)! 😊
Exciting news! My Etsy shop was recently mentioned in a collectSPACE article about the SpaceX Crew-10 mission and its unique zero-gravity indicator—a hand-crocheted origami crane named “Droog.” 🕊️
To clarify, I did not create Droog, the crane that flew with the astronauts. However, the article included my Etsy shop as an alternative for anyone interested in purchasing a similar hand-crocheted origami crane. Seeing my work listed in connection to such a historic mission is a huge honor!
The crew’s choice of an origami crane as their zero-g indicator is especially meaningful—it’s a universal symbol of peace, hope, and perseverance. I love that something as delicate as a crane played a small but special role in the mission, helping the astronauts confirm when they reached microgravity.
And if you’re looking for your own hand-crocheted origami crane, you can find them in my Etsy shop here (solid color) and here (multicolor)! Thank you for all the support—it means the world (and beyond 🚀).
I wanted to take a moment to share some big news and give you all an update on why things have been a little quiet around here. Life has taken a very exciting turn—back in September, I found out I was pregnant 👶! This will be my first baby, and my husband and I couldn’t be happier. It’s been such a surreal experience knowing that we’ll be welcoming a little one into our lives in June 2025.
That being said, this pregnancy has definitely come with its challenges. As much as I love creating, writing, and sharing with you all, I’ve had to slow down quite a bit. The first trimester hit me with all the classic symptoms—fatigue, nausea, and just generally feeling like I needed to hibernate. While I had hoped to keep up with my usual schedule of blog posts and videos, I quickly realized that I needed to listen to my body and give myself the rest I needed.
I truly appreciate everyone’s patience and support during this time. I know many of you look forward to my posts, and I hate feeling like I’m letting anyone down. But I promise, this isn’t goodbye! I’ll do my best to get back into the swing of things when I can. Some days are better than others, so whenever I have the energy, I’ll try to post and keep you all updated.
For now, I’m taking things one step at a time and focusing on this new chapter in my life. Thank you all for sticking around and being such an amazing part of this journey with me. Your support means the world, and I can’t wait to share more with you in the months ahead!
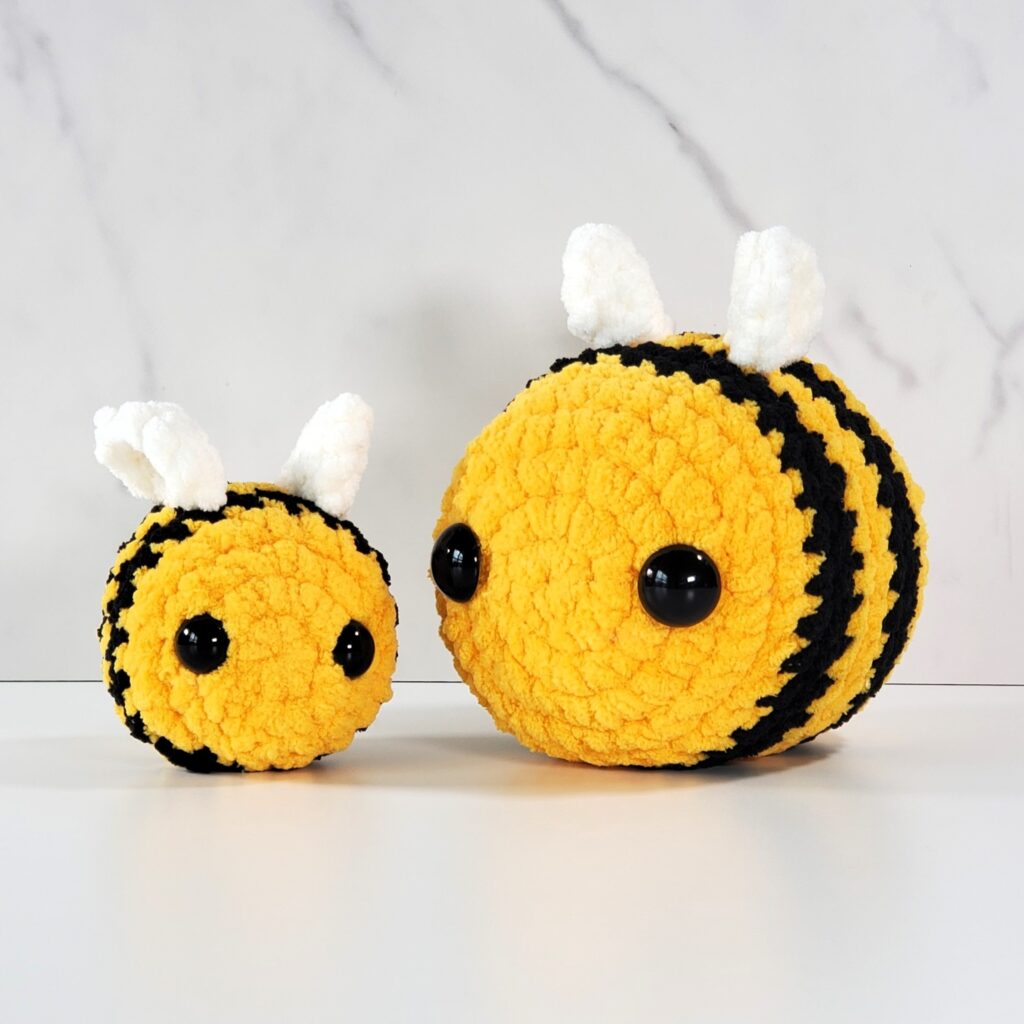
Buzzzzzing into your heart this cozy season, I’m excited to introduce my latest creations—Mama and Baby Bee crochet plushies! 🐝 These two are sweet as honey, soft as clouds, and ready to be your new best buds. Whether you’re looking for a cute handmade addition to your space or the perfect gift to bring some bee-autiful joy, Mama and Baby Bee are ready to buzz right in!
Meet Mama & Baby Bee 🐝👶
These adorable bees are crocheted with Bernat Blanket Super Bulky yarn (#6) using an 8mm hook, giving them a soft, chunky feel that’s perfect for snuggling. Their bright, cheerful bodies are crocheted with Sunsoaked, while their stripes are made with Coal Black—and let’s not forget their little wings, made with Vintage White for an extra cute touch!
Mama Bee is crafted using the free pattern from hannahhcrochets, and she has big, friendly 20mm safety eyes that give her a sweet, protective look.
Baby Bee is created from the free pattern by crochet._.cottage, featuring adorable 16mm safety eyes for that curious, playful vibe.
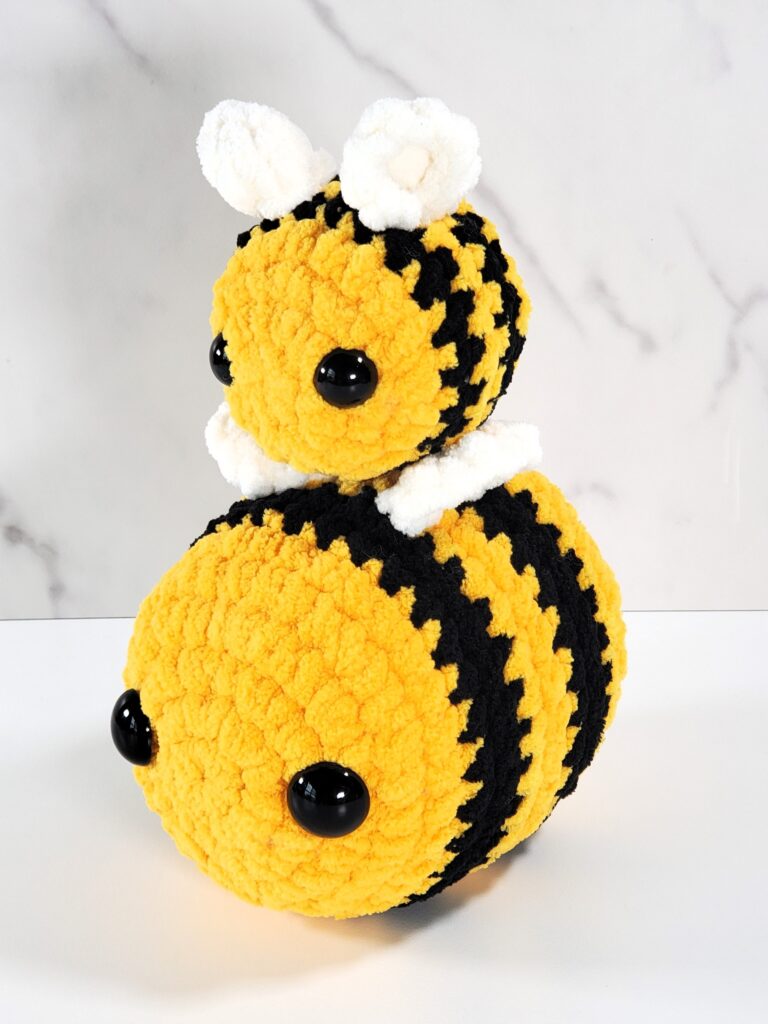
The Perfect Pair for Cozy Snuggles
These buzzing buddies are as soft and squishy as can be, perfect for keeping you company as the weather cools down. Whether you’re a fan of cute plushies or just need a cuddly pal, Mama and Baby Bee are sure to bring some handmade charm to your day.
Materials
Here’s everything I used to create these sweet bees:
Yarn: Bernat Blanket Super Bulky yarn (#6) in Sunsoaked for the body, Coal Black for the stripes, and Vintage White for the wings
Want to create your own buzzing duo? Both patterns are free—hannahhcrochets has the pattern for Mama Bee, and crochet._.cottage provides the pattern for Baby Bee. Don’t forget to check out my Crochet Supplies page for everything you’ll need to get started!
These sweet Mama and Baby Bee plushies are now available in my Etsy shop here, ready to buzz their way into your home! Whether you’re keeping them for yourself or gifting them, these bees are guaranteed to bring lots of smiles and fuzzy feelings. 💛
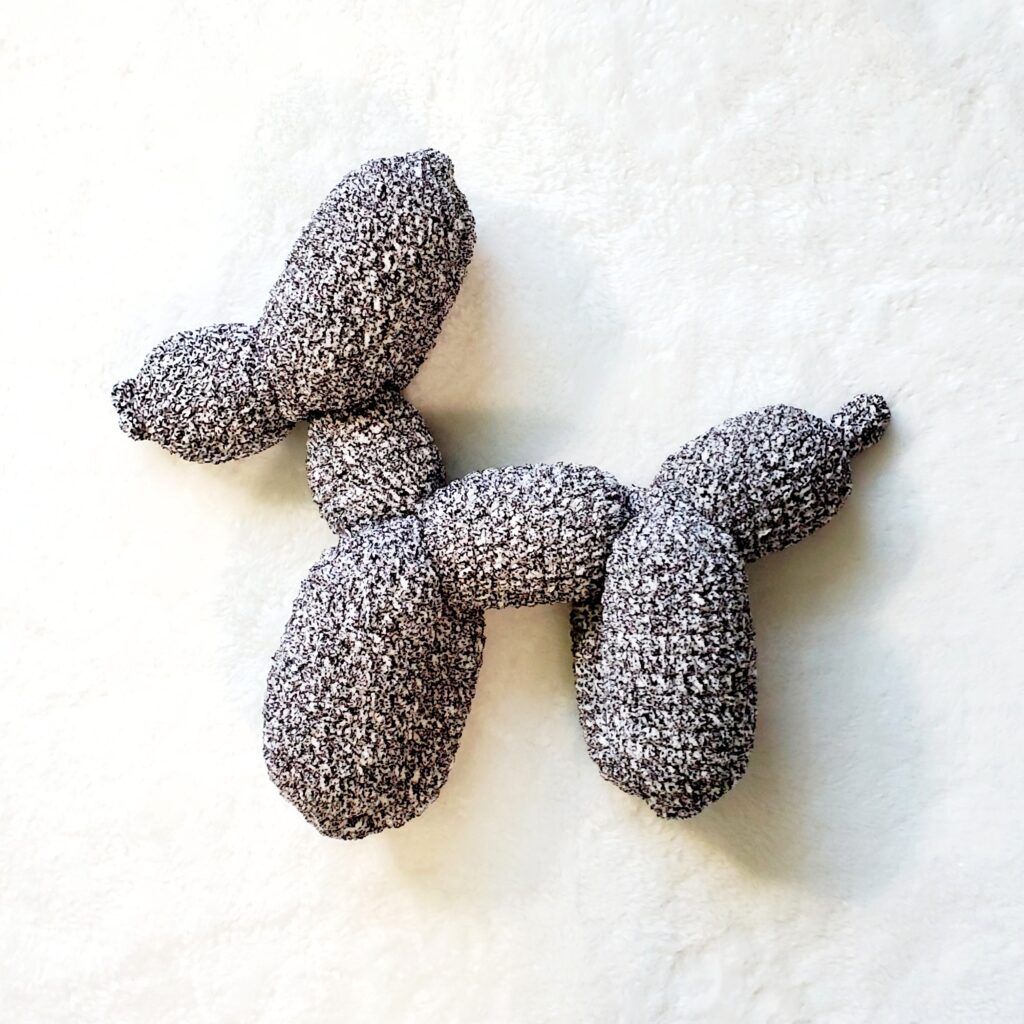
With cooler days rolling in and cozy blankets coming out, it’s the perfect time to dive into a fun, snuggly crochet project. And what could be more fun than creating your very own Balloon Dog Crochet Plushie? 🐶🎈 This little cutie is inspired by the classic balloon animals we all know and love, but with a twist—it won’t pop or deflate! Made with Bernat Blanket Speckle Super Bulky yarn in the Typewriter color, this balloon dog is soft, squishy, and ready to brighten your day. Whether you’re new to crochet or a seasoned stitcher, this adorable pup is a great project to cuddle up with (literally!).
My Balloon Dog Crochet Adventure
Let me tell you, this project was a bit of a ride! I didn’t finish it in one sitting; instead, I worked on it on and off over the course of a few days (okay, maybe weeks). There were definitely some moments where I just couldn’t wait to see it all come together, so I pushed myself a little too hard—oops! 😅 And that’s when it happened… I crocheted so much, my wrist and arm started hurting! Yep, that’s right—crochet injuries are real, my friends. I had to take a step back and give my arm some much-needed rest. At one point, I even joked that I’d have to go to “crochet rehab” because my arm was protesting so much. So, lesson learned: no matter how fun or exciting your crochet project is, remember to take breaks! If you’re curious, I wrote a whole post about what I did to tackle my wrist and arm pain—check it out here for some helpful tips.
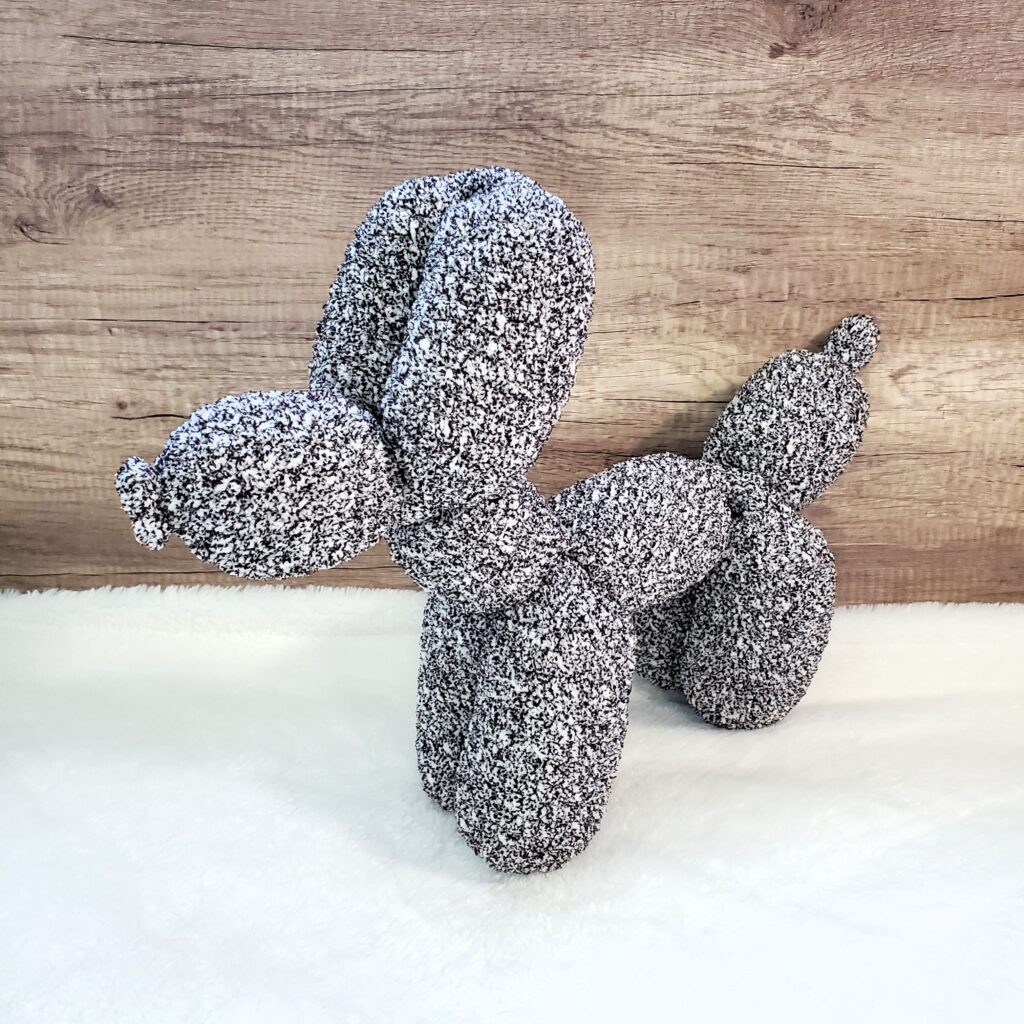
The Head and Neck Challenge: Creative Sewing to the Rescue
Here’s a little heads-up if you’re going to make your own balloon dog—the head is heavy! I didn’t anticipate how much it would weigh compared to the body, and it definitely made the plushie a bit top-heavy. Without some creative sewing, your balloon dog won’t stand up on its own. Instead, it’ll plop down, especially since the head is the heaviest part. But don’t worry, there’s a simple fix! I had to get a little crafty with my stitching. I sewed the neck to the body just a bit for extra stability, and I also stitched the ears to the head in a few spots to make sure it wouldn’t droop. It takes a little trial and error, but once everything’s securely in place, your balloon dog will be ready to stand tall (and look adorable while doing it)!
If you prefer, you could also go down a yarn weight or two to make your balloon dog a little lighter. Something like a worsted or bulky weight yarn might give the plushie more stability. But, honestly, it’s totally up to you! You can get creative and experiment with different yarns to see what works best for your project.
Twisting and Assembling the Balloon Dog
One of the most satisfying parts of this whole project was assembling the balloon dog. Just like with real balloon animals, there’s something so exciting about twisting all the pieces together and watching it come to life. And because the balloon dog shape is so iconic, it felt super nostalgic! If you want to see exactly how I assembled the pieces, I made a YouTube video tutorial where I walk you through the process. It’s surprisingly easy once you get the hang of it, and it’s so rewarding when your balloon dog finally comes together. The head, body, legs, and tail all twist into place perfectly, and before you know it, you’ve got your very own balloon dog plushie ready to show off!
Materials You’ll Need
Ready to make your own balloon dog? Here’s everything I used to create this squishy friend:
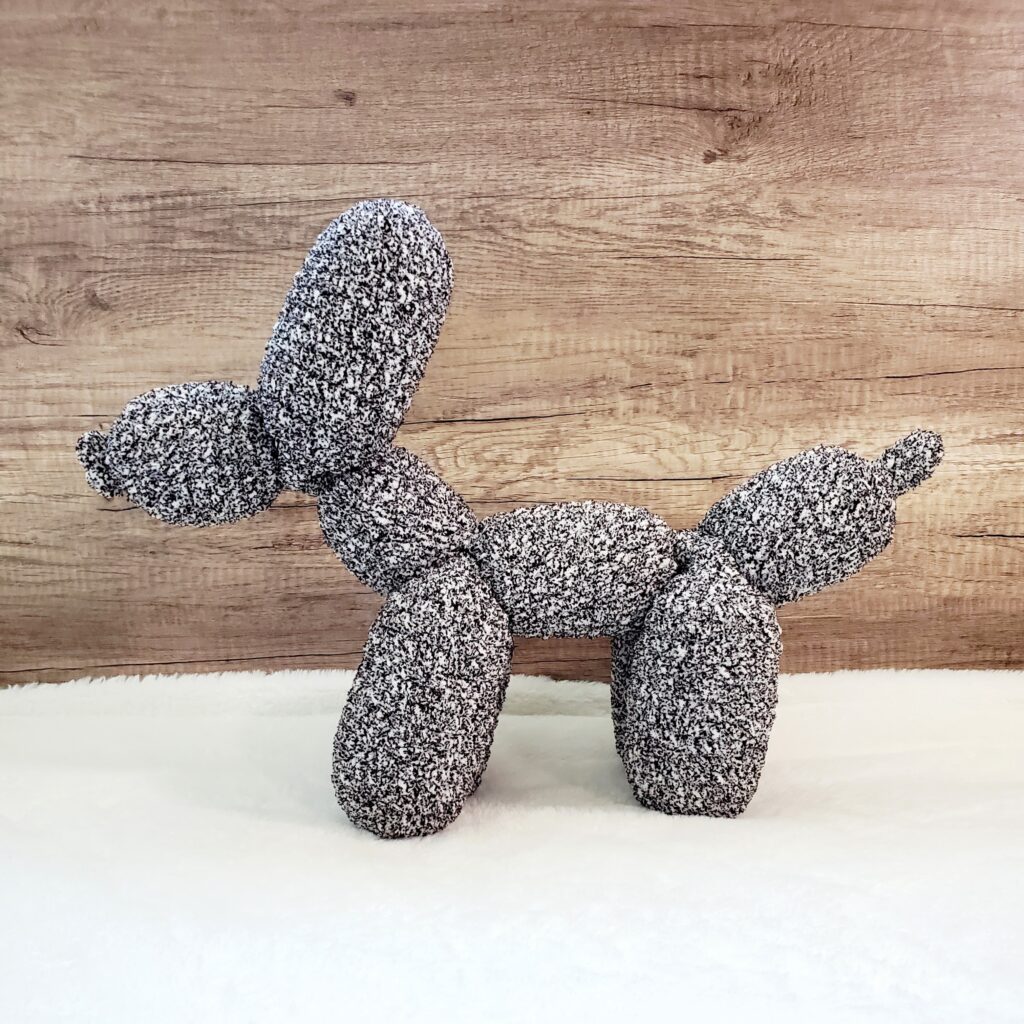
Yarn: Bernat Blanket Speckle Super Bulky yarn (#6) in Typewriter
The pattern is by the talented ann.peach.creations and it’s available for free! The instructions are super easy to follow, and it’s such a fun pattern if you’re looking for something unique and playful to crochet. Plus, who doesn’t love a cute little balloon dog?
My Balloon Dog Crochet Tips:
Take Breaks! I cannot stress this enough—take breaks while crocheting! Even if you’re super excited to finish, give your wrists and arms a little rest. Crocheting for hours on end can lead to soreness, and you’ll enjoy your project a lot more if you stay comfortable. I learned this the hard way, and trust me, you don’t want to end up with crochet-related arm pain like I did.
Get Creative with Sewing: As I mentioned, the head of the balloon dog is a bit heavy, so be prepared to sew a little extra to keep it balanced. Sewing the neck to the body helped stabilize everything, and a few extra stitches connecting the ears to the head made sure my balloon dog wouldn’t topple over.
Why This Balloon Dog is a Must-Make
I absolutely loved making this balloon dog, and I think you will too! Not only is it a super fun project, but the end result is adorable and totally unique. Whether you’re making it for yourself, gifting it to a friend, or adding it to your crochet collection, this little balloon dog is sure to bring smiles wherever it goes. Plus, its squishy, plush texture makes it the perfect cuddle buddy—or even a playful decoration for your room! And because it’s crocheted, it’ll last much longer than a real balloon animal. 😉 If you’re ready to dive in, be sure to check out my Crochet Suppliespage for all the tools and materials you’ll need!
As the spooky season draws near, it’s time to add some hauntingly fun decor to your space! Our latest YouTube tutorial teaches you how to fold a simple origami skull that’s perfect for Halloween enthusiasts or anyone looking to embrace some creative, spooky vibes. 💀
This easy origami project is great for all skill levels, whether you’re a beginner or a seasoned origami artist. Follow along step-by-step, and in no time, you’ll have a cool skull to use for decorating, crafting, or gifting!
What You’ll Need:
A square piece of white origami paper (I recommend using tant paper for its durability and crisp folds)
Sharpie for adding those eerie details
A bit of patience and a playful spirit for Halloween!
Why You’ll Love It:
Beginner-Friendly: With easy-to-follow instructions, this tutorial is perfect for everyone, even if it’s your first time trying origami.
Spooky and Fun: Whether you’re decorating for a Halloween party or just want to embrace the season, these little skulls are a fantastic addition to your creepy collection.
Versatile: Use your origami skull to decorate a table, create a Halloween garland, or pair it with other festive origami pieces like bats or pumpkins!
Ready to fold your way into spooky season? 🎃 Watch the full tutorial here and don’t forget to subscribe for more fun and easy origami projects!
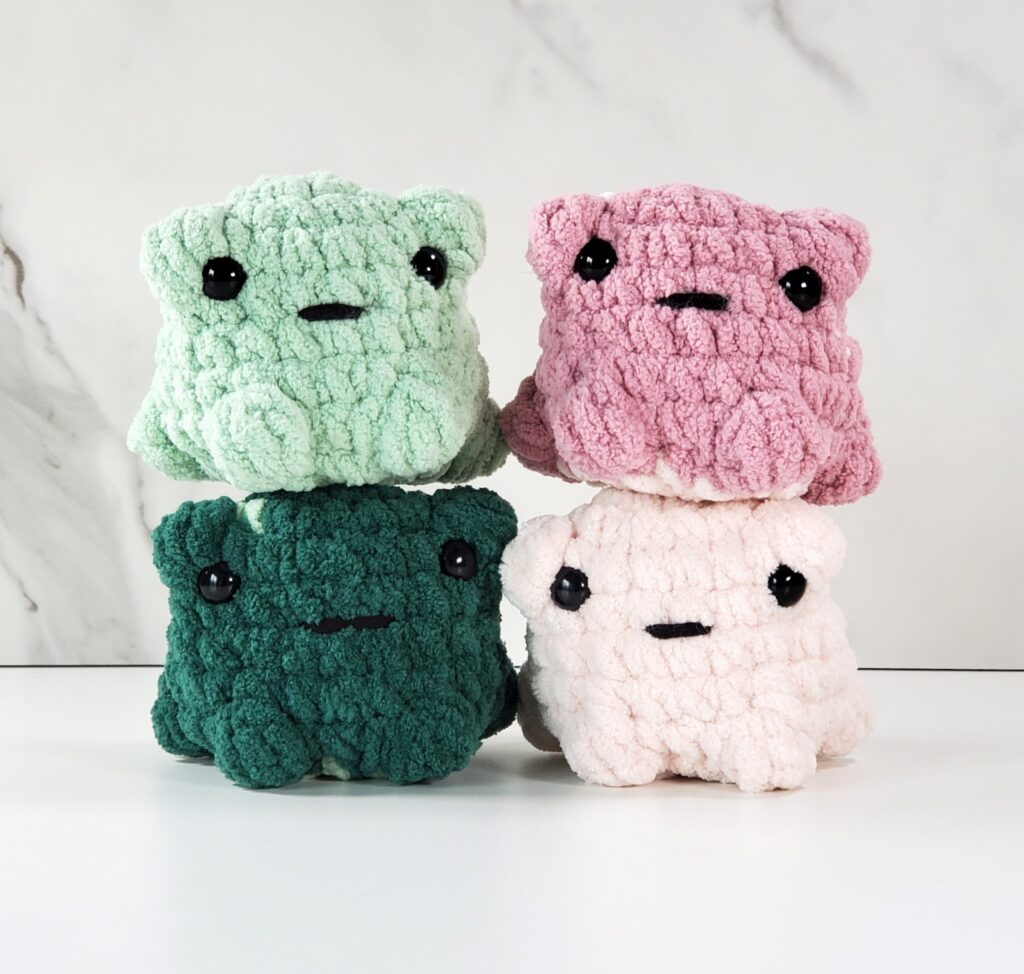
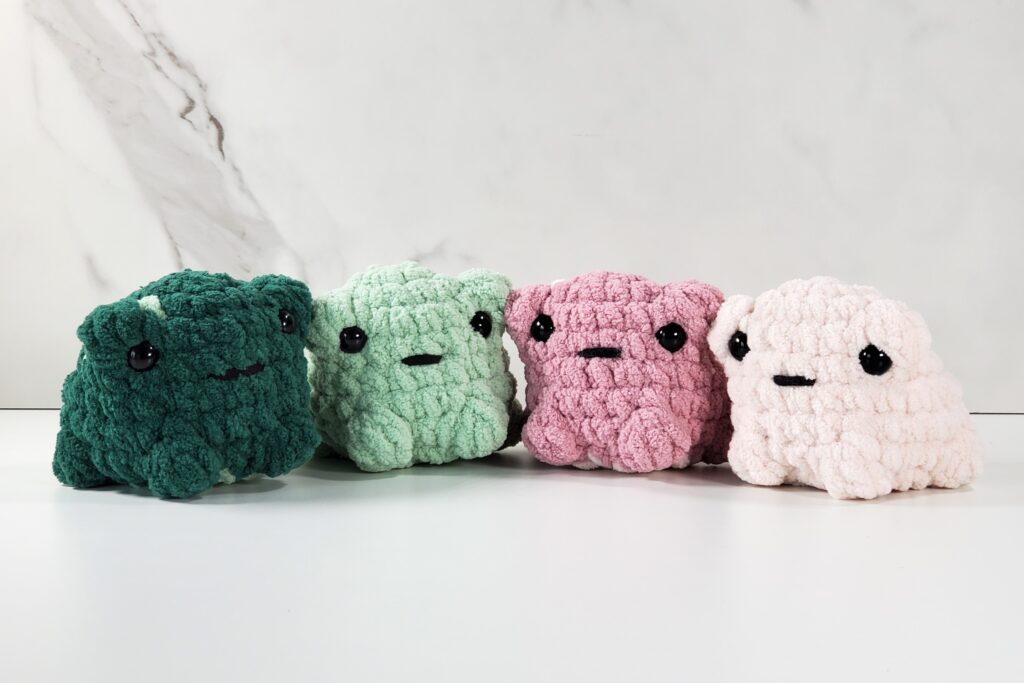
Chubby spotted toad crochet plushie! Available in 4 colors 😍
As the weather cools and the cozy season rolls in, there’s nothing like a soft, squishy companion to keep you company. Introducing my latest creation: a little toad crochet plushie that’s as adorable as it is functional! 🐸✨
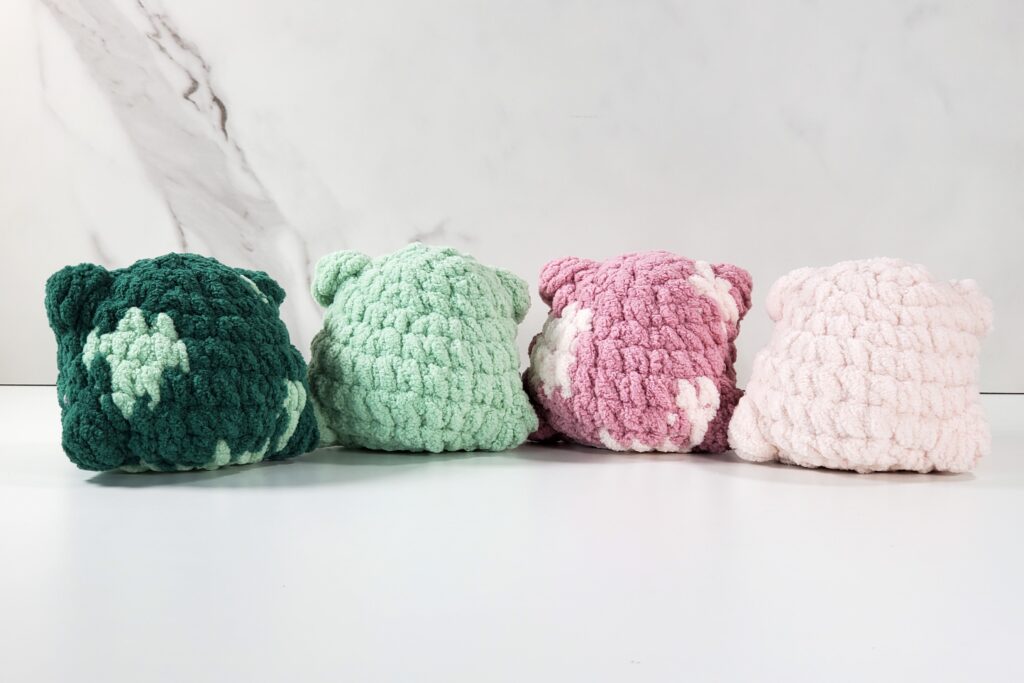
Introducing our adorable frog toad, meticulously crafted with Bernat Blanket Super Bulky yarn (#6) for a plush, squishable feel that’s perfect for relieving stress. Its compact, round design makes it an ideal companion for those seeking a bit of comfort. Available in four distinct colors—two featuring spots and two in solid hues—there’s a toad to match every personality. The 12mm safety eyes provide a delightful touch, while the mouth is intricately detailed using Beginner Yarn (#4) in Black. Whether you’re looking for a cute collectible or a soothing stress ball, this frog toad is sure to bring a smile to your face
The pattern for this delightful plushie comes from my_universe64 and is available for free! Whether you’re looking to brighten up your room with a touch of handmade charm or simply need a playful companion to help relieve stress, this crochet frog toad is ready to hop right into your heart.
Feeling inspired to create your own? The pattern is easy to follow and uses an 8mm hook, making it a fun and rewarding project for crocheters of all levels. You can find all the supplies you need on my Crochet Supplies page.
Materials
Yarn: Bernat Blanket Super Bulky yarn (#6) in Lotus Pink or Deep Sea for the body
This cute and squishy toad is now available in my Etsy shop here! Whether you’re gifting it or keeping it for yourself, this little toad is sure to bring smiles and stress relief all around. 🐸💚
With Halloween just around the corner, it’s time to get crafty and bring some spooky fun into your home! Our latest YouTube tutorial will show you how to fold a simple and eerie origami spider, perfect for adding a little creepy-crawly charm to your decorations. 🕷️
Whether you’re new to origami or a seasoned folder, this project is designed for all skill levels. In just a few easy steps, you’ll have a fun spider ready to haunt your space!
What You’ll Need:
A square piece of black origami paper (black tant paper works best for a spooky spider, but feel free to use other colors for a creative twist)
Scissors for trimming your spider legs to perfection
A little bit of patience (and maybe a love for creepy-crawlies!)
Why You’ll Love It:
Easy for Beginners: This tutorial is beginner-friendly, with clear, step-by-step instructions that guide you through the entire process.
Halloween Vibes: These cute little spiders are perfect for decorating your home, classroom, or party for the Halloween season.
Creative & Customizable: Once you’ve made one spider, you can experiment with different paper colors, sizes, and even patterns to create a whole family of spooky spiders!
Ready to add a creepy touch to your Halloween decor? Watch the full tutorial here and don’t forget to subscribe for more fun and easy origami projects! 🕸️