As the spooky season draws near, it’s time to add some hauntingly fun decor to your space! Our latest YouTube tutorial teaches you how to fold a simple origami skull that’s perfect for Halloween enthusiasts or anyone looking to embrace some creative, spooky vibes. 💀
This easy origami project is great for all skill levels, whether you’re a beginner or a seasoned origami artist. Follow along step-by-step, and in no time, you’ll have a cool skull to use for decorating, crafting, or gifting!
What You’ll Need:
A square piece of white origami paper (I recommend using tant paper for its durability and crisp folds)
Sharpie for adding those eerie details
A bit of patience and a playful spirit for Halloween!
Why You’ll Love It:
Beginner-Friendly: With easy-to-follow instructions, this tutorial is perfect for everyone, even if it’s your first time trying origami.
Spooky and Fun: Whether you’re decorating for a Halloween party or just want to embrace the season, these little skulls are a fantastic addition to your creepy collection.
Versatile: Use your origami skull to decorate a table, create a Halloween garland, or pair it with other festive origami pieces like bats or pumpkins!
Ready to fold your way into spooky season? 🎃 Watch the full tutorial here and don’t forget to subscribe for more fun and easy origami projects!
With Halloween just around the corner, it’s time to get crafty and bring some spooky fun into your home! Our latest YouTube tutorial will show you how to fold a simple and eerie origami spider, perfect for adding a little creepy-crawly charm to your decorations. 🕷️
Whether you’re new to origami or a seasoned folder, this project is designed for all skill levels. In just a few easy steps, you’ll have a fun spider ready to haunt your space!
What You’ll Need:
A square piece of black origami paper (black tant paper works best for a spooky spider, but feel free to use other colors for a creative twist)
Scissors for trimming your spider legs to perfection
A little bit of patience (and maybe a love for creepy-crawlies!)
Why You’ll Love It:
Easy for Beginners: This tutorial is beginner-friendly, with clear, step-by-step instructions that guide you through the entire process.
Halloween Vibes: These cute little spiders are perfect for decorating your home, classroom, or party for the Halloween season.
Creative & Customizable: Once you’ve made one spider, you can experiment with different paper colors, sizes, and even patterns to create a whole family of spooky spiders!
Ready to add a creepy touch to your Halloween decor? Watch the full tutorial here and don’t forget to subscribe for more fun and easy origami projects! 🕸️
Who says owls are only for nighttime? 🦉 Unleash your creativity and craft a charming origami owl with our latest YouTube tutorial! Whether you’re a seasoned paper-folder or just starting your origami journey, this step-by-step guide will help you create your very own feathered friend in no time.
Why Fold an Origami Owl?
Origami isn’t just about folding paper—it’s an enchanting experience! It’s a fantastic way to unwind, ignite your imagination, and produce something truly special. Plus, who wouldn’t love a cute little owl perched on their desk or hanging on their wall? 😄
What You’ll Need:
A square sheet of origami paper (any color you fancy). I recommend using tant paper for its perfect folding finesse.
Pair of scissors
A sprinkle of patience and positive vibes!
I truly hope this post ignites your excitement and inspires you to embark on the journey of creating your very own origami owl. There’s something magical about folding paper and watching it transform into a beautiful creation! So, dive into the fun, unleash your creativity, and let’s get folding together! For a detailed, step-by-step walkthrough of the process, don’t forget to check out our YouTube tutorial linked here. You won’t want to miss it!
🐟 Dive into the world of creativity with our latest YouTube tutorial, where you’ll learn how to fold a charming origami angelfish! This delightful project is perfect for everyone, whether you’re a seasoned origami expert or just starting out on your crafting journey. With our easy-to-follow, step-by-step guide, you’ll find yourself swimming alongside your very own beautiful paper fish in no time. Gather your supplies, get comfortable, and let’s make some magical origami together!
Why Fold an Origami Angelfish?
Origami is more than just folding paper—it’s a delightful adventure! Crafting an origami angelfish is a fantastic way to relax, unleash your imagination, and create something beautiful. Plus, who wouldn’t want a vibrant little fish gliding around their workspace or hanging out in a sunny spot? 🌈
What You’ll Need:
A square sheet of origami paper (choose any color that inspires you!). I recommend tant paper for its exceptional folding quality or washi-inspired origami paper for the amazing patterns!
A sprinkle of patience and a dash of creativity.
I hope this post inspires you to create your very own origami angelfish. If you prefer a ready-made option, you can purchase an adorable angelfish shadowbox in either a solid color or a patterned design on my Etsy shop! Jump into the fun, and let’s start folding! For a detailed walkthrough, don’t forget to check out our YouTube tutorial here.
Get ready to brighten your day with our latest YouTube tutorial on how to make an adorable origami chick! This fun and easy project is perfect for everyone, whether you’re a seasoned paper-folding pro or just starting your origami journey. With our step-by-step guide, you’ll be crafting your own little feathered friend in no time! 🐤
Why Fold an Origami Chick?
Origami is more than just folding paper—it’s a delightful adventure in creativity! Engaging in this art form is a fantastic way to relax and unwind while sparking your imagination. As you fold each crease, you’ll discover the joy of transforming a simple square of paper into a charming chick that can brighten any space. Plus, who wouldn’t want a cute little chick perched on their desk or hanging out in their room? It’s a cheerful addition that can bring a smile to anyone’s face! 🌼
What You’ll Need:
A square sheet of origami paper (choose any color that makes you smile!). I recommend tant paper for its excellent folding quality.
A sprinkle of patience and a dash of creativity!
I hope this post gets you excited to create your own origami chick. It’s a fun and rewarding project that anyone can tackle, regardless of skill level. So gather your materials and let’s dive into the fun of origami! For a detailed walkthrough, don’t forget to check out our YouTube tutorial here. You’ll find everything you need to know, from the first fold to the final touches. 🐥
🐰 Hop into creativity with our latest YouTube tutorial, where you’ll learn to make an adorable origami bunny rabbit! Whether you’re a seasoned folder or just starting out, this simple step-by-step guide will have you crafting a cute bunny friend in no time. You’ll be amazed at how easy it is to transform a simple piece of paper into a delightful creature that’s sure to bring a smile to your face!
Origami isn’t just a relaxing way to pass the time—it’s a wonderful creative outlet that encourages mindfulness and focus. Folding paper into shapes is like weaving a little bit of magic! Plus, creating your own origami bunny can brighten up your desk, make a thoughtful gift, or even be the star of your next DIY project. Imagine having a tiny paper bunny perched on your shelf or nestled in your garden décor. This bunny is perfect for all ages and occasions—whether it’s Easter, a birthday, or just because you love bunnies! ❤️
What You’ll Need:
A square sheet of origami paper (any color you like). Tant paper works great for clean, crisp folds, but feel free to choose any paper that speaks to you!
A sprinkle of patience and a generous dash of creativity to let your imagination run wild!
I hope this post inspires you to create your very own origami bunny rabbit! It’s not only a fun project but also a great way to spend some quality time, whether alone or with family and friends. For a full tutorial, hop on over to our YouTube channel here, where you’ll find all the folding fun waiting for you.
And if you’d like to add a touch of charm to your home, don’t forget to check out my Etsy shop here, where you can purchase a beautiful frame of origami bunnies!
Let’s get folding and bring your paper bunny to life! Happy crafting! 😊
If you’re a fan of cute and easy origami, you’ll love our latest YouTube tutorial: how to make a cute origami panda! This project is not only adorable but also perfect for beginners and seasoned folders alike. 🐼
All you need for this tutorial are two square sheets of dual-color origami paper—preferably black and white to match the classic panda look. I highly recommend using Toyo dual-color kami paper for the best results, as the contrasting shades will bring your panda to life.
Why Make an Origami Panda?
Creating this little paper panda is a fun way to relax and unleash your creativity. It’s a simple yet satisfying project that can double as a desk decoration or a thoughtful handmade gift. Whether you’re folding for fun or making it for a friend, this panda is sure to add a bit of charm to your day!
What You’ll Need:
Two square sheets of dual-color origami paper (black and white recommended)
Head over to my YouTube channel for the step-by-step tutorial, where I’ll guide you through each fold and technique here. With a little patience, you’ll have your very own adorable paper panda in no time!
If you’re not into crafting or just don’t have the time to make one yourself but love the idea of a cute panda, check out my Etsy shop where you can purchase a ready-made panda shadowbox here!
Do you love all things cute and cozy? Then you’re going to adore our latest origami project—a sleeping cat! This little feline creation is not only fun to make but also super relaxing, perfect for winding down with a cup of tea and a cozy blanket. Whether you’re a paper-folding pro or just getting started, this project is for you!
For a complete, step-by-step guide, be sure to check out our YouTube tutorial here! In the video, I’ll walk you through each fold and crease to help you create the perfect paper cat. 🐱✨
Why Make an Origami Sleeping Cat? Origami is such a peaceful and creative way to spend your time. Folding paper into something as cute as a sleeping cat can be surprisingly calming and satisfying. Plus, it’s a great way to practice mindfulness and focus. Whether you’re making it as a decoration or a gift, this little cat is sure to bring joy to anyone who sees it! 🧘♀️
What You’ll Need:
A square sheet of origami paper (any color you love). I recommend using tant paper for a little extra sturdiness and texture.
A touch of patience and creativity ✨
I hope this blog post has inspired you to create your very own origami sleeping cat! With a bit of practice, you’ll have a cute new friend to display on your desk or give to a fellow cat lover. 😺
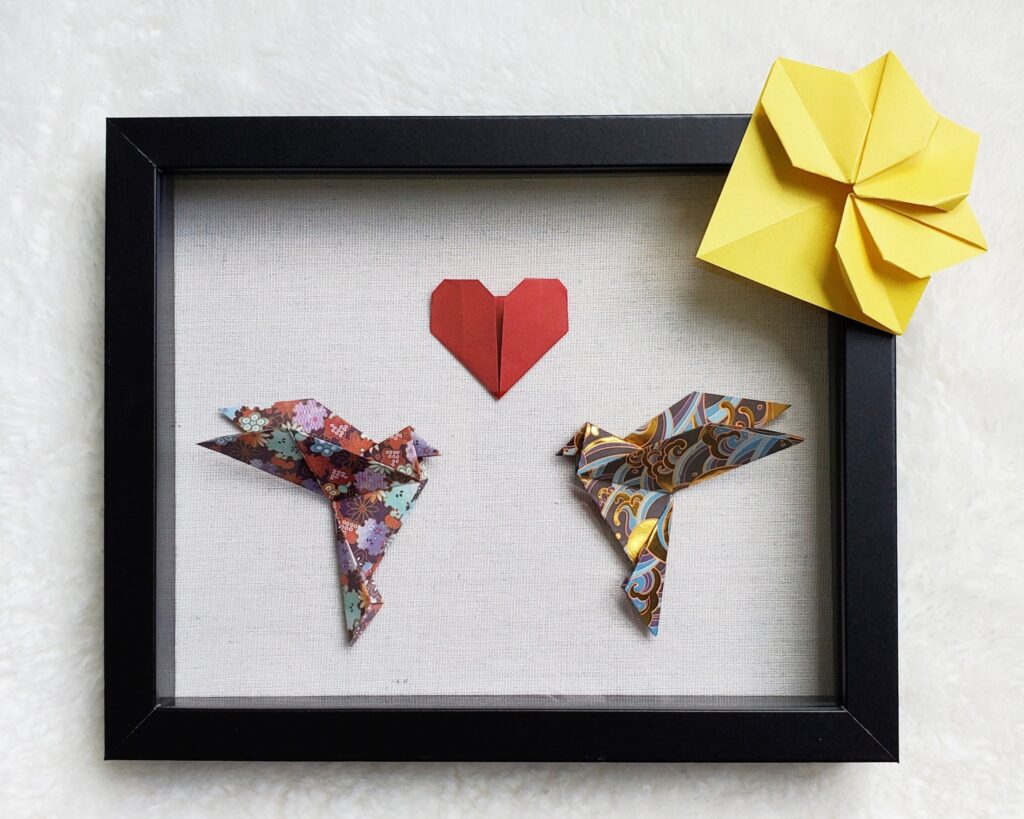
Pair of Patterned Origami Doves with Red Heart – Handcrafted Wooden Linen Shadow Box (8×10 inches) – Home Decor, Wall Art, Unique Giftwith a Flower Bookmark 🕊📚
Hello, dove enthusiasts! 🕊️
One of my absolute favorite and best-selling creations, the Elegant Origami Dove Shadowbox with a Red Heart, has been bringing joy to so many people! These two beautifully folded origami doves are nestled gracefully in a meticulously crafted shadowbox. Known for their timeless symbolism of love and loyalty, these doves are a perfect choice for a first-anniversary gift or a meaningful Valentine’s Day present. ❤️
Why You’ll Love This Project
Peaceful and Elegant: The dove’s serene design is perfect for adding a touch of tranquility to your home or giving as a meaningful gift.
Beginner-Friendly: This project is simple enough for beginners, yet satisfying for seasoned folders who want a quick and beautiful craft.
Versatile Decor: You can use your origami dove as a decoration, a gift topper, or even hang it up as part of a peaceful mobile. It’s a lovely accent for weddings, holidays, or any peaceful moment.
What makes this shadowbox extra special is the inspiration behind it—doves are often seen as soulmates, pairing for life and embodying everlasting love. I wanted to capture that sense of devotion and unity through the art of origami, crafting each dove with precision and care. The simplicity of the design, paired with the romantic symbolism of the doves, makes this piece a stunning addition to any space. 💟
The shadowbox itself is carefully arranged to create an 8×10 inch display that tells a love story. The delicate origami doves float together, connected by a heart, symbolizing the bond they share. It’s not just a decorative piece—it’s a heartfelt gesture, a celebration of love, and a work of art that can be cherished for years to come.
If you’d prefer to purchase one instead of making your own, head over to my Etsy shop here and get your hands on this elegant piece!
Want to make your own? Be sure to watch my tutorial here to learn how to fold your own beautiful origami doves! 🕊️ And if you’re interested in making a charming origami flower bookmark, be sure to check out the tutorial for that here too!
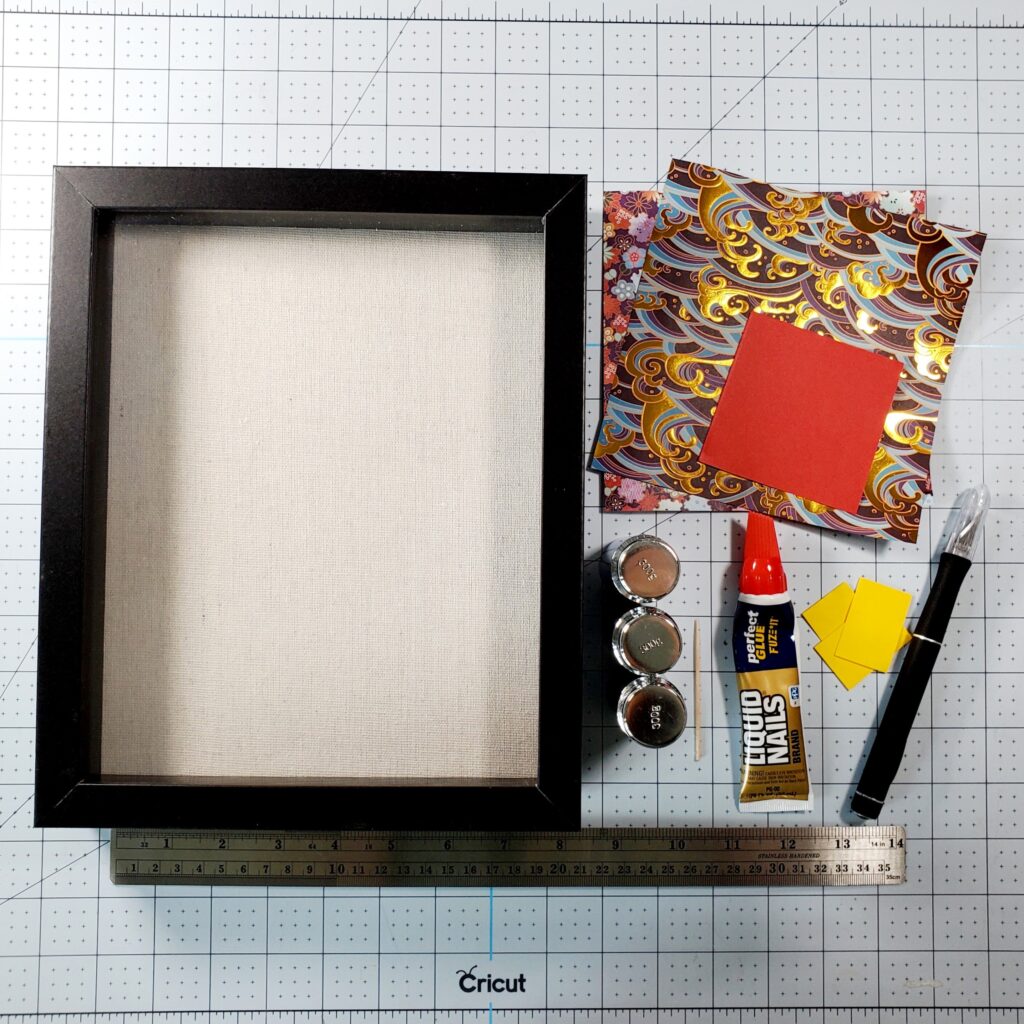
My crafting tools are essential. Liquid Nails glue ensures the pieces stay securely in place. I use toothpicks for precise glue application and sticky notes to protect the paper from the weights I use—individual calibration weights perfect for holding down the paper without damage. My ergonomic X-acto knife makes precise cuts, and my self-healing Cricut crafting mat ensures clean, accurate cuts.
Step-by-Step Instructions:
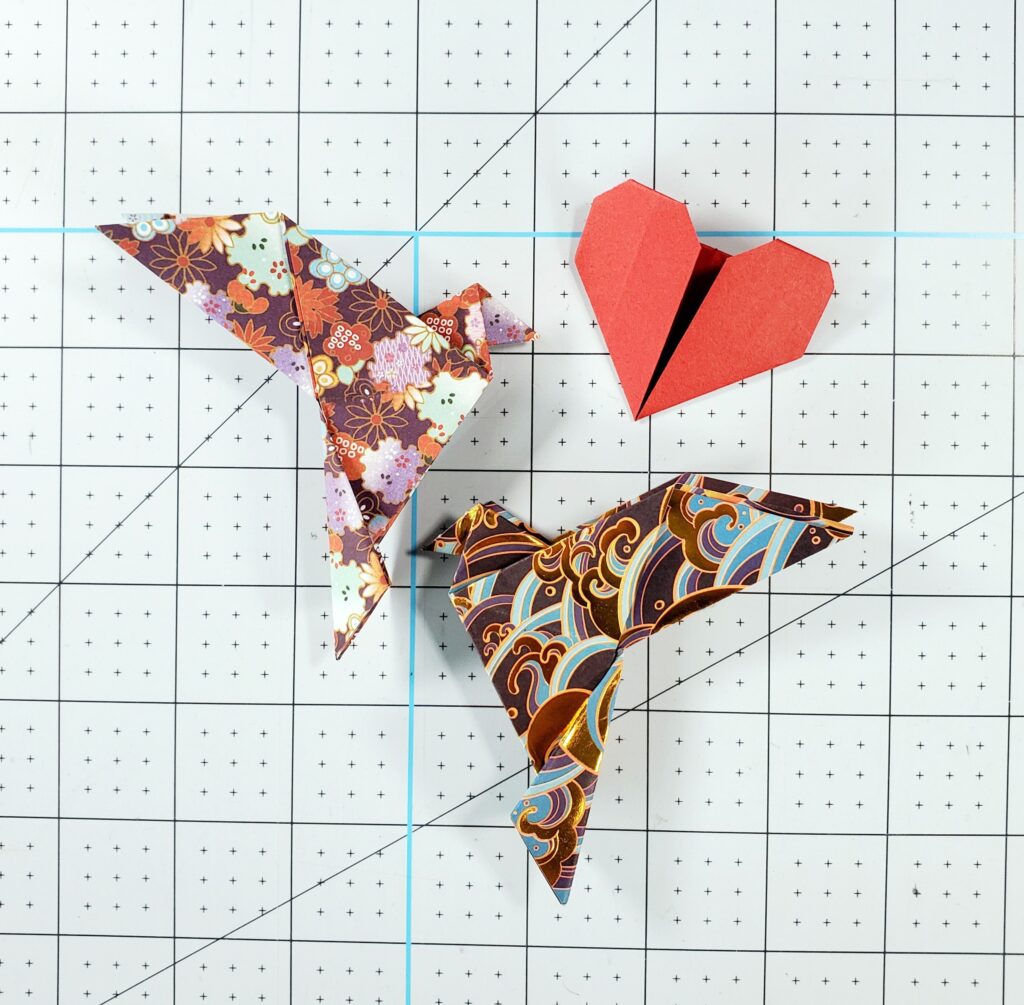
The first step is to create your origami doves and heart. Follow these simple and calming tutorials to get started: here and here!
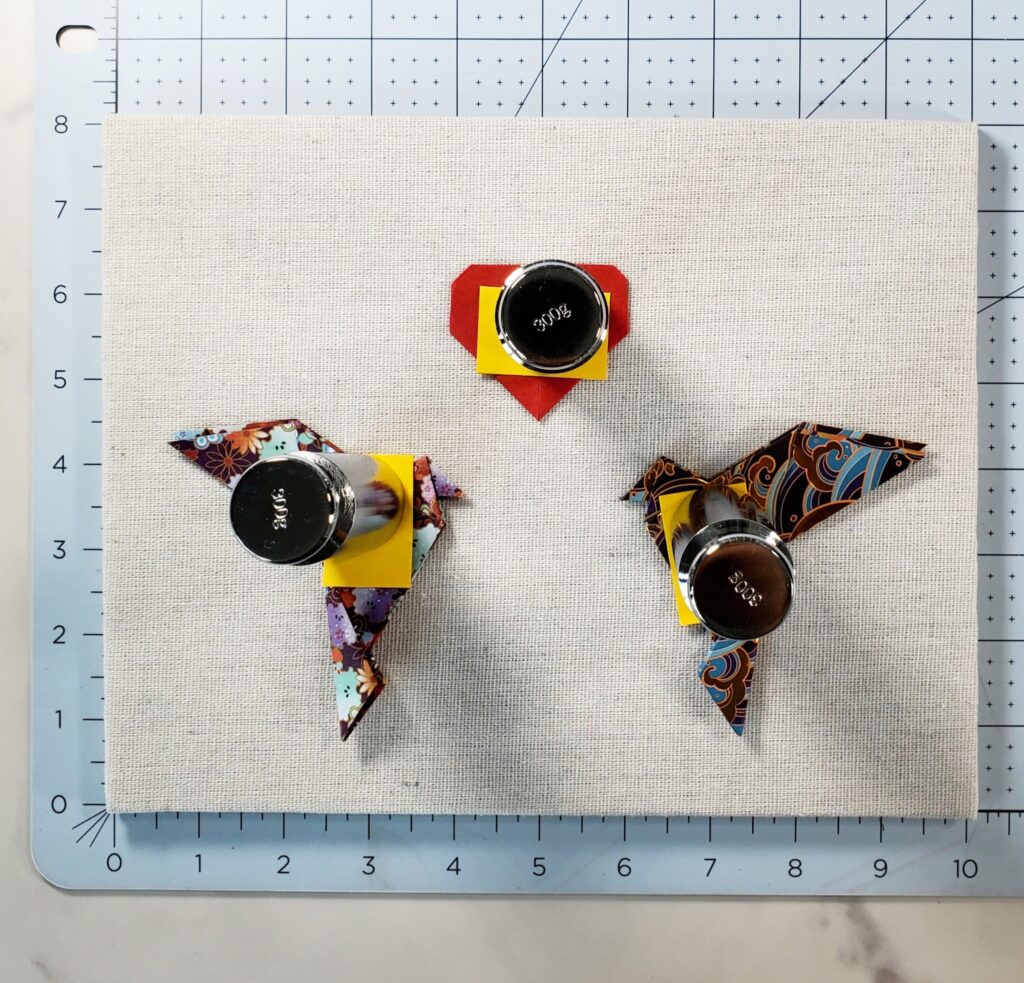
Open the shadowbox and remove the backboard. With the backboard, position the heart slightly above the middle and place the doves below on the sides, as shown in the nearing and below pictures. I typically guesstimate their placements, but ensuring they are equal in length. 😅
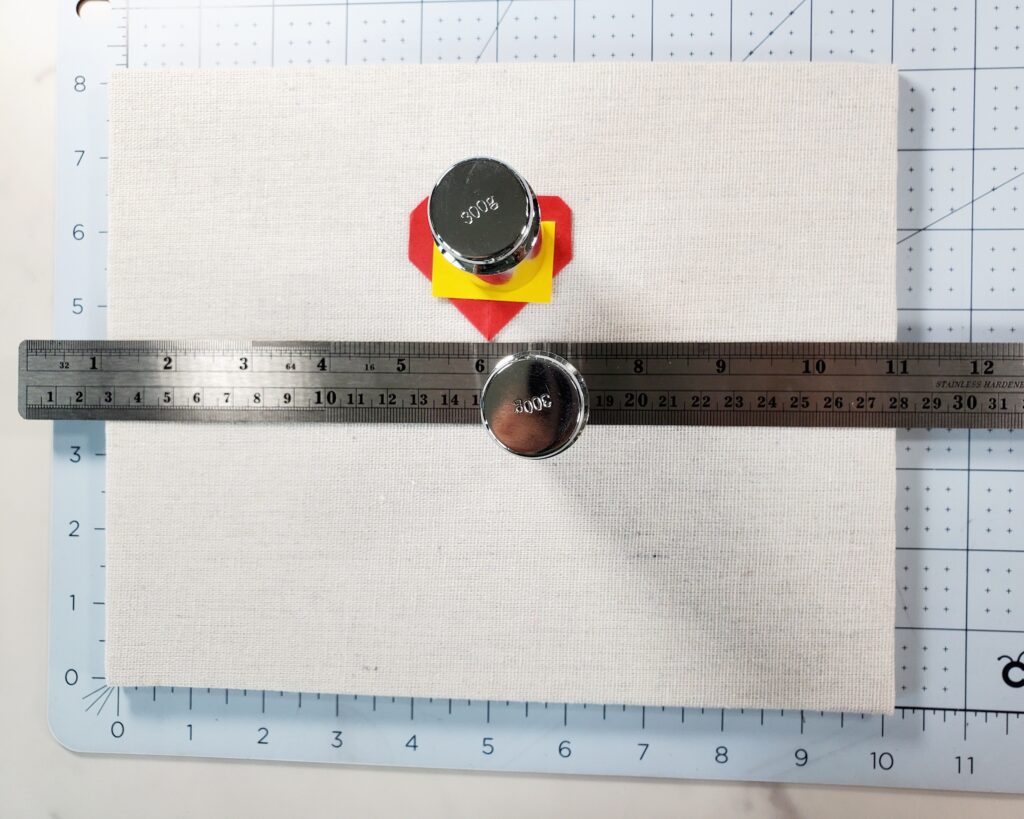
Using a toothpick, apply a small dab of Liquid Nails glue under the heart. Cover the heart with a sticky note and place a weight on top to hold it in place while it dries. Repeat this process for the doves: apply glue behind them, cover with sticky notes, and place weights on top. Allow the glue to dry completely. I typically wait 1 hour minimum.
Once the glue is dry, reattach the backboard to the shadowbox frame and secure it.
Ta-da! You’ve crafted your very own dove shadowbox! Give yourself a pat on the back 🥳🎉 Please be sure to share your creations with me at @orikim_creations on Instagram! I can’t wait to see all the beautiful dove shadowboxes you make. 🦖
As the leaves start to change and the air turns crisp, it’s the perfect time to bring some seasonal creativity into your home. Our latest YouTube tutorial shows you how to fold a simple origami pumpkin that’s not only fun to make but also a festive addition to your fall décor. 🎃 Whether you’re crafting for Halloween or just love the cozy vibes of autumn, this project is for everyone!
Our step-by-step tutorial makes it easy for beginners to follow along, so you’ll have a cute pumpkin in no time.
What You’ll Need:
A square piece of orange origami paper. I prefer a high-quality tant paper for a smooth, sturdy finish.
Sharpie or similar for some jack-o-lantern faces 🎃
A dash of creativity and a love for fall!
Not only is this origami pumpkin easy to make, but it’s also super versatile! Use it to decorate your space, jazz up a fall-themed table setting, or even turn it into a cute little garland for your Halloween party. ✨
Why You’ll Love It:
Beginner-Friendly: Our YouTube tutorial walks you through each fold, making it simple for everyone.
Festive: This little pumpkin is the perfect addition to your fall décor lineup.
Gift-Worthy: Looking for a unique gift idea? Hand out these cute pumpkins as part of a DIY fall-themed present!
Ready to dive into the world of origami and start crafting your very own pumpkin? 🍂 Watch our tutorial here, and don’t forget to subscribe for more fun and easy origami projects!