Balloon Dog Crochet Plushie: A Squishy Companion with a Twist!

Twistable balloon dog plushie! đŸ¶

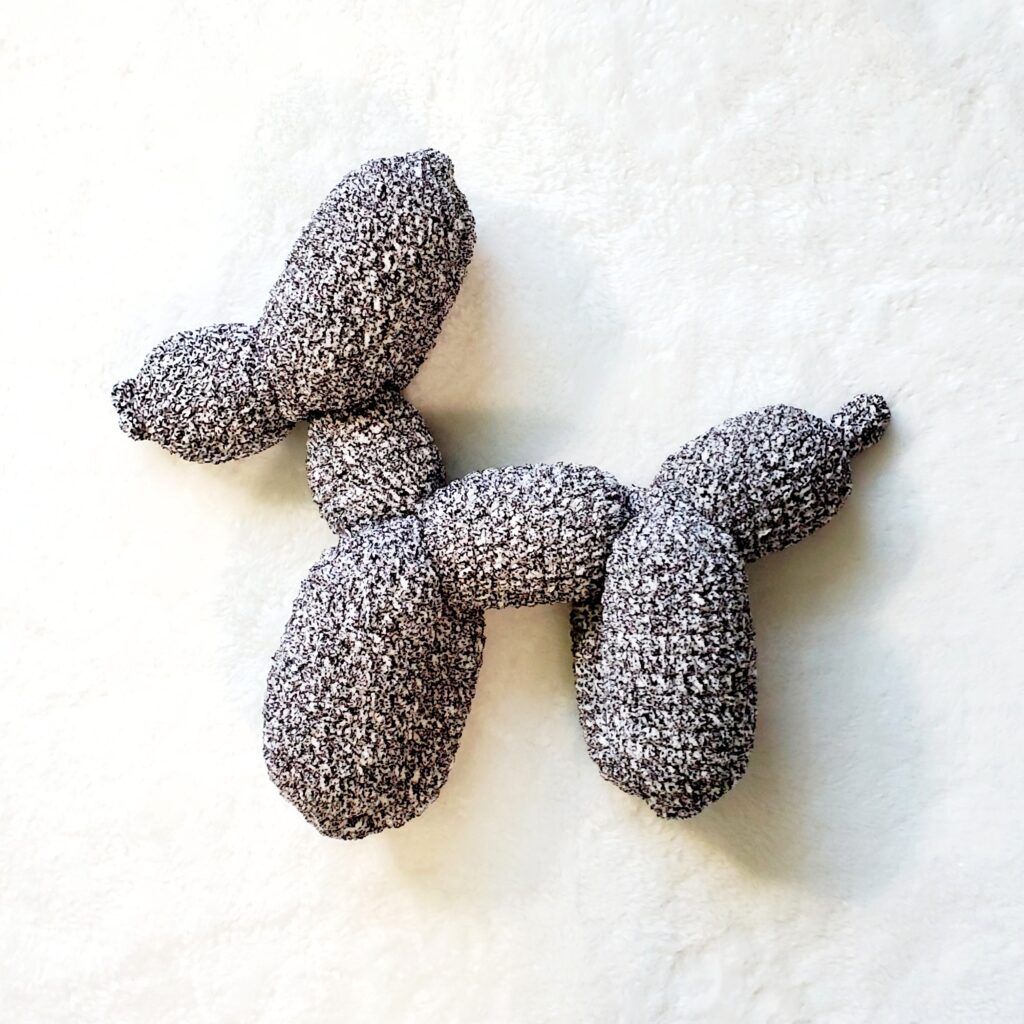
With cooler days rolling in and cozy blankets coming out, it’s the perfect time to dive into a fun, snuggly crochet project. And what could be more fun than creating your very own Balloon Dog Crochet Plushie? đŸ¶đŸŽˆ This little cutie is inspired by the classic balloon animals we all know and love, but with a twist—it won’t pop or deflate! Made with Bernat Blanket Speckle Super Bulky yarn in the Typewriter color, this balloon dog is soft, squishy, and ready to brighten your day. Whether you’re new to crochet or a seasoned stitcher, this adorable pup is a great project to cuddle up with (literally!).

My Balloon Dog Crochet Adventure

Let me tell you, this project was a bit of a ride! I didn’t finish it in one sitting; instead, I worked on it on and off over the course of a few days (okay, maybe weeks). There were definitely some moments where I just couldn’t wait to see it all come together, so I pushed myself a little too hard—oops! 😅 And that’s when it happened… I crocheted so much, my wrist and arm started hurting! Yep, that’s right—crochet injuries are real, my friends. I had to take a step back and give my arm some much-needed rest. At one point, I even joked that I’d have to go to “crochet rehab” because my arm was protesting so much. So, lesson learned: no matter how fun or exciting your crochet project is, remember to take breaks! If you’re curious, I wrote a whole post about what I did to tackle my wrist and arm pain—check it out here for some helpful tips.

The Head and Neck Challenge: Creative Sewing to the Rescue

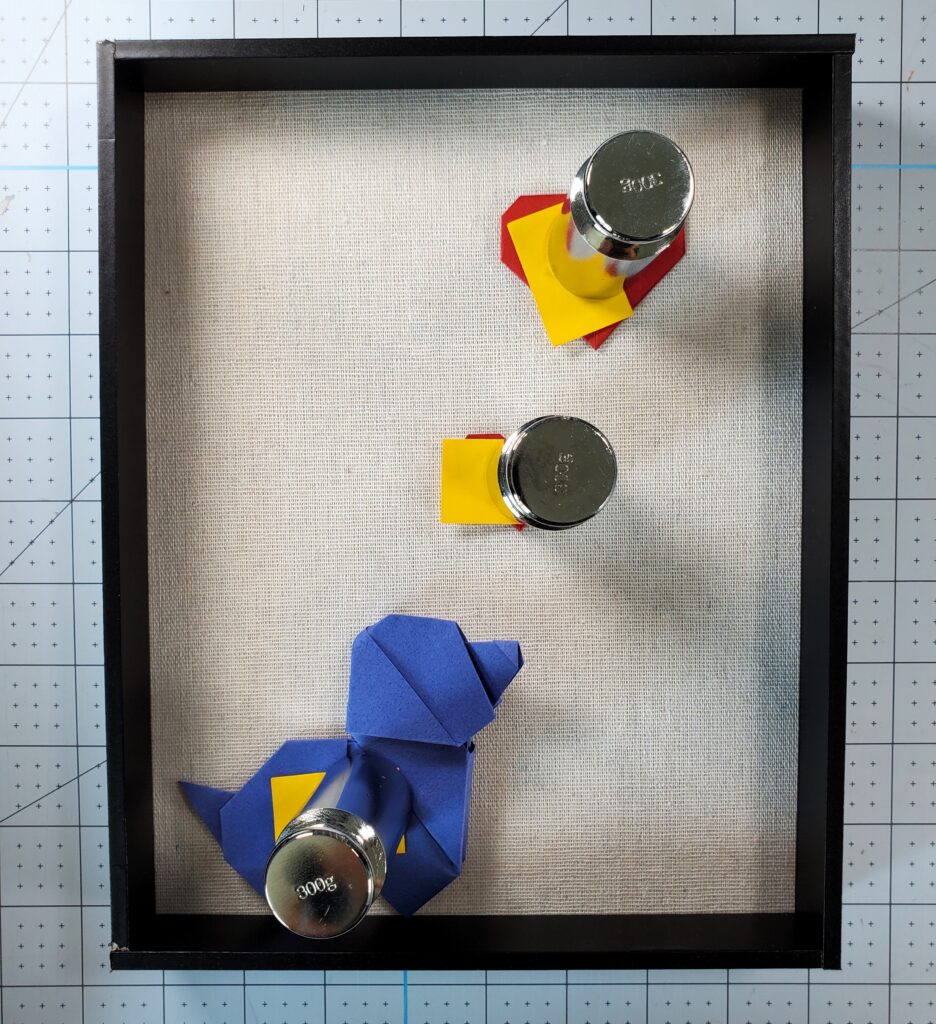
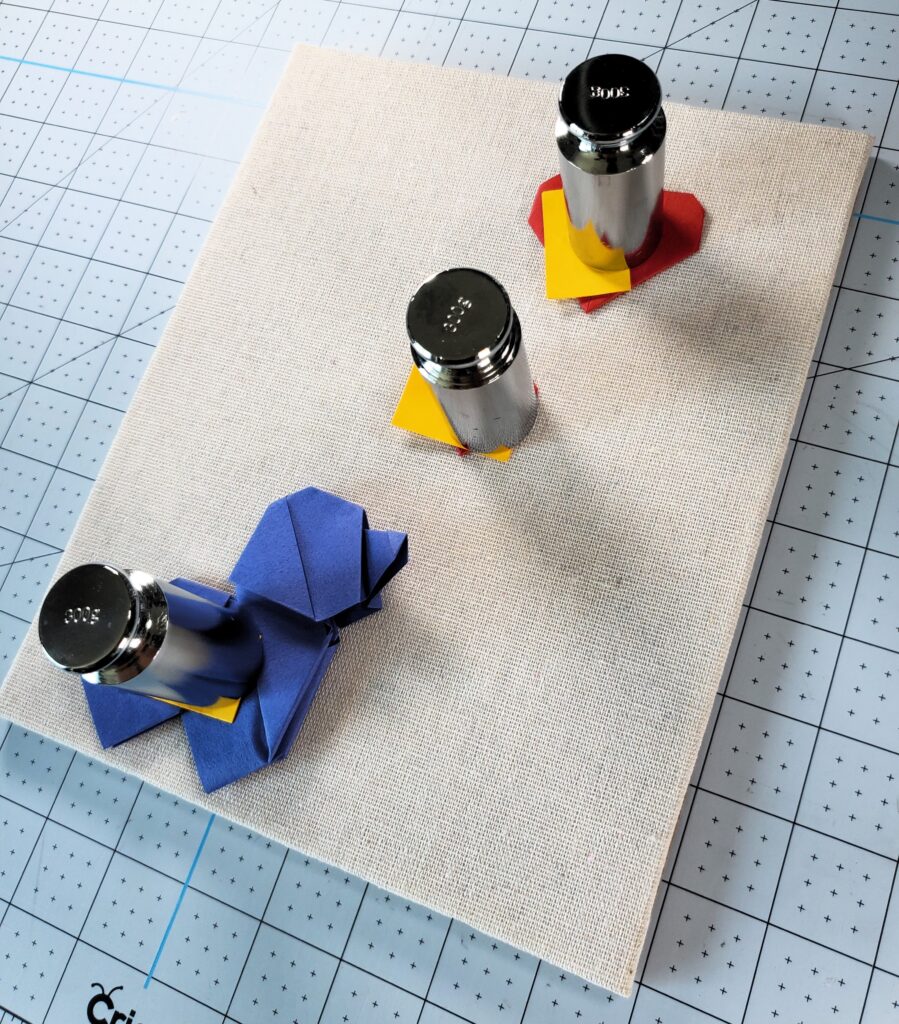
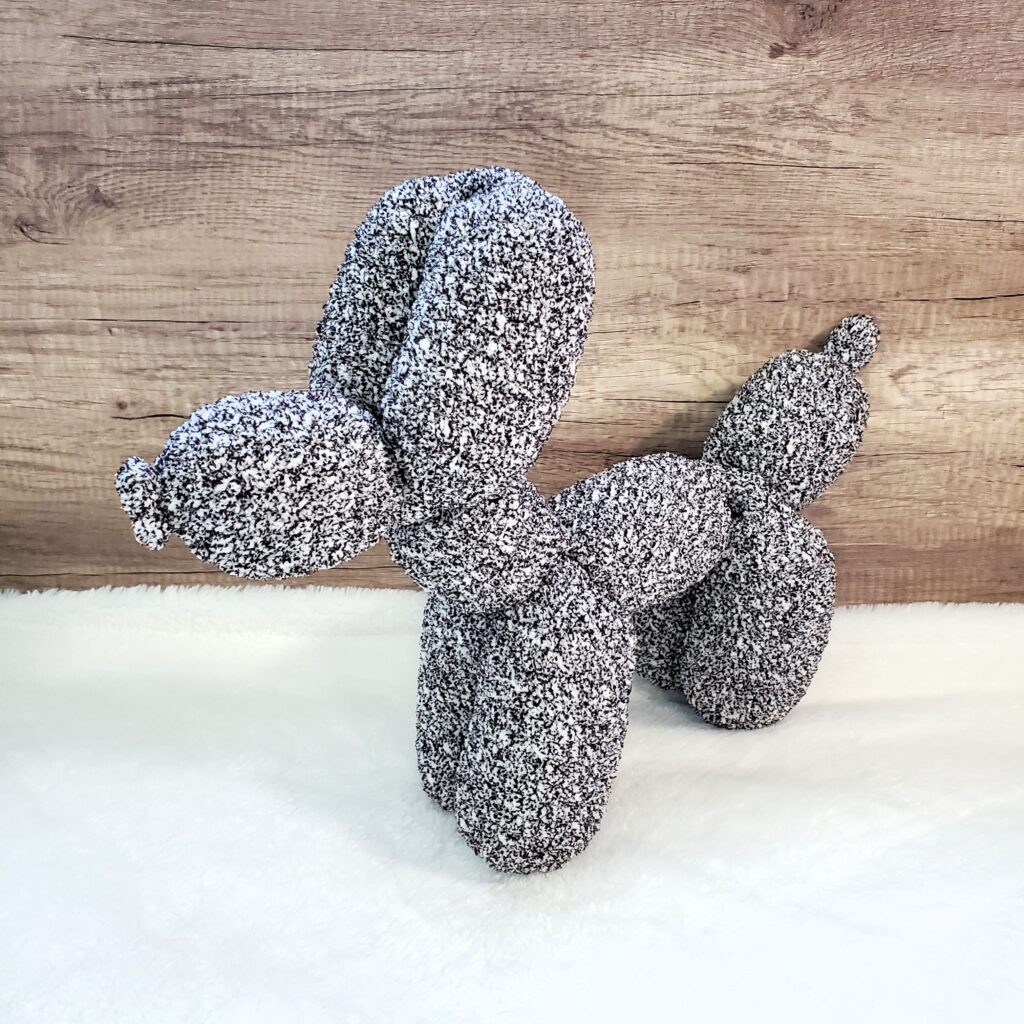
Here’s a little heads-up if you’re going to make your own balloon dog—the head is heavy! I didn’t anticipate how much it would weigh compared to the body, and it definitely made the plushie a bit top-heavy. Without some creative sewing, your balloon dog won’t stand up on its own. Instead, it’ll plop down, especially since the head is the heaviest part. But don’t worry, there’s a simple fix! I had to get a little crafty with my stitching. I sewed the neck to the body just a bit for extra stability, and I also stitched the ears to the head in a few spots to make sure it wouldn’t droop. It takes a little trial and error, but once everything’s securely in place, your balloon dog will be ready to stand tall (and look adorable while doing it)!

If you prefer, you could also go down a yarn weight or two to make your balloon dog a little lighter. Something like a worsted or bulky weight yarn might give the plushie more stability. But, honestly, it’s totally up to you! You can get creative and experiment with different yarns to see what works best for your project.

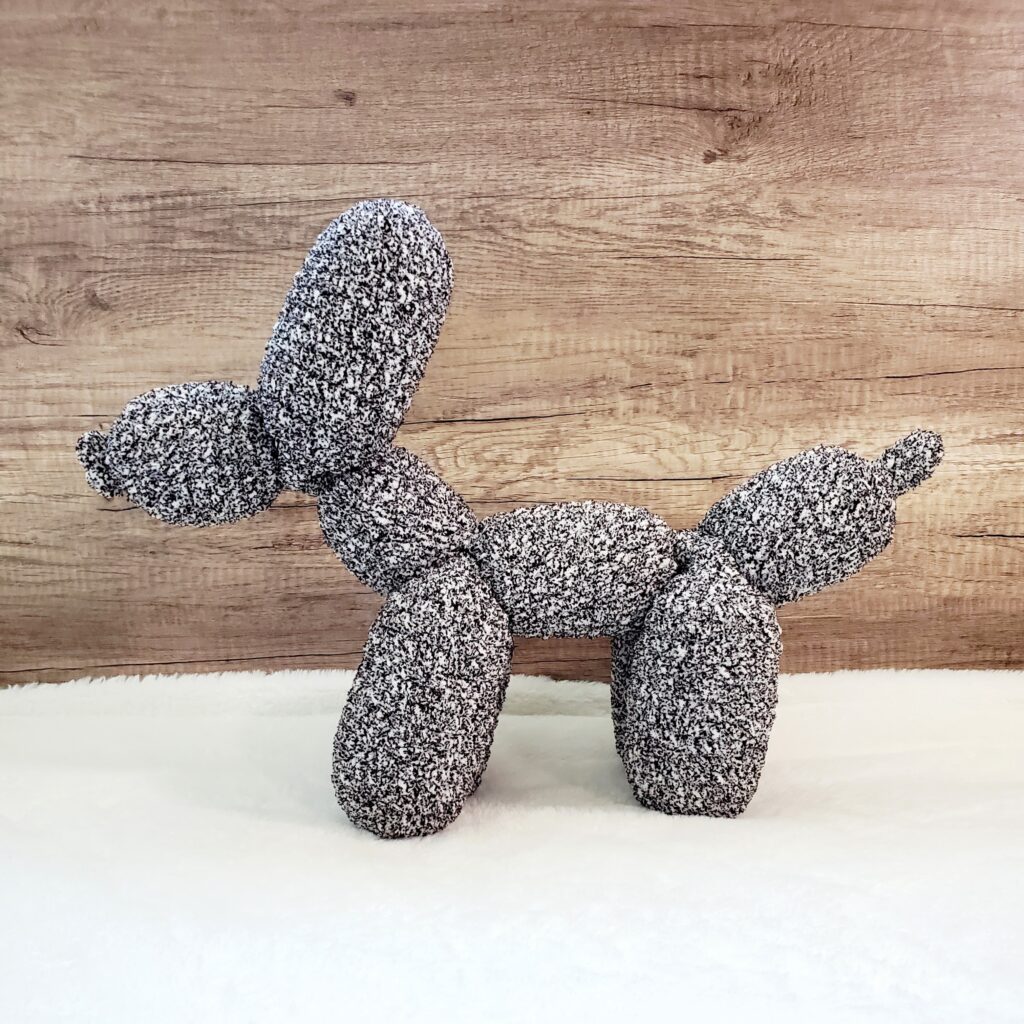
Twisting and Assembling the Balloon Dog

One of the most satisfying parts of this whole project was assembling the balloon dog. Just like with real balloon animals, there’s something so exciting about twisting all the pieces together and watching it come to life. And because the balloon dog shape is so iconic, it felt super nostalgic! If you want to see exactly how I assembled the pieces, I made a YouTube video tutorial where I walk you through the process. It’s surprisingly easy once you get the hang of it, and it’s so rewarding when your balloon dog finally comes together. The head, body, legs, and tail all twist into place perfectly, and before you know it, you’ve got your very own balloon dog plushie ready to show off!

Materials You’ll Need

Ready to make your own balloon dog? Here’s everything I used to create this squishy friend:

The pattern is by the talented ann.peach.creations and it’s available for free! The instructions are super easy to follow, and it’s such a fun pattern if you’re looking for something unique and playful to crochet. Plus, who doesn’t love a cute little balloon dog?

My Balloon Dog Crochet Tips:

  • Take Breaks! I cannot stress this enough—take breaks while crocheting! Even if you’re super excited to finish, give your wrists and arms a little rest. Crocheting for hours on end can lead to soreness, and you’ll enjoy your project a lot more if you stay comfortable. I learned this the hard way, and trust me, you don’t want to end up with crochet-related arm pain like I did.
  • Get Creative with Sewing: As I mentioned, the head of the balloon dog is a bit heavy, so be prepared to sew a little extra to keep it balanced. Sewing the neck to the body helped stabilize everything, and a few extra stitches connecting the ears to the head made sure my balloon dog wouldn’t topple over.

Why This Balloon Dog is a Must-Make

I absolutely loved making this balloon dog, and I think you will too! Not only is it a super fun project, but the end result is adorable and totally unique. Whether you’re making it for yourself, gifting it to a friend, or adding it to your crochet collection, this little balloon dog is sure to bring smiles wherever it goes. Plus, its squishy, plush texture makes it the perfect cuddle buddy—or even a playful decoration for your room! And because it’s crocheted, it’ll last much longer than a real balloon animal. 😉 If you’re ready to dive in, be sure to check out my Crochet Supplies page for all the tools and materials you’ll need!

Learn to Make Adorable an Origami Dog Face with Easy-to-Switch Ears!

Hello, origami enthusiasts!

I’m thrilled to announce a new YouTube tutorial that will have you folding and personalizing an adorable origami dog face! This project is perfect for all skill levels, whether you’re a beginner or a seasoned origami artist. What makes this origami dog face so special is its interchangeable ears. You can choose to have them down, perked up, or even with one up and one down, allowing you to create a variety of expressions for your paper pup. đŸ¶

Why You’ll Love This Project

  • Versatility: With interchangeable ears, you can create different looks with a single model, offering endless possibilities for customization.
  • Easy and Fun: This tutorial is designed to be straightforward and enjoyable, making it a great activity to do alone or with family and friends.
  • Perfect for All Ages: Whether you’re making it as a fun craft project with kids or as a creative stress-relief activity for yourself, this origami dog face is sure to bring a smile to your face.

What You’ll Need

To get started, gather your materials:

  • Origami paper: You can use any color or pattern you like. Consider using a square piece of tant paper for best results. If you would like floral designs, I recommend Japanese washi-inspired paper shown in the tutorial.
  • Markers or colored pencils (optional): These are optional but great for adding eyes, a nose, or other details to personalize your dog face.

Watch the Tutorial

Head over to my YouTube channel for the full step-by-step tutorial. I’ll guide you through the entire process, showing you how to fold the base of the dog face and then create the interchangeable ears for a customizable finish. Tutorial here!

Don’t forget to subscribe to my channel for more fun and easy origami tutorials. 🙏

Happy folding! 😊

Crafting Inspiration: Origami Dog Shadowbox – Behind the Scenes of Another Best-Selling Etsy Debut!

Origami Dog with Red Hearts – Handcrafted Wooden Shadow Box (8×10 inches) đŸ¶

Dogs are more than just pets; they are family members who fill our lives with joy, loyalty, and unconditional love. Whether your beloved canine has crossed the rainbow bridge or is still your faithful companion, creating a dog shadowbox can be a heartfelt way to celebrate their presence in your life! đŸŸ

Inspiration Behind the Dog Shadowbox

The inspiration for the dog shadowbox comes from my love for dogs and the special bond we share with them. These shadowboxes have become a common purchase for those wishing to memorialize their furry friends. Each shadowbox tells a unique story, capturing the essence of your dog’s personality and the cherished moments you’ve shared.

For those who love to embrace their creativity, making your own dog shadowbox is a perfect way to honor your dog’s memory or celebrate their life. You’ll have the opportunity to personalize every aspect, from selecting the background to arranging the elements that best represent your pet.

How to Make Your Own Dog Shadowbox

Creating a dog shadowbox is a rewarding project that allows you to commemorate your furry companion in a unique and personal way. Keep scrolling for step-by-step instructions on how to create your own! âŹ‡ïž

Prefer a Custom-Made Shadowbox?

If you’d rather have a custom dog shadowbox made for you, check out my Etsy listing here! I would be honored to create a special piece that captures the unique spirit of your furry friend. ❀

Whether you choose to create your own or have one made, a dog shadowbox is a beautiful tribute to the dogs that bring so much joy to our lives. Embrace your love for your canine companion with this heartfelt project!

Steps on How to Make Your Own Dog Shadowbox 🐕

Essential Supplies:

My crafting tools are essential. Liquid Nails glue ensures the pieces stay securely in place. I use toothpicks for precise glue application and sticky notes to protect the paper from the weights I use—individual calibration weights perfect for holding down the paper without damage. My ergonomic X-acto knife makes precise cuts, and my self-healing Cricut crafting mat ensures clean, accurate cuts.

Step-by-Step Instructions:

The first step is to create your origami cat and heart. Follow these easy and simple tutorials to get started: here and here!

Open the shadowbox and remove the backboard. With the backboard, position the large heart slightly in the top right corner, the small heart just underneath on the left side of the large heart, and place the cat near the bottom left corner, as shown in the nearing and below pictures. I typically guesstimate their placements, but ensuring they are equal in length. 😅

To create the illusion of the dog standing on a ledge within the shadowbox, position the inner border on top of the backboard as shown in the left picture. Carefully place the dog at the bottom of the inner border, making it appear as if it’s perched on the ledge.

Using a toothpick, apply a small dab of Liquid Nails glue under the hearts. Cover the hearts with a sticky note and place a weight on top to hold it in place while it dries. Repeat this process for the dog: apply glue behind it, cover with sticky notes, and place weights on top. Allow the glue to dry completely. I typically wait 1 hour minimum.

Once the glue is dry, reattach the backboard to the shadowbox frame and secure it.

Ta-da! You’ve crafted your very own dog shadowbox! đŸ„łđŸŽ‰ Please be sure to share your creations with me at @orikim_creations on Instagram! I can’t wait to see all the beautiful dog shadowboxes you make. đŸ¶

If you’re a cat lover, check out this blog post on how to create your own cat shadowbox! đŸ˜ș

These supplies can be found on my Origami Supplies page.

Pawsitively Fun: How to Fold an Origami Dog Bookmark

Hey everyone! Are you looking for a creative and fun way to keep track of your place in a book? Check out my latest YouTube video, where I demonstrate how to fold an adorable origami dog bookmark. đŸ¶

What You’ll Need:

  • Square piece of origami paper. While any paper will work, I recommend tant paper for its quality and variety
  • Patience and fun vibes!

In the video, I also showcase the book “Origami Design Secrets: Mathematical Methods for an Ancient Art, Second Edition.” I explain how to use your cute new bookmark and delve into the fascinating world of origami math and magic. This book is a fantastic resource for anyone curious about the deeper aspects of origami. You can grab a copy here. 📚

Head over to my YouTube channel to follow the full tutorial and create your very own origami dog bookmark. Watch the video here!

Happy folding! 😊