Hop to It! A Fun and Easy Origami Jumping Frog Tutorial

Are you ready for a leap into the world of origami? I’m excited to introduce our latest YouTube tutorial on how to make an origami jumping frog! This project is not just a paper-folding adventure—it’s interactive, easy to make, and perfect for all ages. Whether you’re looking for a fun activity with the kids or just want to relax and create something playful, this jumping frog will bring joy to everyone. 🐸

Why You’ll Love This Tutorial 😍

  • A Classic: The origami jumping frog is a timeless project that’s been enjoyed for generations.
  • Fun and Interactive: The best part about this origami frog? It jumps! Fold it up, press its back, and watch it hop. Challenge your friends to a jumping contest or create a whole family of frogs.
  • Easy to Make: We’ve designed this tutorial to be beginner-friendly, so even if you’re new to origami, you’ll find it easy to follow along.
  • Great for All Ages: Whether you’re a kid or just a kid at heart, this project is a fantastic way to spend some creative time.

What You’ll Need

  • A square piece of origami tant paper (or any square paper you have on hand)
    • If you don’t have tant paper on hand, no worries—you can grab a pack here! The paper’s vibrant colors and sturdy texture make it ideal for this project.
  • A flat surface to fold on
  • A little bit of patience and a whole lot of enthusiasm!

Get Started Now

Ready to start folding? Watch the tutorial here, follow along, and you’ll have a jumping frog in no time! 😊
Create Your Own Origami Penguin: Fun and Easy Step-by-Step Tutorial for Beginners!

Hello, fellow origami enthusiasts! 🐧💕

I posted a new YouTube tutorial on how to make an origami penguin! This charming little project was inspired by a recent Etsy order for a shadowbox featuring a pair of origami penguins with a red heart. You can create your own penguin now! 🎉

What You’ll Need:

In this easy and relaxing tutorial, I’ll guide you step-by-step to fold your very own penguin. It’s a delightful activity that’s perfect for everyone, from beginners to seasoned origami lovers.

Watch the tutorial here! But the fun doesn’t stop there! If you’d love a pair of these adorable penguins but prefer to skip the folding, check out our Etsy shop, Orikim. I offer a lovely shadowbox featuring two origami penguins holding a red heart, perfect as a gift or a cute decoration for any room which can be found here!

Happy folding, and enjoy every moment of creativity! 🌟

Crafting Inspiration: Origami Dog Shadowbox – Behind the Scenes of Another Best-Selling Etsy Debut!

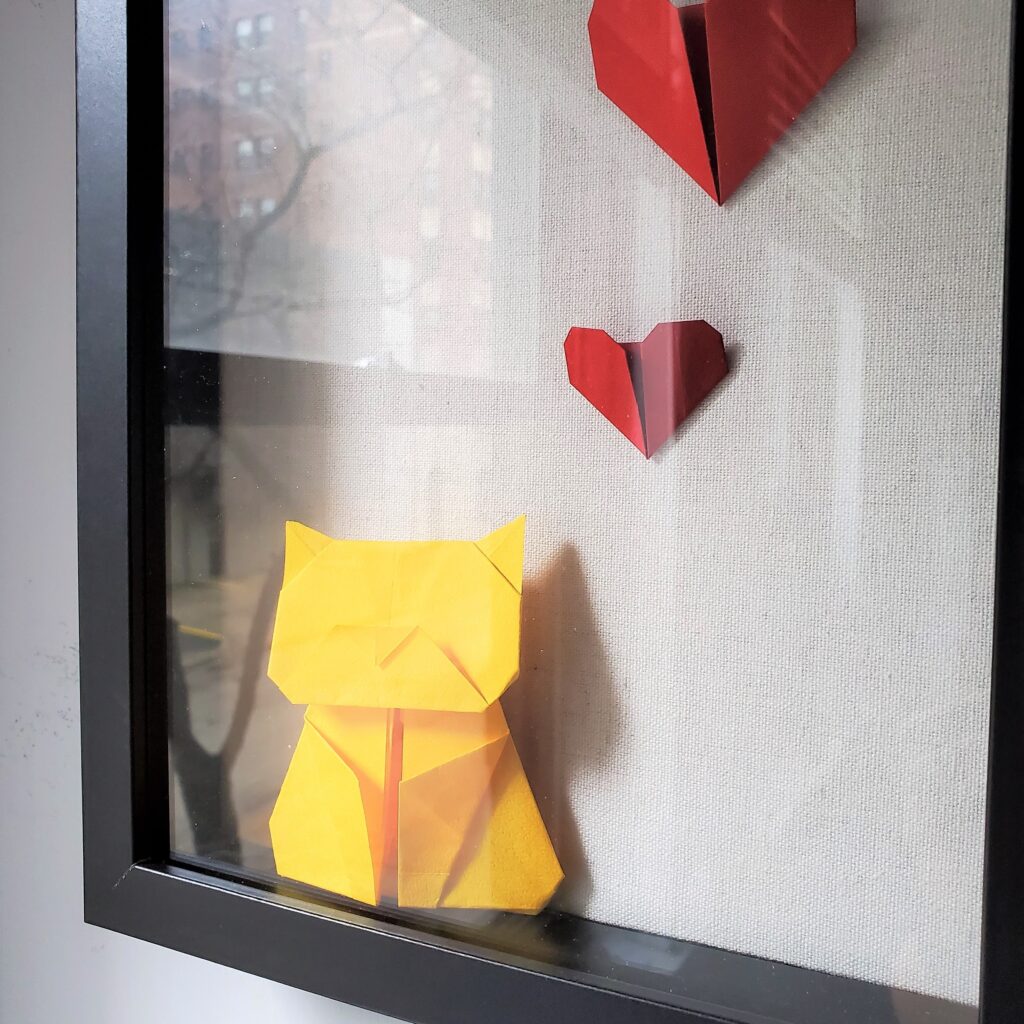
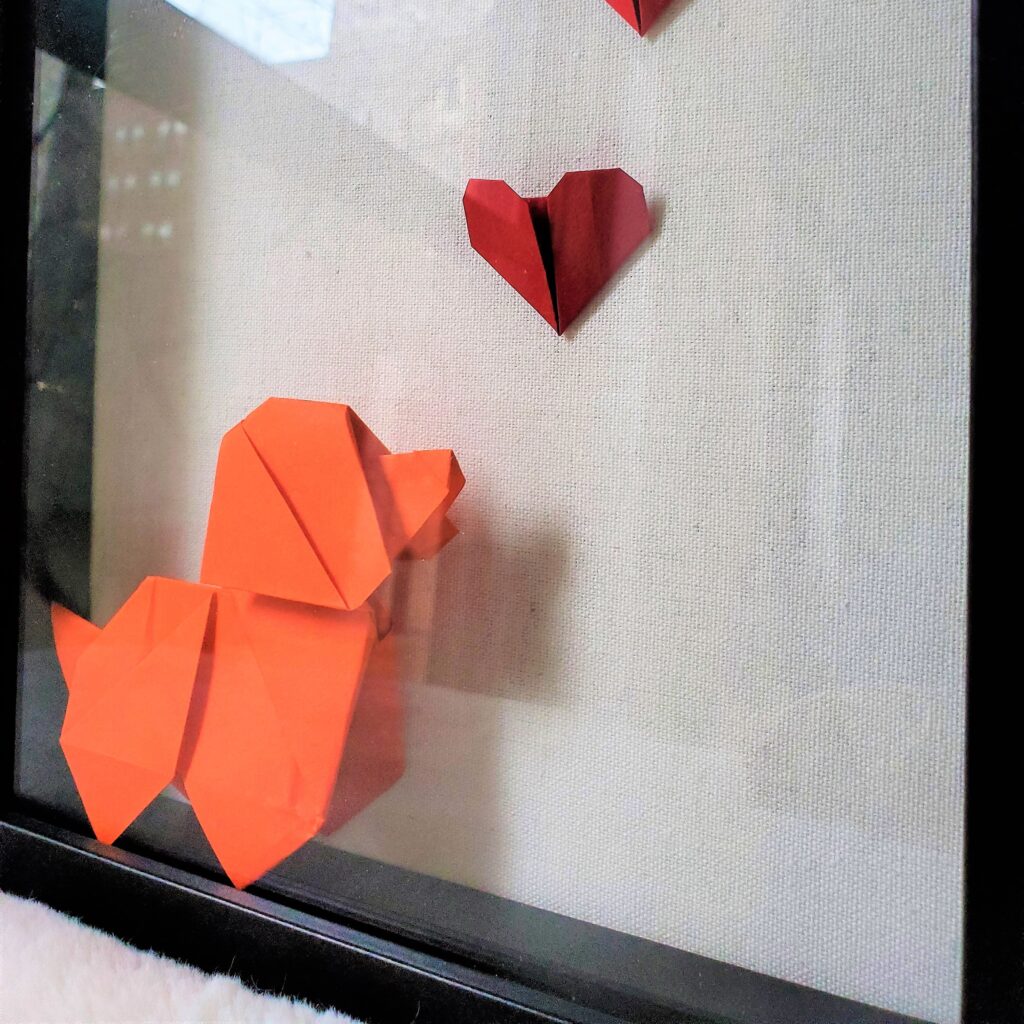
Origami Dog with Red Hearts – Handcrafted Wooden Shadow Box (8×10 inches) 🐶

Dogs are more than just pets; they are family members who fill our lives with joy, loyalty, and unconditional love. Whether your beloved canine has crossed the rainbow bridge or is still your faithful companion, creating a dog shadowbox can be a heartfelt way to celebrate their presence in your life! 🐾

Inspiration Behind the Dog Shadowbox

The inspiration for the dog shadowbox comes from my love for dogs and the special bond we share with them. These shadowboxes have become a common purchase for those wishing to memorialize their furry friends. Each shadowbox tells a unique story, capturing the essence of your dog’s personality and the cherished moments you’ve shared.

For those who love to embrace their creativity, making your own dog shadowbox is a perfect way to honor your dog’s memory or celebrate their life. You’ll have the opportunity to personalize every aspect, from selecting the background to arranging the elements that best represent your pet.

How to Make Your Own Dog Shadowbox

Creating a dog shadowbox is a rewarding project that allows you to commemorate your furry companion in a unique and personal way. Keep scrolling for step-by-step instructions on how to create your own! ⬇️

Prefer a Custom-Made Shadowbox?

If you’d rather have a custom dog shadowbox made for you, check out my Etsy listing here! I would be honored to create a special piece that captures the unique spirit of your furry friend. ❤️

Whether you choose to create your own or have one made, a dog shadowbox is a beautiful tribute to the dogs that bring so much joy to our lives. Embrace your love for your canine companion with this heartfelt project!

Steps on How to Make Your Own Dog Shadowbox 🐕

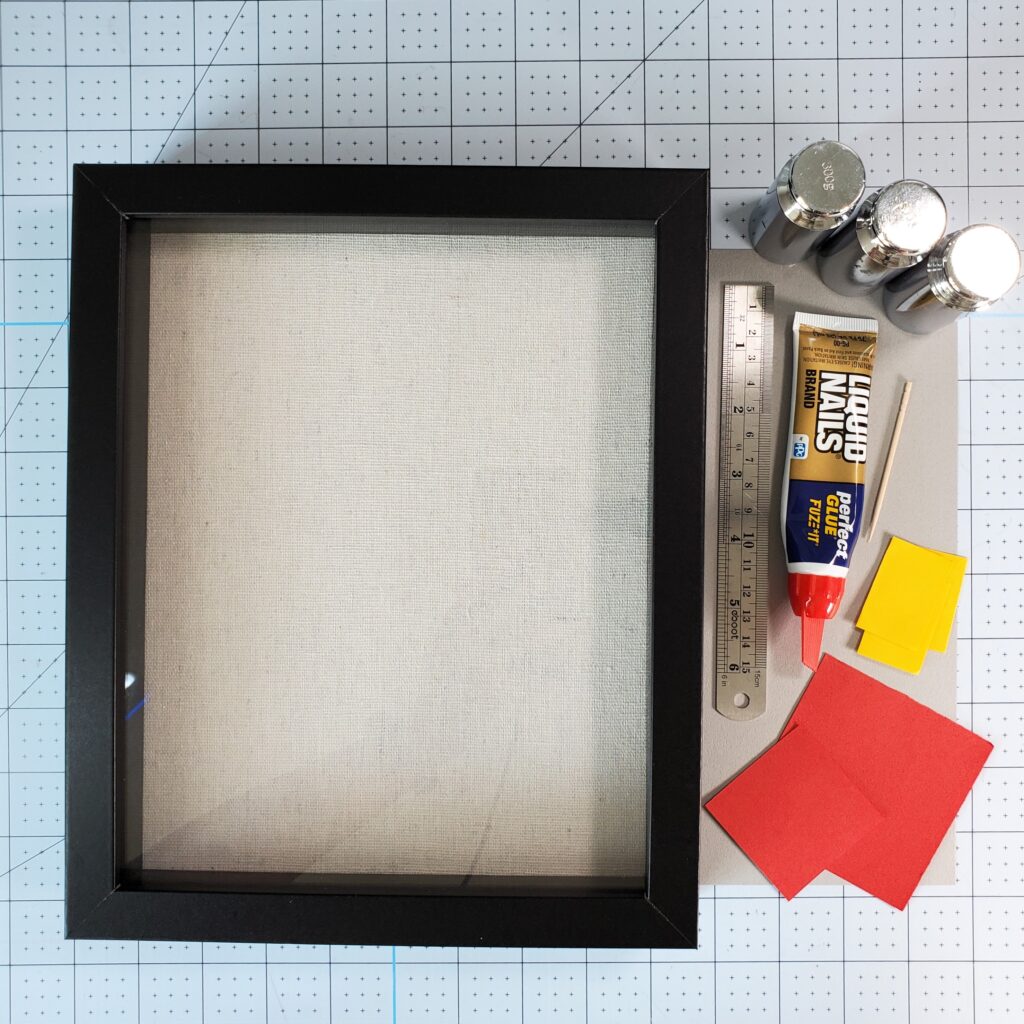
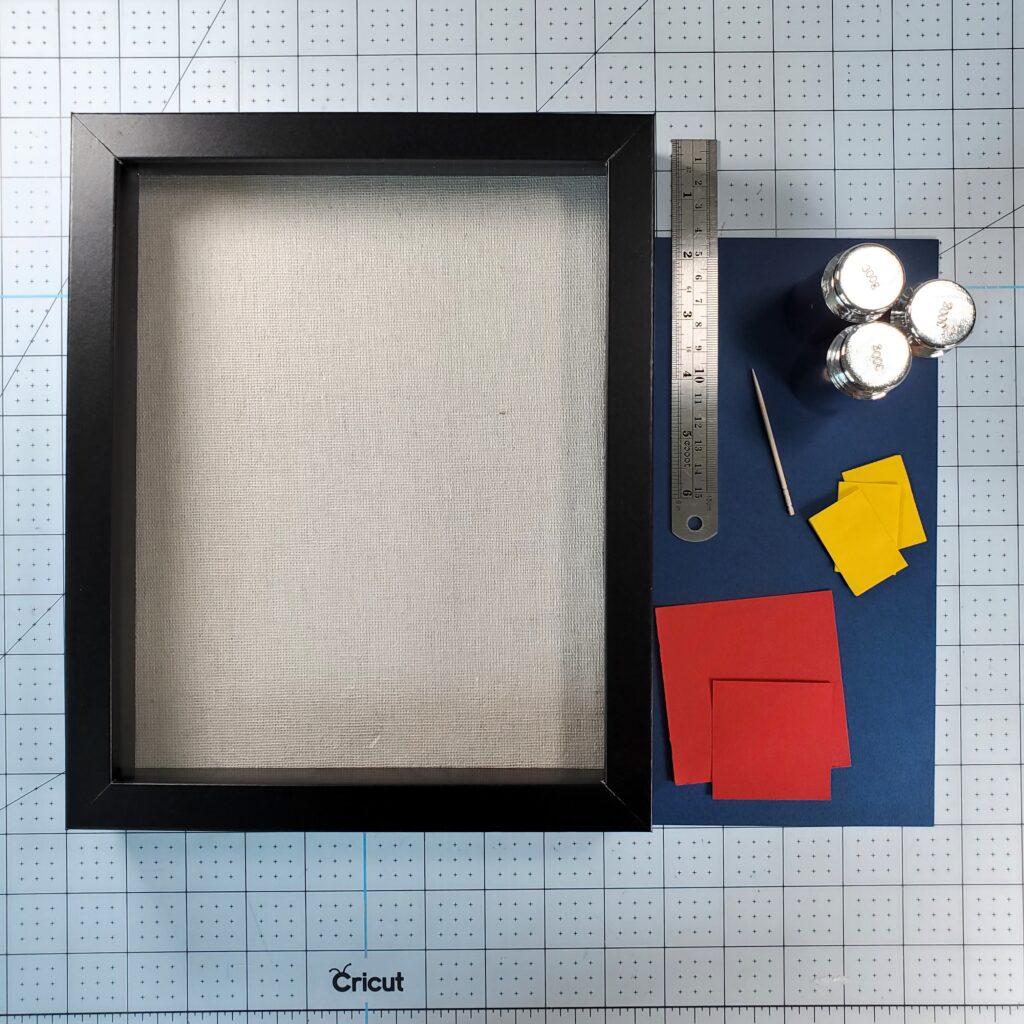
Essential Supplies:

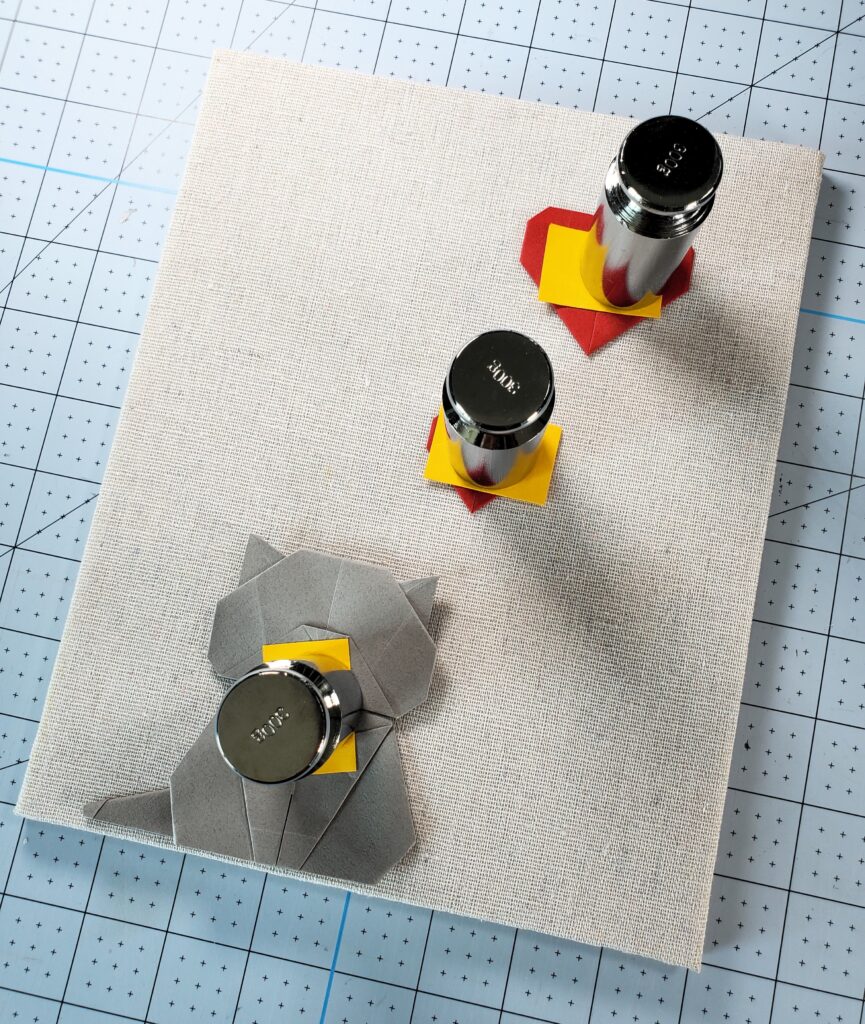
My crafting tools are essential. Liquid Nails glue ensures the pieces stay securely in place. I use toothpicks for precise glue application and sticky notes to protect the paper from the weights I use—individual calibration weights perfect for holding down the paper without damage. My ergonomic X-acto knife makes precise cuts, and my self-healing Cricut crafting mat ensures clean, accurate cuts.

Step-by-Step Instructions:

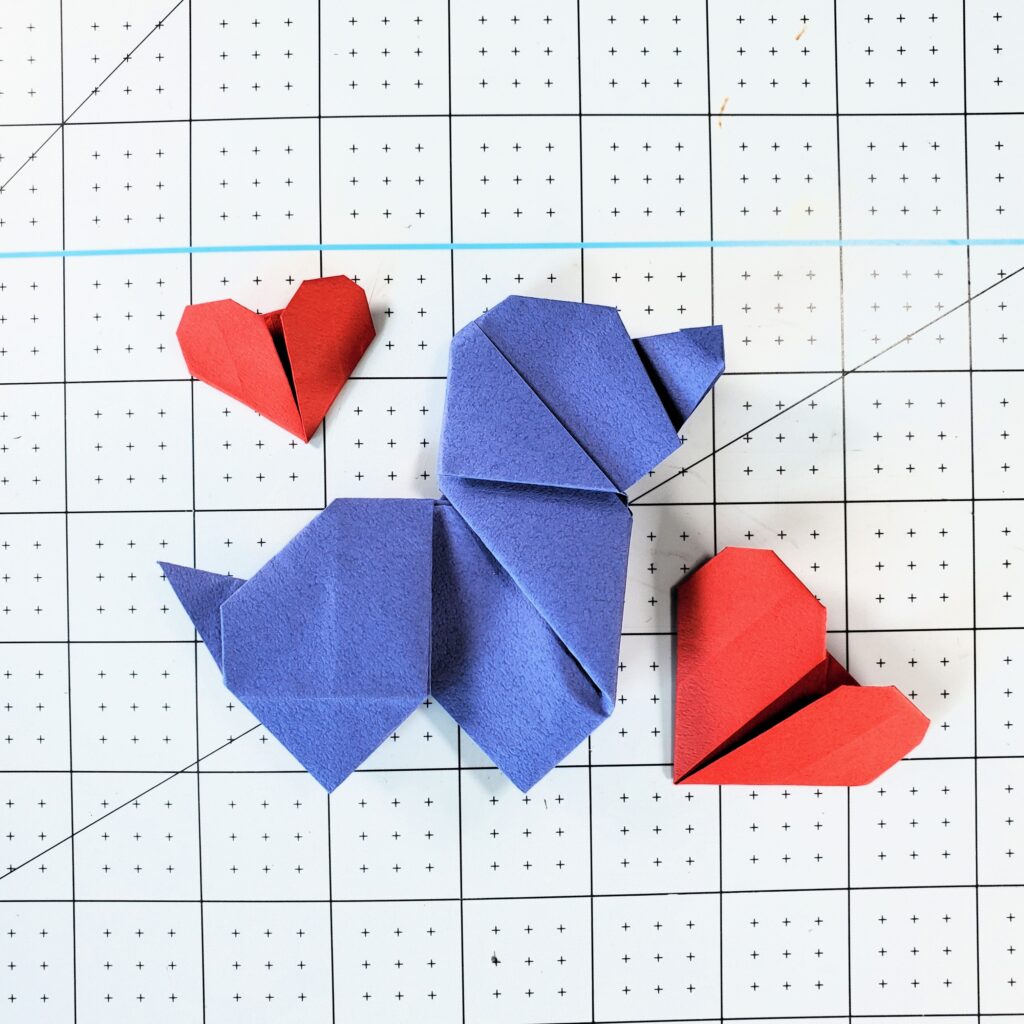
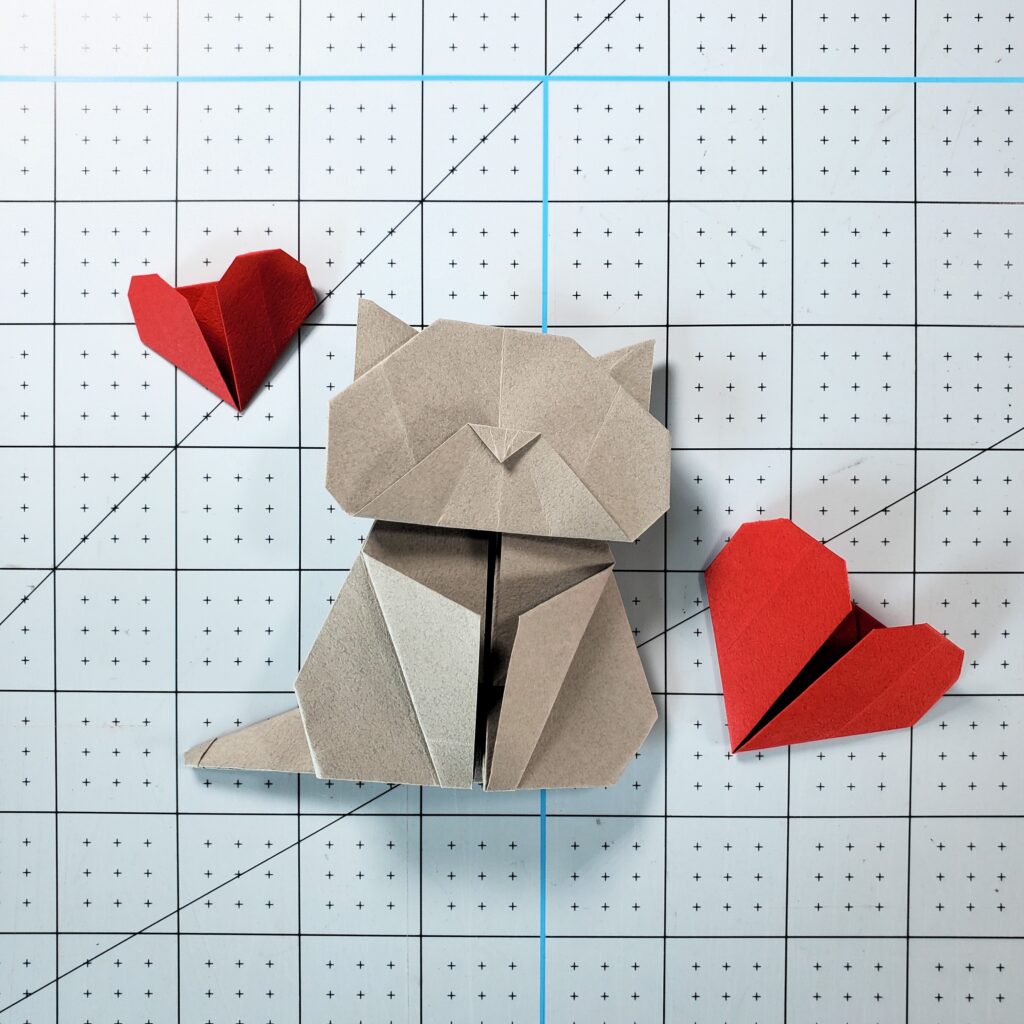
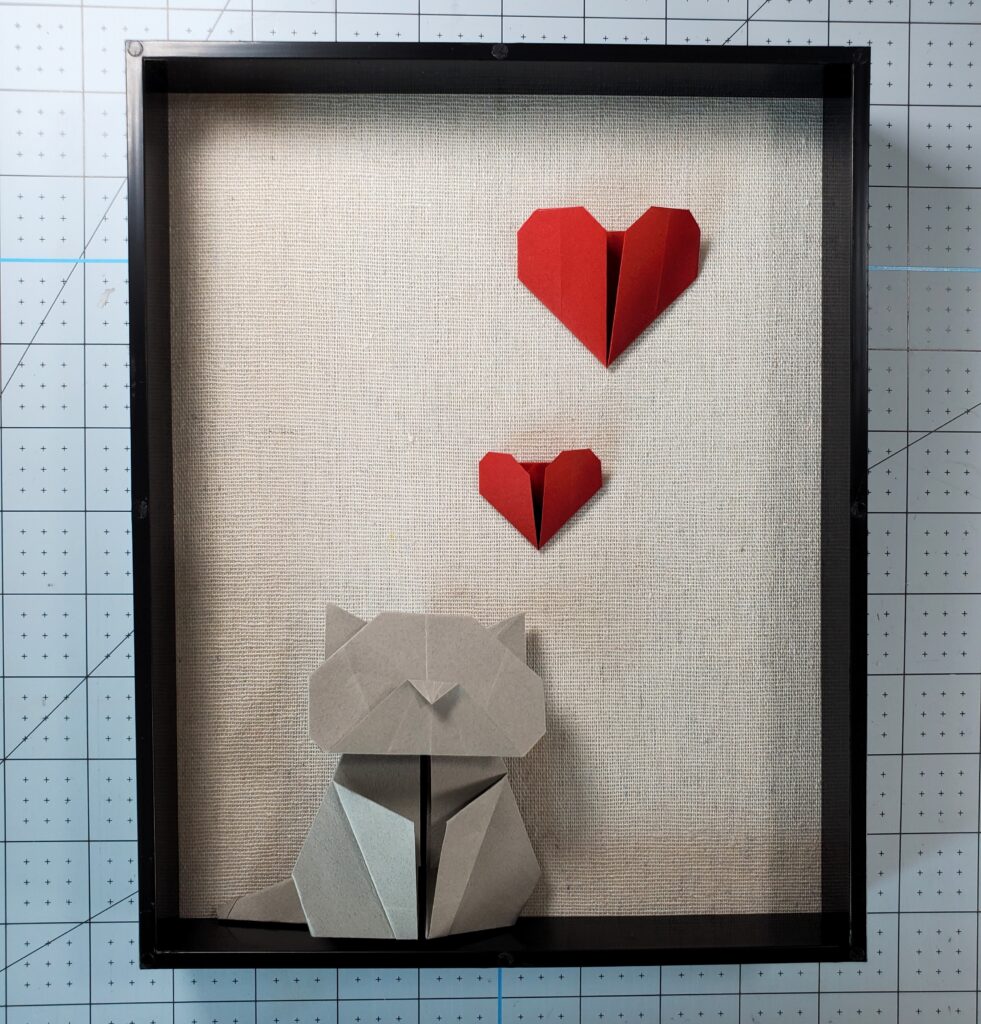
The first step is to create your origami cat and heart. Follow these easy and simple tutorials to get started: here and here!

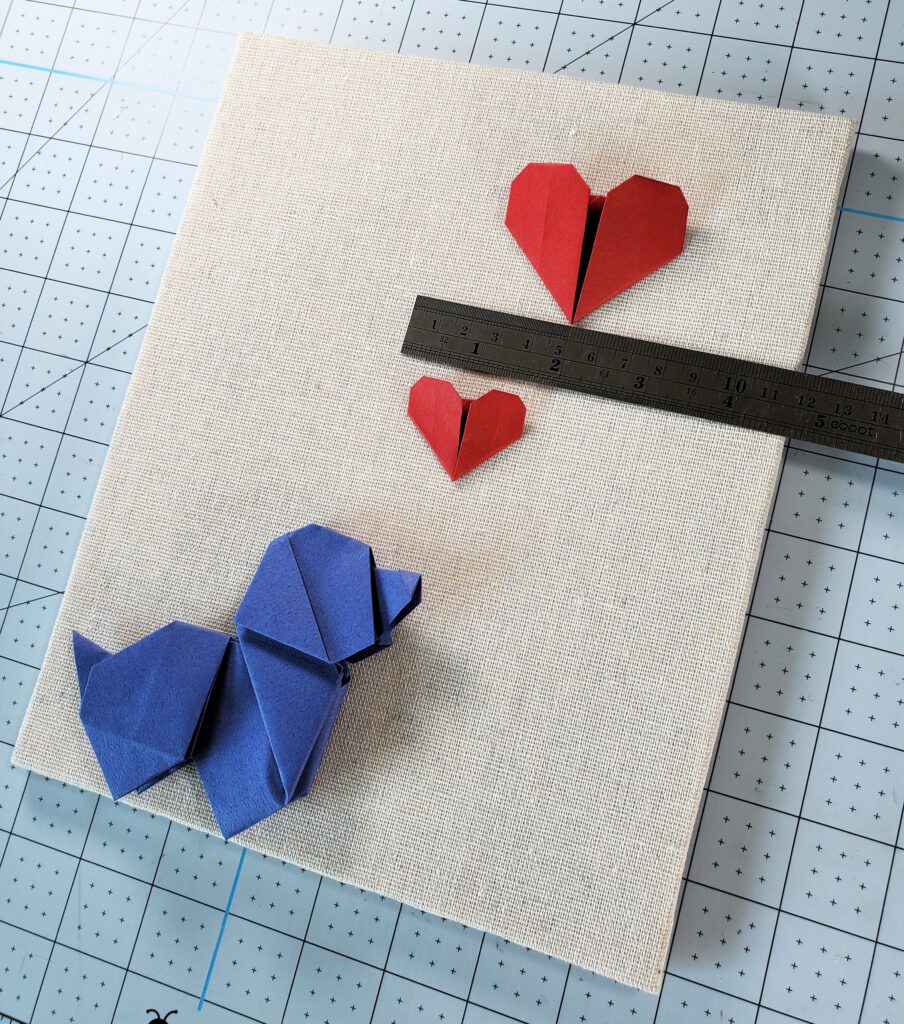
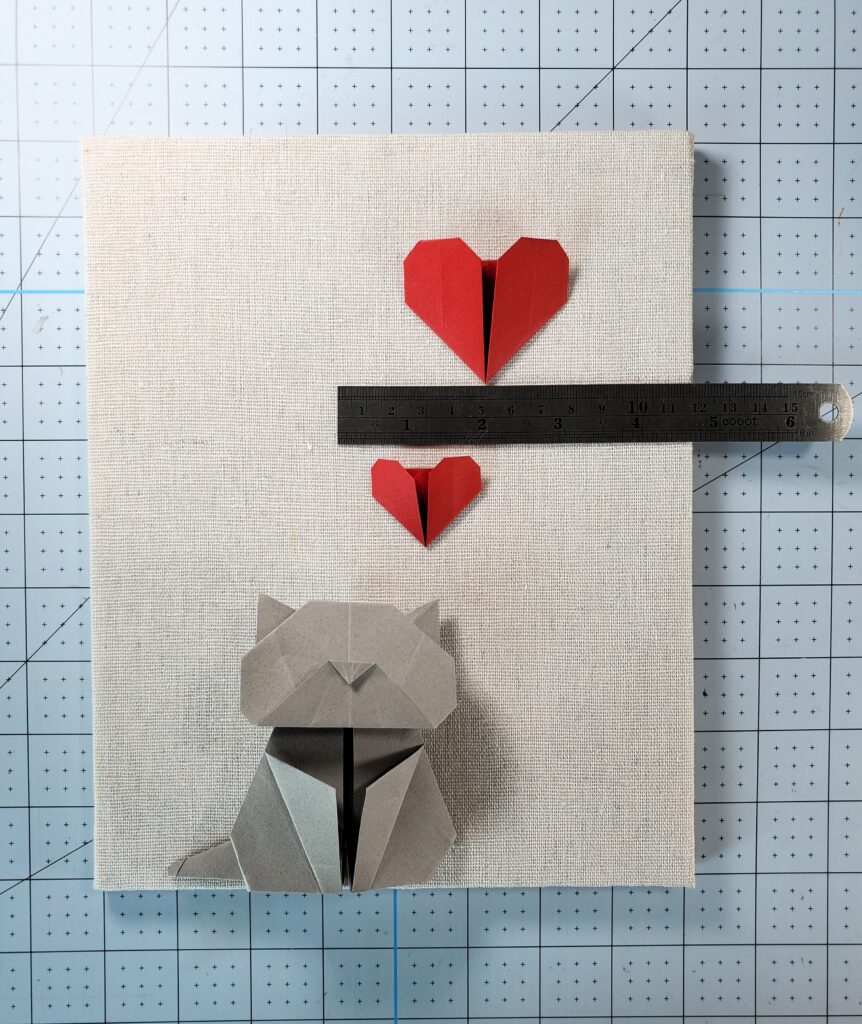
Open the shadowbox and remove the backboard. With the backboard, position the large heart slightly in the top right corner, the small heart just underneath on the left side of the large heart, and place the cat near the bottom left corner, as shown in the nearing and below pictures. I typically guesstimate their placements, but ensuring they are equal in length. 😅

To create the illusion of the dog standing on a ledge within the shadowbox, position the inner border on top of the backboard as shown in the left picture. Carefully place the dog at the bottom of the inner border, making it appear as if it’s perched on the ledge.

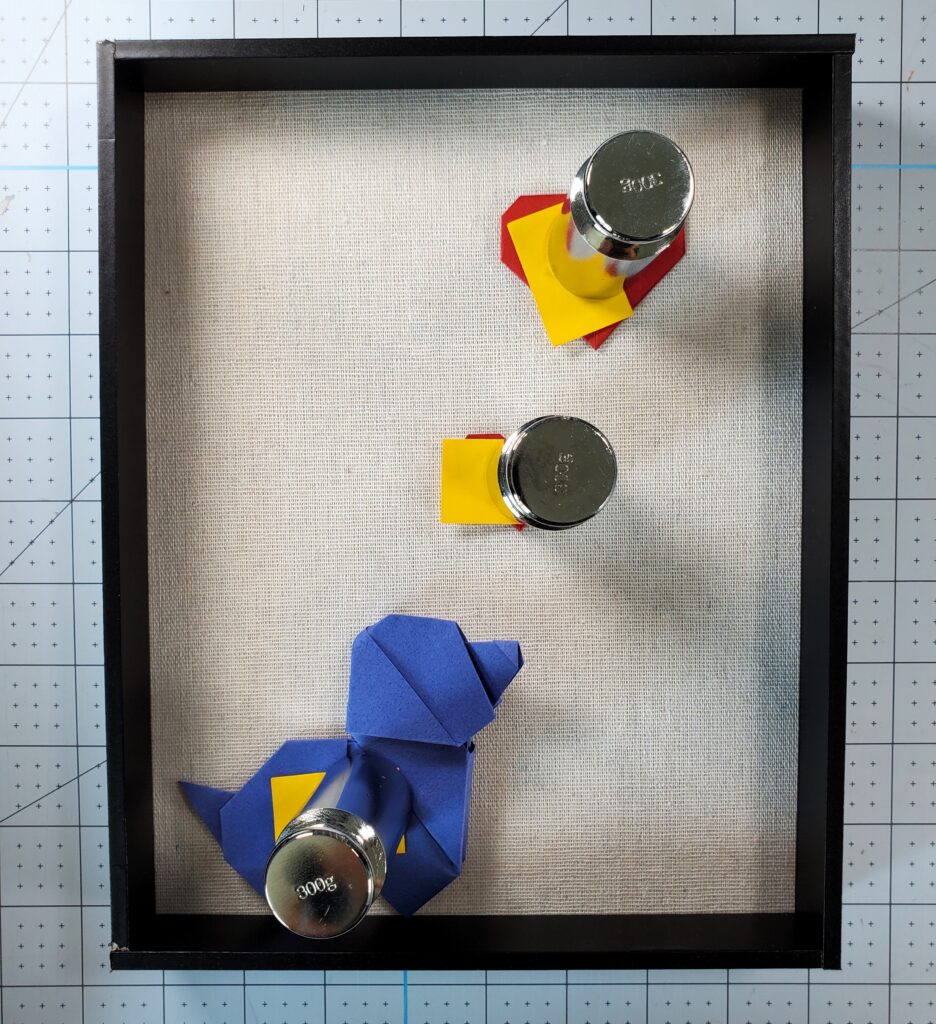
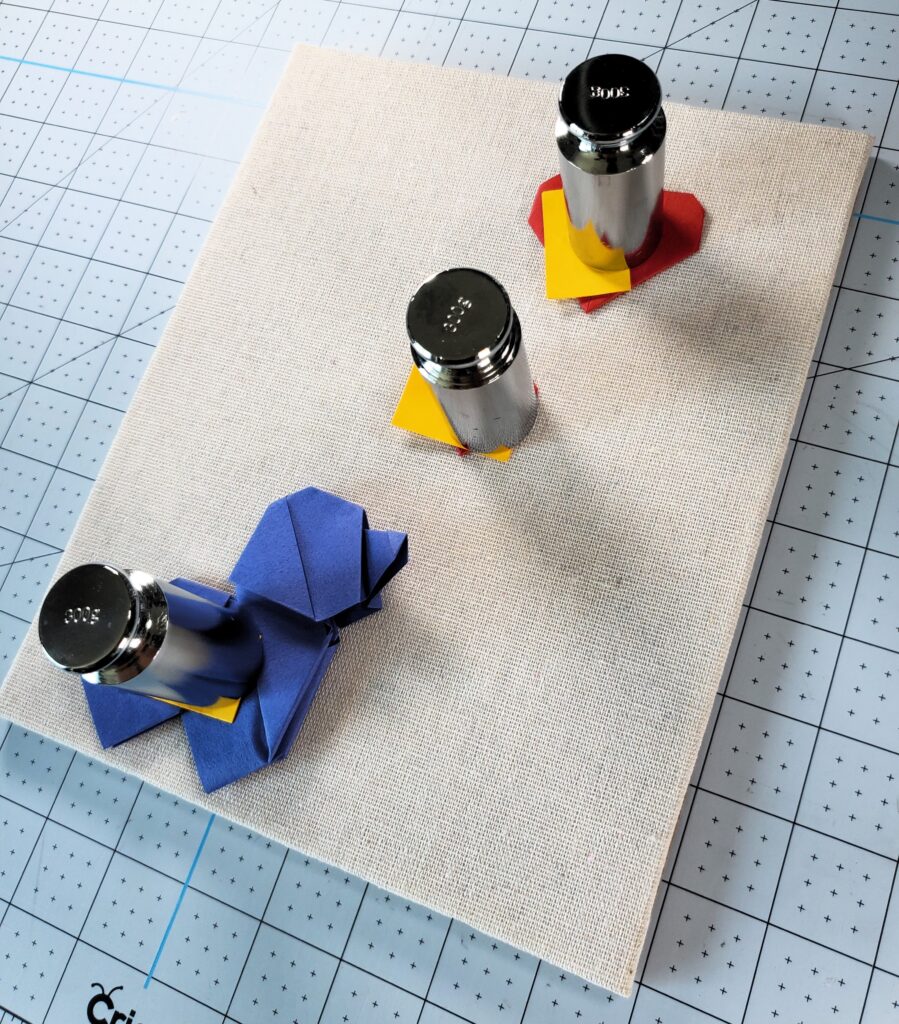
Using a toothpick, apply a small dab of Liquid Nails glue under the hearts. Cover the hearts with a sticky note and place a weight on top to hold it in place while it dries. Repeat this process for the dog: apply glue behind it, cover with sticky notes, and place weights on top. Allow the glue to dry completely. I typically wait 1 hour minimum.

Once the glue is dry, reattach the backboard to the shadowbox frame and secure it.

Ta-da! You’ve crafted your very own dog shadowbox! 🥳🎉 Please be sure to share your creations with me at @orikim_creations on Instagram! I can’t wait to see all the beautiful dog shadowboxes you make. 🐶

If you’re a cat lover, check out this blog post on how to create your own cat shadowbox! 😺

These supplies can be found on my Origami Supplies page.

Crafting Inspiration: Origami Cat Shadowbox – Behind the Scenes of Another Best-Selling Etsy Debut!

Origami Cat with Red Hearts – Handcrafted Wooden Shadow Box (8×10 inches) 😺

If you’re a cat lover and a DIY enthusiast, making your own cat shadowbox can be a heartwarming project that celebrates your furry companions! Shadowboxes are a beautiful way to capture the essence of your beloved pet and create a personalized keepsake that tells their story. 😻These shadowboxes are not just pieces of art; they are a way to honor and remember our feline friends. Many people choose to create or purchase these shadowboxes in memory of their furry companions, capturing their unique personalities and special moments shared together.

Creating your own cat shadowbox allows you to infuse it with personal touches and memories. It’s a perfect project for those who want to embrace their love for cats and channel it into something creative. Whether you want to display a cherished photo, include a small toy or collar, or add some decorative elements that remind you of your cat, the possibilities are endless. Keep scrolling for step-by-step instructions on how to create your own! ⬇️

Not a DIY Enthusiast?

If you’d rather have a professionally made cat shadowbox, I offer custom-made options in my Etsy shop. These shadowboxes are crafted with care and attention to detail, making them a perfect tribute to your beloved pet. You can check out my Etsy listing here!

Watch the Magic Happen

Curious about how these shadowboxes come together? Check out this YouTube short where I put together a custom order for a beloved kitty! 😍

Whether you decide to create your own or purchase a ready-made one, a cat shadowbox is a wonderful way to keep your furry companion close to your heart. Embrace your love for cats and let your creativity shine!

Steps on How to Make Your Own Cat Shadowbox 😺

Essential Supplies:

My crafting tools are essential. Liquid Nails glue ensures the pieces stay securely in place. I use toothpicks for precise glue application and sticky notes to protect the paper from the weights I use—individual calibration weights perfect for holding down the paper without damage. My ergonomic X-acto knife makes precise cuts, and my self-healing Cricut crafting mat ensures clean, accurate cuts.

Step-by-Step Instructions:

The first step is to create your origami cat and heart. Follow these simple and calming tutorials to get started: here and here!

Open the shadowbox and remove the backboard. With the backboard, position the large heart slightly in the top right corner, the small heart just underneath on the left side of the large heart, and place the cat near the bottom left corner, as shown in the nearing and below pictures. I typically guesstimate their placements, but ensuring they are equal in length. 😅

To create the illusion of the cat sitting on a ledge within the shadowbox, position the inner border on top of the backboard as shown in the left picture. Carefully place the cat at the bottom of the inner border, making it appear as if it’s perched on the ledge.

Using a toothpick, apply a small dab of Liquid Nails glue under the hearts. Cover the hearts with a sticky note and place a weight on top to hold it in place while it dries. Repeat this process for the cat: apply glue behind it, cover with sticky notes, and place weights on top. Allow the glue to dry completely. I typically wait 1 hour minimum.

Once the glue is dry, reattach the backboard to the shadowbox frame and secure it.

Ta-da! You’ve crafted your very own cat shadowbox! 🥳🎉 Please be sure to share your creations with me at @orikim_creations on Instagram! I can’t wait to see all the beautiful cat shadowboxes you make. 😺

If you’re a dog lover, check out this blog post on how to create your own dog shadowbox! 🐶

These supplies can be found on my Origami Supplies page.

ASMR Origami Bliss: Filling an Etsy Order, One Crane at a Time

I’m so excited to share my latest YouTube video with you! In this one, I dive deep into the world of ASMR while fulfilling a special Etsy order for origami cranes. In this video, I focused on capturing the soft crinkling of the paper, the gentle taps of my fingers, and the overall calming atmosphere. I wanted to create a truly immersive ASMR experience that would help viewers relax and unwind. 🧘‍♀️

The origami paper I used is Double-Sided Japanese Chiyogami Designed Paper Black 4pattern. Folding each crane was a meditative process. I loved the challenge of creating something beautiful and meaningful. I hope you’ll enjoy watching the video as much as I enjoyed making it.

If you’re interested in making your own origami crane, check out this blog post here!

Enjoy! 😊

Summer Crafts | Flutter Your Wings: Make an Origami Flapping Butterfly!

Get ready to spread your wings (or rather, your butterfly’s wings) with our super fun and easy origami tutorial! 🦋 Watch your creation come to life as you fold, crease, and flap your way to butterfly bliss. It’s like magic but with paper!

Whether you’re a seasoned paper folder or just starting your origami adventure, this project is your ticket to a world of whimsy. Gather your supplies, grab a friend (or a pet, they love paper too!), and let’s turn ordinary paper into extraordinary art.

What You’ll Need:

  • A square piece of origami paper in any color you like.
    • I used Japanese washi origami origami paper. The vibrant colors and beautiful patterns added an extra touch of magic to our butterflies. It’s the perfect paper for unleashing your creativity and creating something truly special.
  • A little patience and a lot of imagination!

Why You’ll Love This Project:

  • Fun and Engaging: A delightful activity for families and friends.
  • Easy to Follow: Simple instructions for beginners.
  • Endless Possibilities: Customize your butterfly with different colors and patterns.
  • Educational: Learn about origami and nature.

Ready to transform into a butterfly expert? Click this link here to start flapping! 😊

Paper Magic: Learn to Make an Infinitely Turning Origami Flexagon

Have you ever wanted to create something that moves on its own, seemingly without end In this blog post, we’ll dive into the world of origami and show you how to make a mesmerizing rotating flexagon! ♾️

A flexagon is a fascinating shape that can be folded in different ways to reveal hidden faces. But a rotating flexagon takes it to a whole new level. Once assembled, it continuously spins around, creating a hypnotic visual effect. 😵

To bring this amazing creation to life, watch this fantastic YouTube tutorial here! The tutorial provides clear instructions and helpful visuals, making it suitable for both origami beginners and experienced folders.

What You’ll Need:

  • Three pieces of origami paper in any color you like. I prefer using tant origami paper or thin cardstock for added sturdiness.
  • A little patience and a lot fun vibes!

Benefits Beyond Fun:

Making an origami flexagon isn’t just about the end result. The process itself offers numerous benefits:

  • Stress Relief: Folding paper can be a calming and meditative activity.
  • Improved Motor Skills: The precise folds involved help develop fine motor skills, especially in children.
  • Brain Boost: Figuring out the folding patterns enhances problem-solving and spatial reasoning abilities.

Grab some paper and let’s get started! If you rather have an already-made flexagon check out this Etsy link here! 😊

How to Make a Stunning Origami Hummingbird: Easy Step-by-Step Guide

Have you ever wanted to capture the vibrant energy and delicate beauty of a hummingbird? Now you can with this easy-to-follow origami tutorial here! In my latest YouTube video, I guide you through the steps to create a stunning paper hummingbird that will add a touch of nature to any space. 🐦

What You’ll Need:

  • A square piece of origami paper in any color you like
    • I used Japanese washi inspired origami paper. The paper’s unique texture and subtle shimmer perfectly mimic the hummingbird’s iridescent feathers. I especially love the gold accents in the paper, which add a touch of magic to the finished piece.
  • A little patience and a lot of imagination!

Whether you’re a seasoned origami enthusiast or a complete beginner, this tutorial is for you. With clear instructions and helpful tips, you’ll be folding your own hummingbird in no time! Happy folding! 😊

Summer Crafts | Beat Boredom with an Origami Puzzle Ball: Fun and Easy Tutorial!

Midsummer is in full swing, and it’s time to unplug and unleash your creativity! Introducing the origami puzzle ball – a captivating craft that’s as addictive as it is impressive. Whether you’re a seasoned paper folder or just starting your origami journey, this project is guaranteed to keep you and your family entertained for hours. 🌟

Why You’ll Love This Origami Puzzle Ball:

  • Easy-to-follow tutorial: My step-by-step guide makes it simple for beginners and experts alike.
  • Endless possibilities: Experiment with different colors, sizes, and paper types to create unique designs.
  • Addictive gameplay: Pass the puzzle ball around and see who can keep it together the longest!
  • Brain booster: Folding origami has been shown to improve focus, problem-solving skills, and fine motor skills.

How to Make Your Own Origami Puzzle Ball:

My new YouTube tutorial breaks down the process into easy-to-follow steps. From choosing the right paper to mastering the folding techniques, I’ve got you covered. Once you’ve created your puzzle ball, the fun really begins! Challenge your friends to a game of hot potato, or simply admire your handiwork. 🥔

What You’ll Need:

  • Six pieces of square origami paper. Look for tant origami paper or thin cardstock for best results.
  • Patience – Don’t get discouraged if your first attempt isn’t flawless.
  • Creativity – Add stickers, glitter, or markers to personalize your puzzle ball. 🎨

Ready to dive into this exciting summer craft? Click this link here to watch the tutorial and start creating your very own origami puzzle ball today! You can also grab a puzzle ball made by me here!

Happy folding! 😊

Mastering Origami Cranes: Origins, Symbolism, and Easy Folding Tutorial!

Origami, the ancient art of paper folding, has captivated hearts and minds for centuries. Among its most iconic creations is the delicate and symbolic origami crane. In this post, we delve into the origins and meanings behind these beautiful paper birds. 🕊️

Origins: A Tale of Tradition and Wonder Origami has its origins rooted in ancient Japan, where paper was treasured and used in ceremonial rituals. The elegant crane, known as “orizuru,” holds a special place in Japanese culture. Legend has it that folding 1,000 cranes grants you a wish or eternal good luck—a tradition known as “senbazuru.” This tradition gained worldwide fame through the touching story of Sadako Sasaki, a young girl who folded cranes while battling illness, believing in the power of hope and healing.

Meanings: More Than Just Paper Beyond Japan, origami cranes symbolize peace, hope, and resilience. Their graceful form and the calming process of folding reflect themes of patience, determination, and transformation. Today, these cranes are cherished gifts, offered at weddings for good fortune, shared with the sick for healing wishes, and displayed as art that speaks volumes without a word. 🧘‍♀️

Let’s Fold Together: Your Origami Crane Adventure

Ready to embark on your own origami crane adventure? Watch our chill YouTube tutorial here where I use Double-Sided Japanese Chiyogami Designed Paper to guide you step-by-step through the folding process. You can get this beautiful paper here!

If you prefer already folded origami cranes, check out my Etsy listing for cranes made with this stunning paper.

Whether you’re a newbie or a seasoned folder, crafting an origami crane is a creative voyage that promises relaxation and a sense of accomplishment.

Join the Crane Craze: Spread Joy and Creativity As you fold your first—or thousandth—crane, feel the magic of centuries-old traditions and the joy of creation. Let each crane be a reminder of peace, hope, and the simple pleasure of making something beautiful out of a square piece of paper. 😊