Adorable Mama and Baby Bee Crochet Plushie Now Available – Cute Handmade Gift

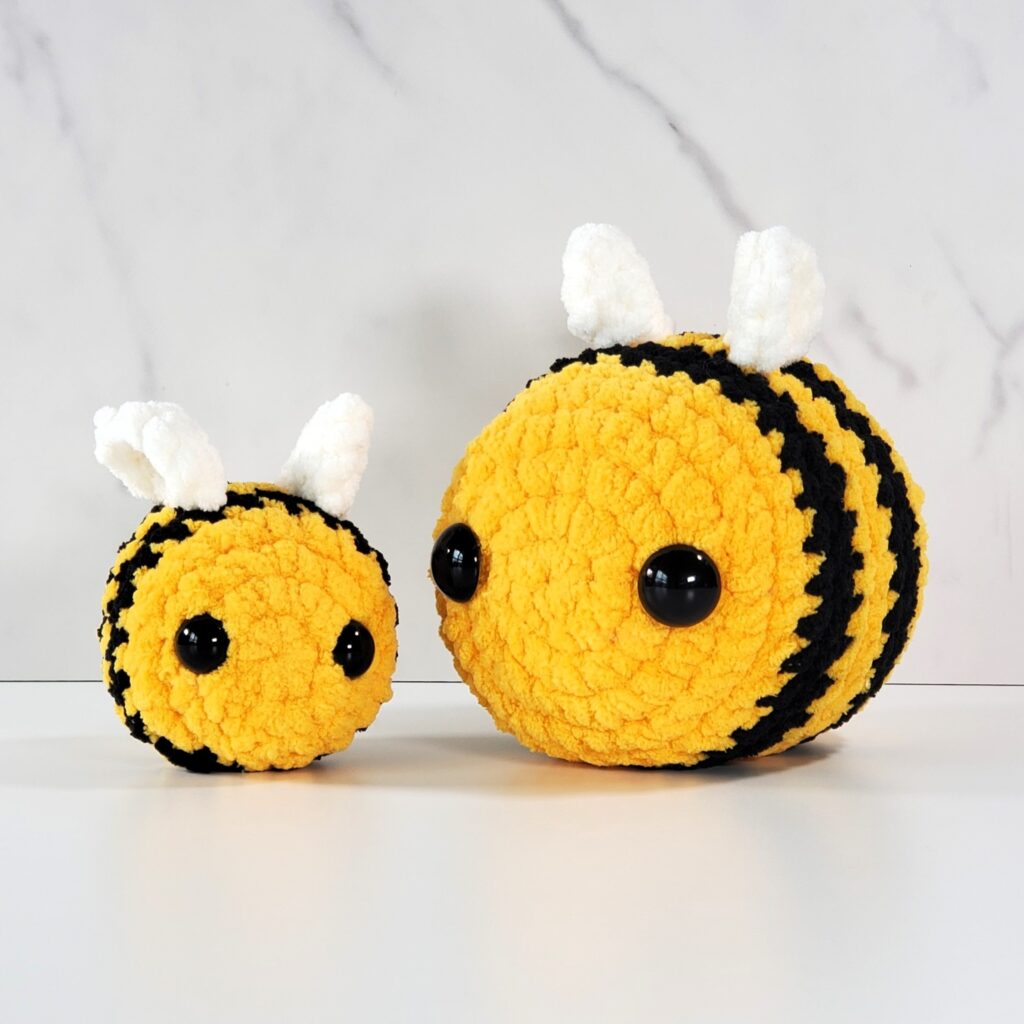
Bee duo! Mama and Baby Bee Crochet Plushies 😍

Buzzzzzing into your heart this cozy season, I’m excited to introduce my latest creations—Mama and Baby Bee crochet plushies! 🐝 These two are sweet as honey, soft as clouds, and ready to be your new best buds. Whether you’re looking for a cute handmade addition to your space or the perfect gift to bring some bee-autiful joy, Mama and Baby Bee are ready to buzz right in!

Meet Mama & Baby Bee 🐝👶

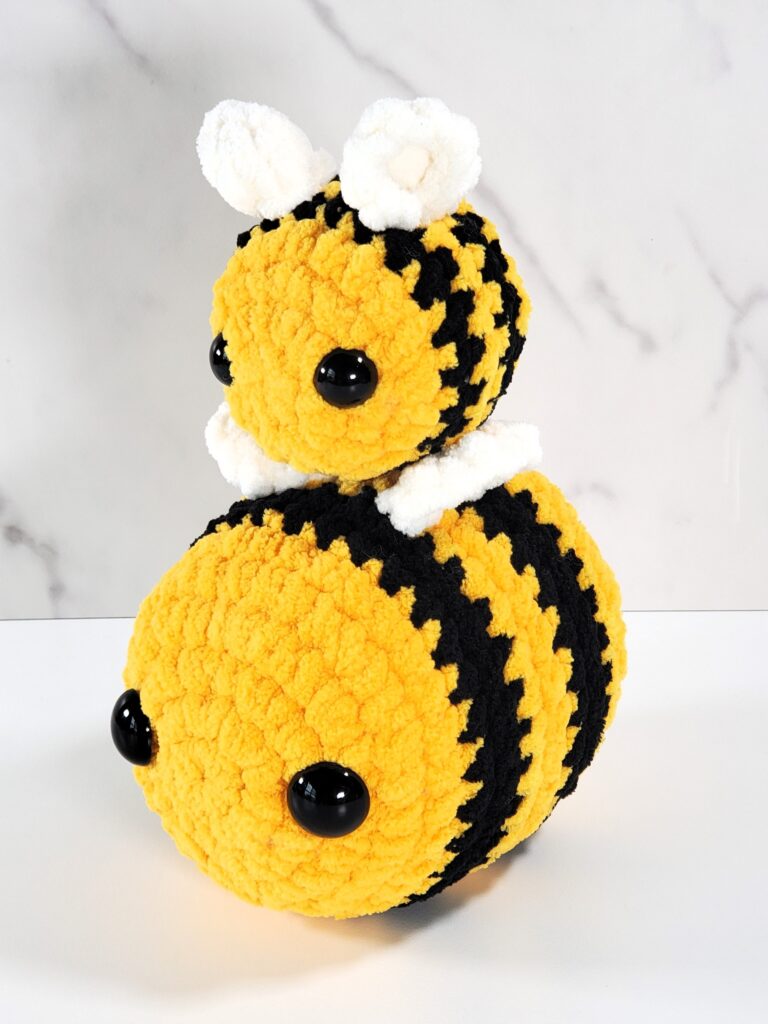
These adorable bees are crocheted with Bernat Blanket Super Bulky yarn (#6) using an 8mm hook, giving them a soft, chunky feel that’s perfect for snuggling. Their bright, cheerful bodies are crocheted with Sunsoaked, while their stripes are made with Coal Black—and let’s not forget their little wings, made with Vintage White for an extra cute touch!

  • Mama Bee is crafted using the free pattern from hannahhcrochets, and she has big, friendly 20mm safety eyes that give her a sweet, protective look.
  • Baby Bee is created from the free pattern by crochet._.cottage, featuring adorable 16mm safety eyes for that curious, playful vibe.

The Perfect Pair for Cozy Snuggles

These buzzing buddies are as soft and squishy as can be, perfect for keeping you company as the weather cools down. Whether you’re a fan of cute plushies or just need a cuddly pal, Mama and Baby Bee are sure to bring some handmade charm to your day.
Materials

Here’s everything I used to create these sweet bees:

Want to create your own buzzing duo? Both patterns are free—hannahhcrochets has the pattern for Mama Bee, and crochet._.cottage provides the pattern for Baby Bee. Don’t forget to check out my Crochet Supplies page for everything you’ll need to get started!

These sweet Mama and Baby Bee plushies are now available in my Etsy shop here, ready to buzz their way into your home! Whether you’re keeping them for yourself or gifting them, these bees are guaranteed to bring lots of smiles and fuzzy feelings. 💛
Adorable Chubby Whale Crochet Plushie Now Available!

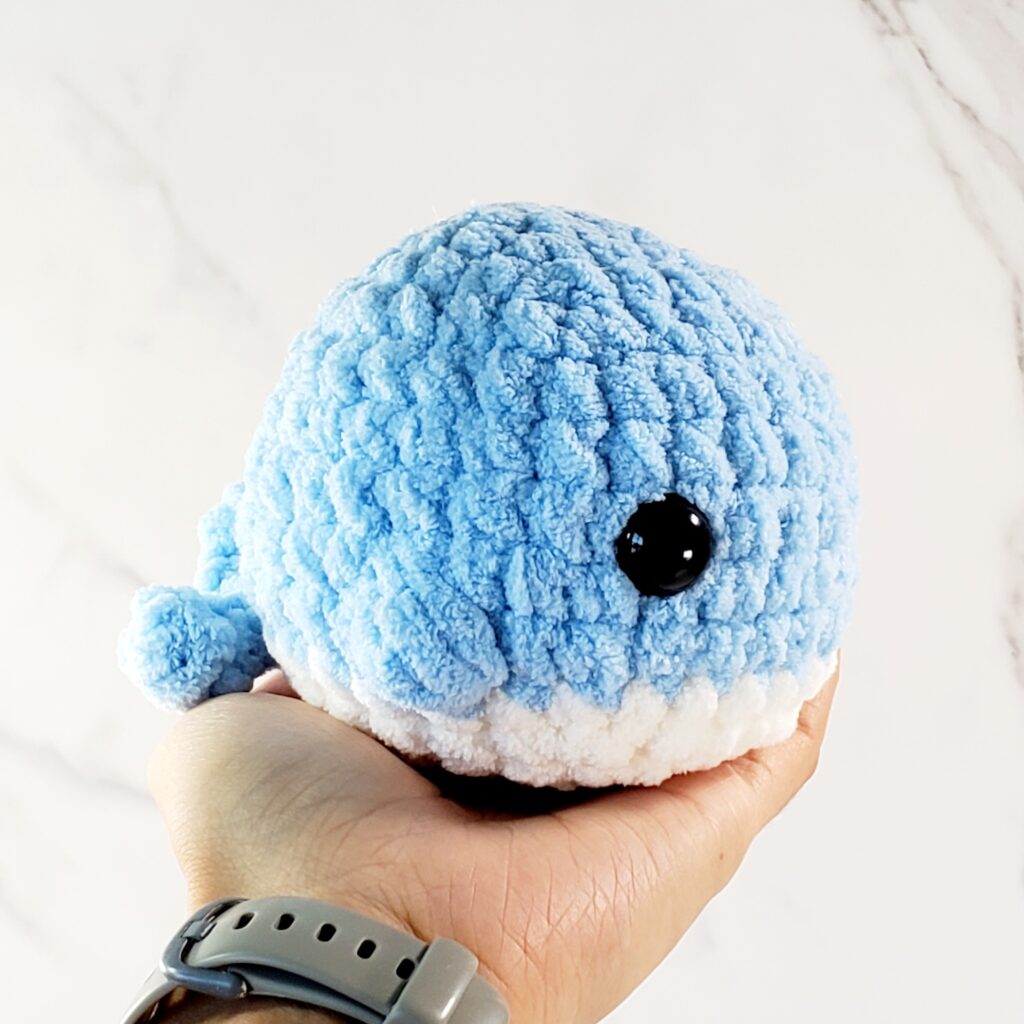
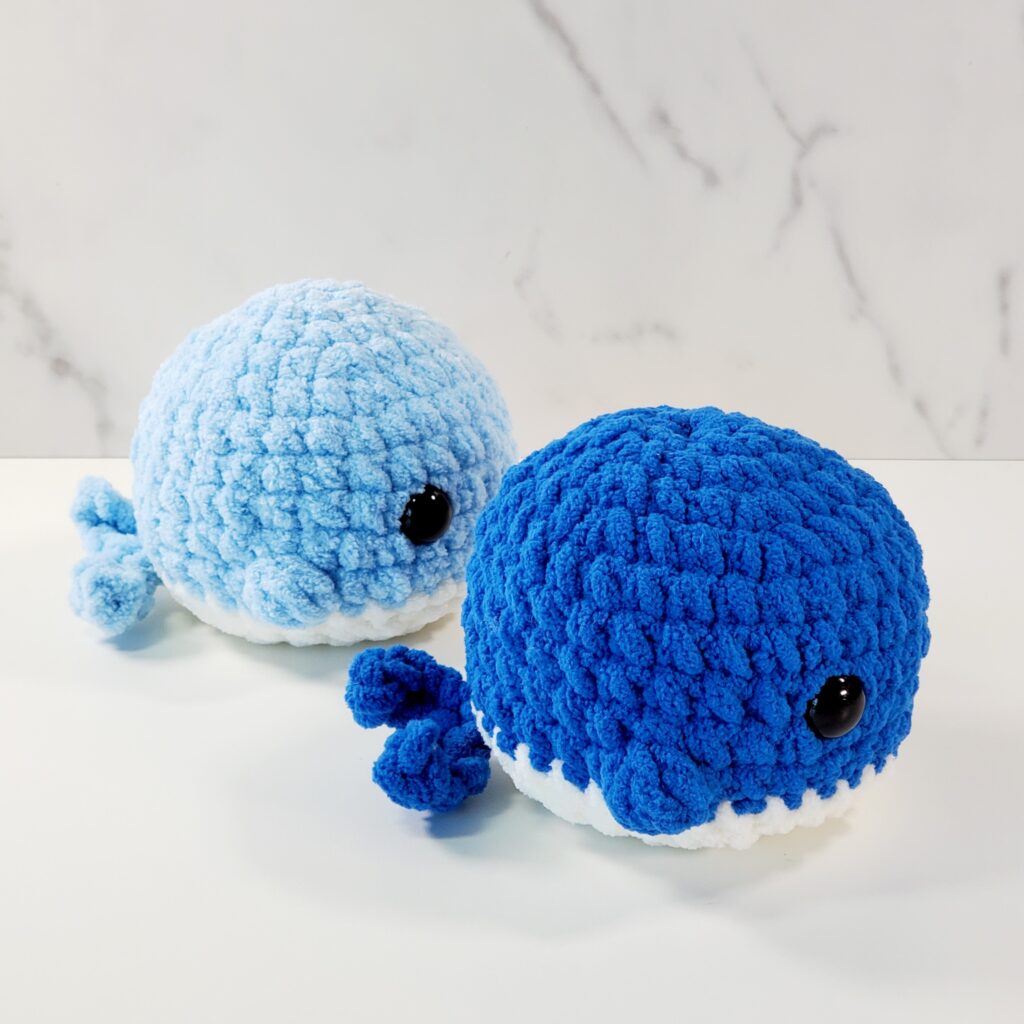
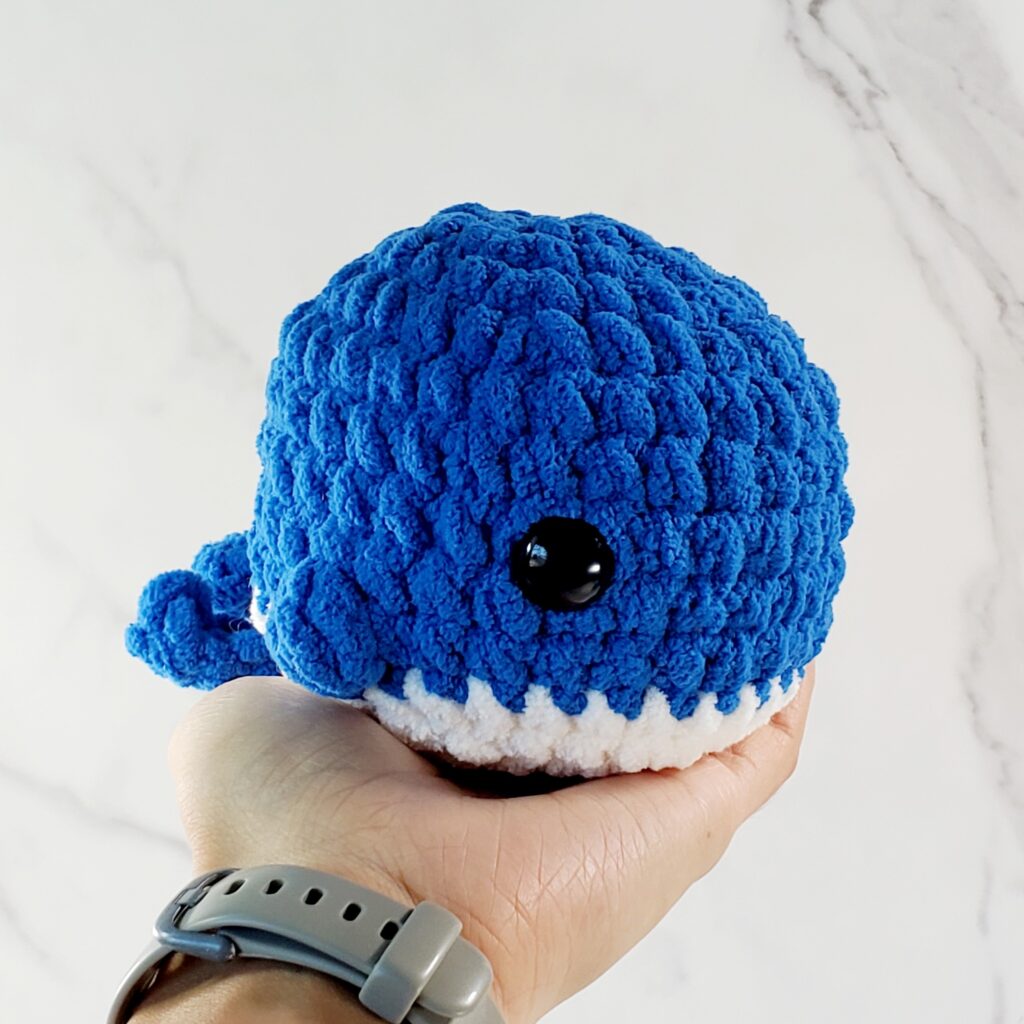
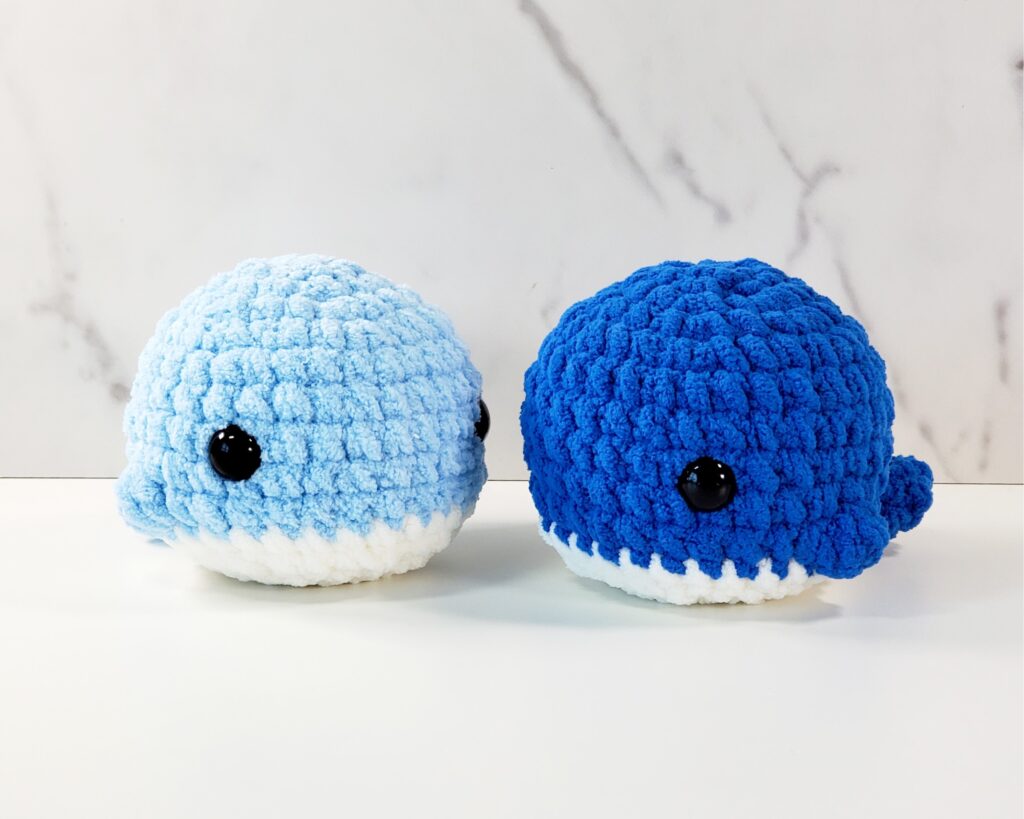
Squishy Chubby Whale Crochet Plushie! Available in two colors 😍

Dive into cuteness with the newest addition to the crochet world—a chubby whale plushie! 🐳 This little whale is as soft and snuggly as it looks, perfect for anyone who loves ocean creatures or simply can’t resist an adorable handmade creation.

A Cozy Whale You Can’t Resist

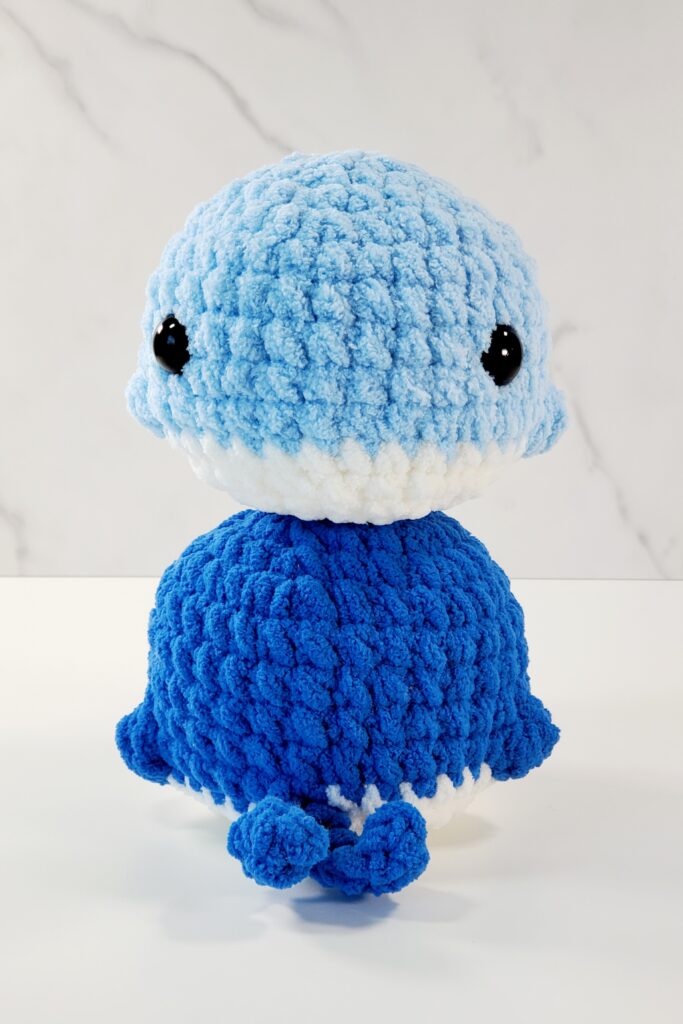
This chubby whale is made from super soft, plush Bernat Blanket yarn, which gives it a delightful, squishable feel that’s just right for cuddling. Whether you’re looking to add some charm to your home decor or a cute companion for your desk, this whale is here to make a splash! The simple design includes a rounded body, tiny fins, and a slightly upturned tail, all crocheted with love to create the ultimate cutie.

The little whale’s wide eyes (crafted with 16mm safety eyes) and sweet embroidered smile give it an extra dose of cuteness, making it impossible not to smile when you see it. Plus, its chunky, soft body and whimsical expression make this plushie perfect for both kids and adults who need a bit of comfort or joy.

Why You’ll Love This Little Whale

Whether you’re an ocean enthusiast, someone who loves quirky handmade gifts, or just a plushie collector, this chubby whale will bring a sense of calm and cheer to your space. Its compact size makes it a versatile addition to any shelf, bedside table, or even your work desk for a little mid-day stress relief.

Get Crafty and Make Your Own!

Want to crochet your very own whale? Great news! The pattern is completely free and comes from the talented designer xiaostitches. This project is beginner-friendly, making it a great introduction to plushie crochet for newbies, while still being enjoyable for experienced crocheters. You can find the free pattern here!

Grab your 8mm crochet hook, choose your favorite yarn color, and get ready to create this adorable whale! The materials needed for this project, including the Bernat Blanket yarn and safety eyes, can be found on my Crochet Supplies page.

What You’ll Need:

The pattern is easy to follow, so whether you’re new to crochet or a seasoned pro, you’ll love working up this whale. If you’re not into crafting but still want to bring a chubby whale into your life, check out my Etsy shop here where the plushie is available for purchase!

Add a Splash of Joy to Your Day! 🌊

Whether as a cute gift or a treat for yourself, this chubby whale crochet plushie is sure to bring a smile to anyone’s face. Soft, squishy, and utterly adorable, it’s the perfect way to celebrate your love of the ocean—or just add a little bit of handmade joy to your world.

Happy crocheting, and may your days be as peaceful as the ocean! 💙

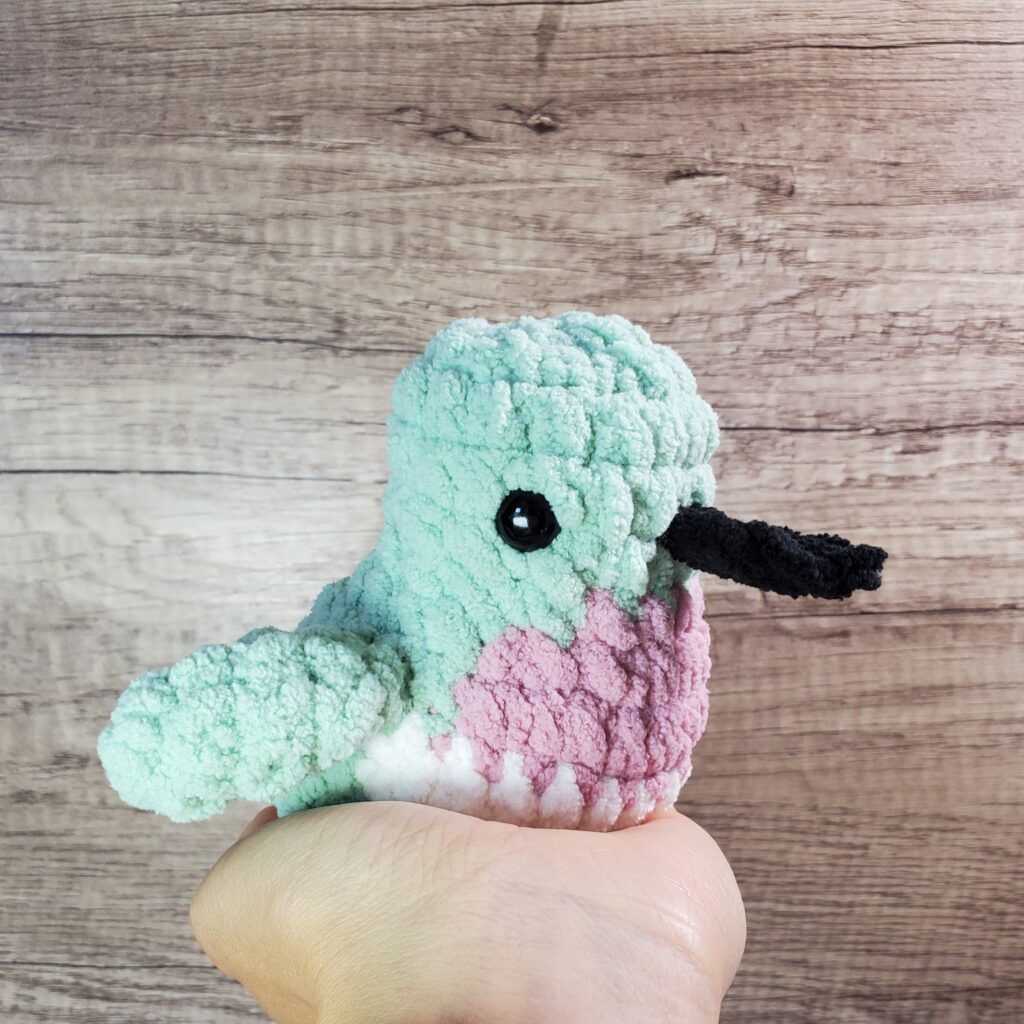
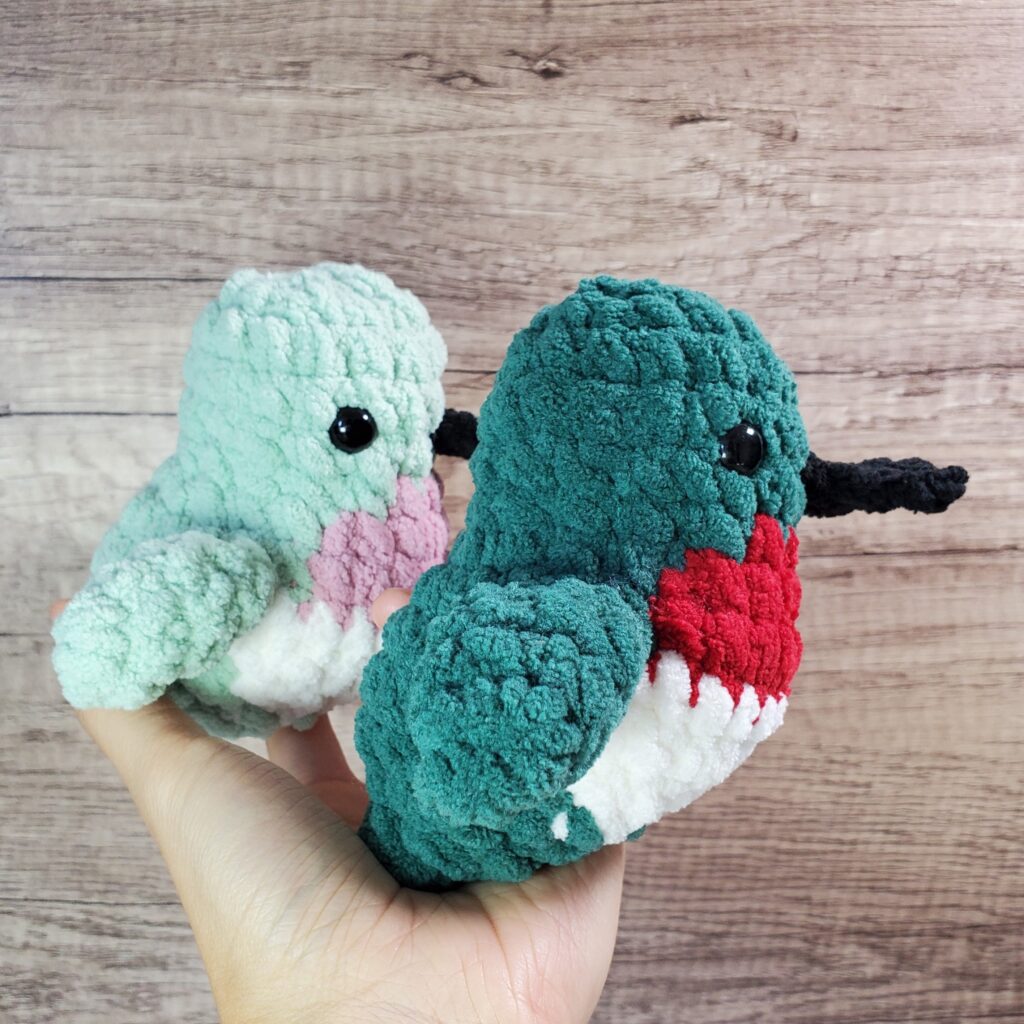
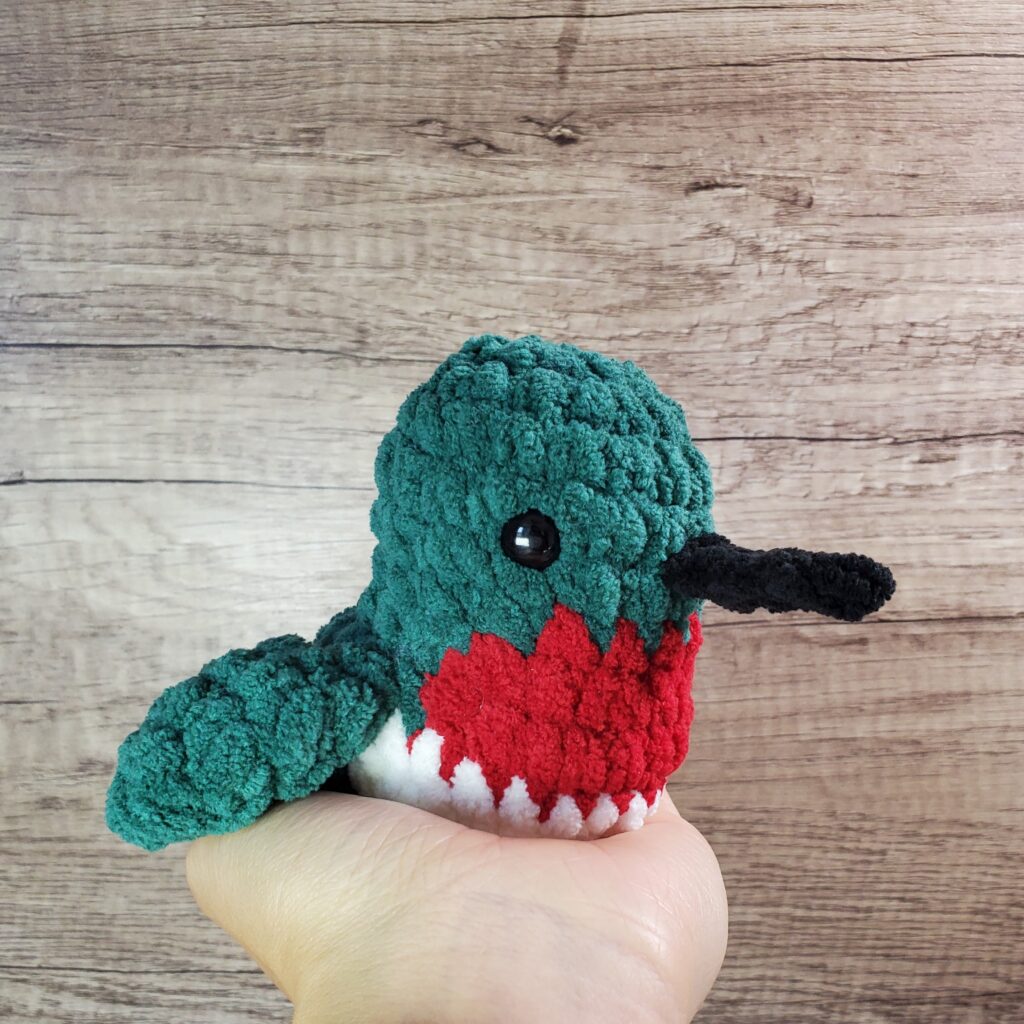
Introducing the Adorable Chubby Ruby-Throated Hummingbird Crochet Plushie!

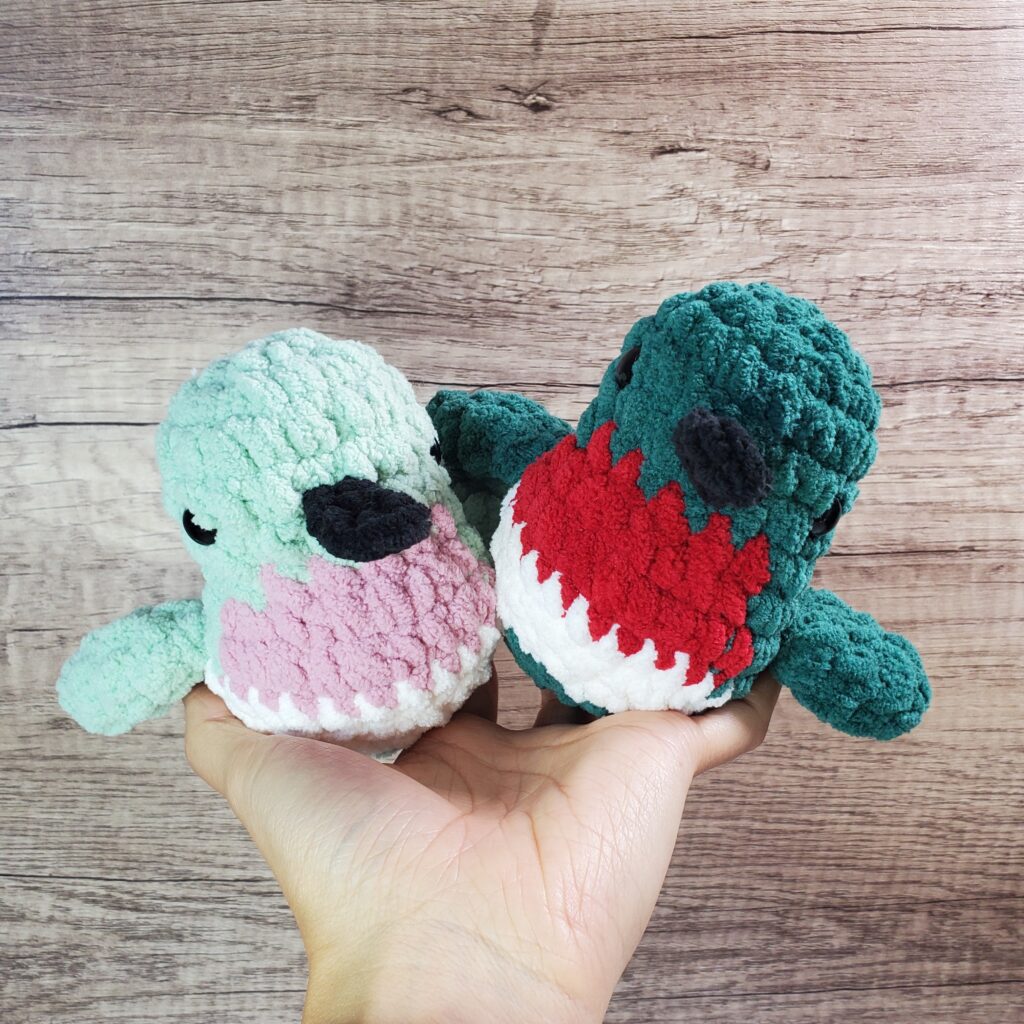
Cute chubby ruby-throated hummingbirds! Available in two colors 😍

Meet the Chubby Ruby-Throated Hummingbird Crochet Plushie!

I’m so excited to introduce this little cutie—the chubby ruby-throated hummingbird crochet plushie! 🐦 Inspired by the vibrant colors and delicate charm of the real ruby-throated hummingbird, this plushie is designed to be as adorable as it is huggable.

Soft, Squishy, and Adorable

This hummingbird is made using soft and cozy Bernat Blanket Super Bulky yarn (#6), giving it a plush and squishable feel that’s perfect for cuddling or adding some handmade charm to your space. With its rounded body and tiny wings, this little birdie is sure to bring joy whether perched on a shelf, sitting on your desk, or nestled in your hands.

The standout feature of this plushie is the bright ruby-red throat, a nod to the hummingbird’s famous coloring. Its big, wide eyes (crafted with 12mm safety eyes) add an extra layer of cuteness, while the beak is sewn on using Bernat Blanket Super Bulky yarn (#6) in Black. It’s the perfect combination of cozy and cute, making this hummingbird a delightful companion! 😍

Perfect for Hummingbird Lovers and Collectors

Whether you’re a bird enthusiast, looking for a unique handmade gift, or simply want to add a dash of adorable decor to your home, this chubby hummingbird will steal your heart. Its compact size also makes it a great desk companion or a comforting little stress-relief buddy. With its soft and round shape, this hummingbird is made for sitting perfectly in your hand!

Create Your Own Hummingbird!

Feeling crafty? You can create your very own chubby ruby-throated hummingbird with the pattern from CrochetGrottoByEmma. It’s beginner-friendly and super fun to make! You can purchase the pattern here!

Using an 8mm hook and your favorite yarn colors, this project is enjoyable for crocheters of all levels. Plus, you can find all the materials needed, including Bernat Blanket Super Bulky yarn and safety eyes, right on my Crochet Supplies page.

Materials

This plushie is now available in my Etsy shop! Whether it’s a gift or a little treat for yourself, this sweet chubby ruby-throated hummingbird will definitely bring smiles and comfort. Check it out here!

Happy crafting! 💕

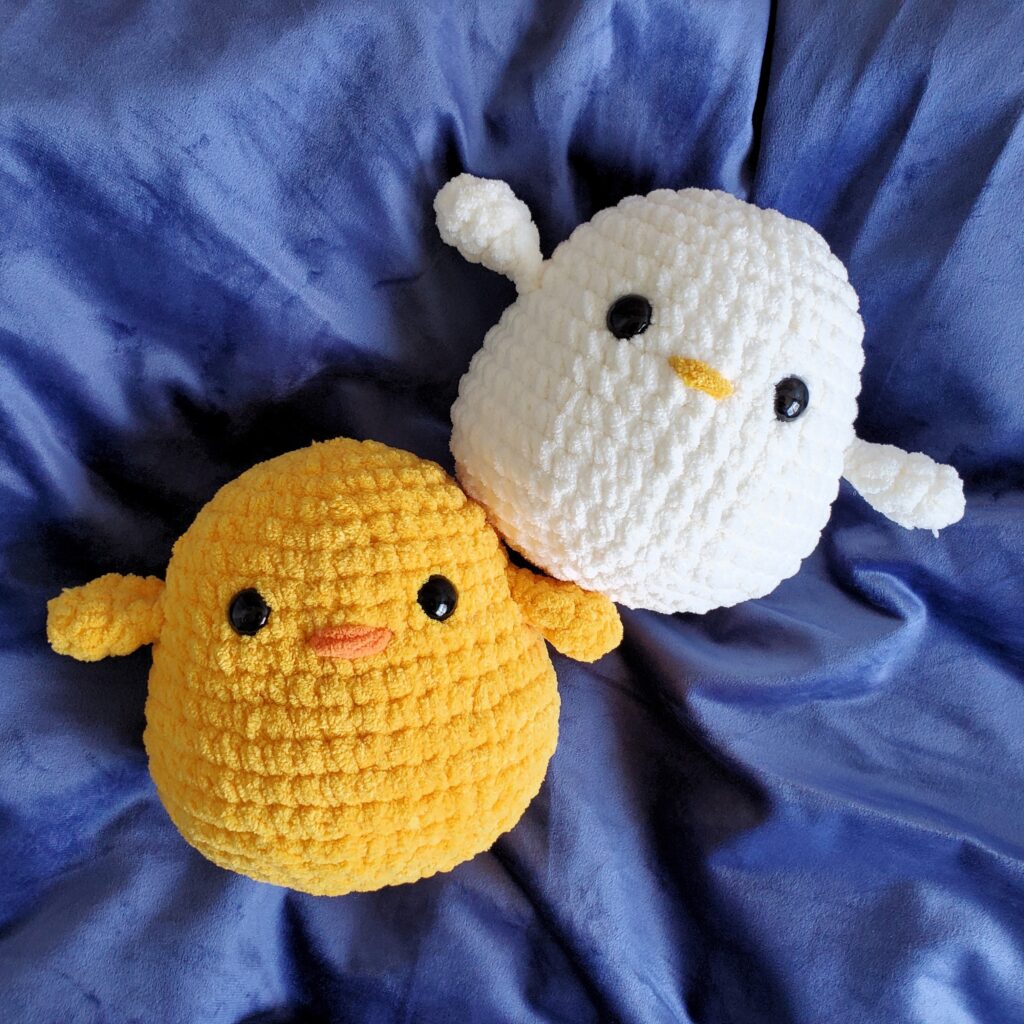
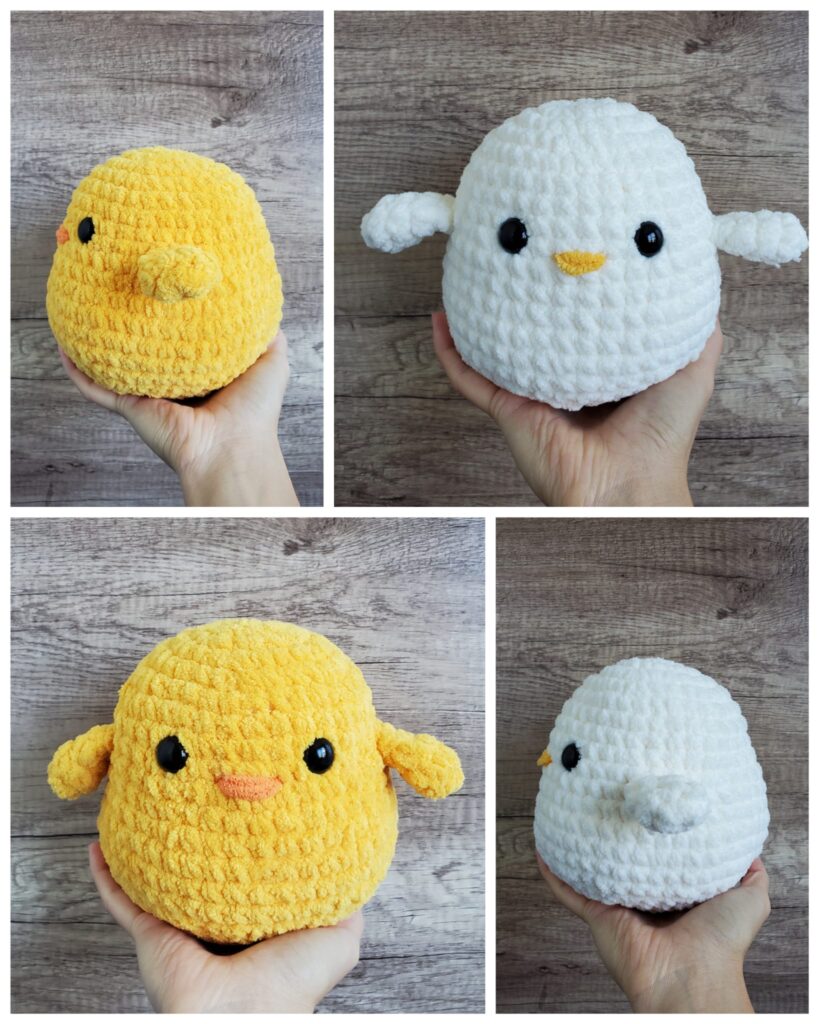
Adorable Chonky Chick Crochet Plushie: Now Available!

Chonky Chick Crochet Plushie! Available in two colors 😍

How better to embrace cuteness than with a handmade creation that’s fluffy, chubby, and irresistibly squishy? I’m beyond excited to introduce my latest crochet friend: the Cute Chonky Chick plushie! 🐥This adorable little chick is the perfect blend of cozy and cute, and I can’t wait to share it with you all.

Inspired by my love for crafting fun and heartwarming plushies, the Chonky Chick is designed to bring joy and a little extra softness to your life. Whether you’re a fan of cute animals or just need a squishy friend to brighten your day, this chick is made to make you smile! 😊

Two Adorable Color Options:

These chonky chicks come in two equally adorable colors:

  • Vintage White body with Sunsoaked yellow beak
  • Sunsoaked yellow body with Carrot Orange beak

Both versions keep things simple, letting their fluffy, chonky bodies steal the spotlight. Whether you prefer a sunny yellow or a classic white chick, these plushies are perfect for hugging, squishing, or even tossing around for a little fun!

Details & Materials

Each fluffy chick is crocheted with Bernat Blanket Super Bulky yarn (#6), giving them their soft, cuddly texture. The beaks are crafted in either Carrot Orange or Sunsoaked, adding a bright, cheerful touch. The 16mm safety eyes give them their sweet, innocent expressions, while their small, plump bodies make them the perfect size to throw around for some lighthearted fun! 💛
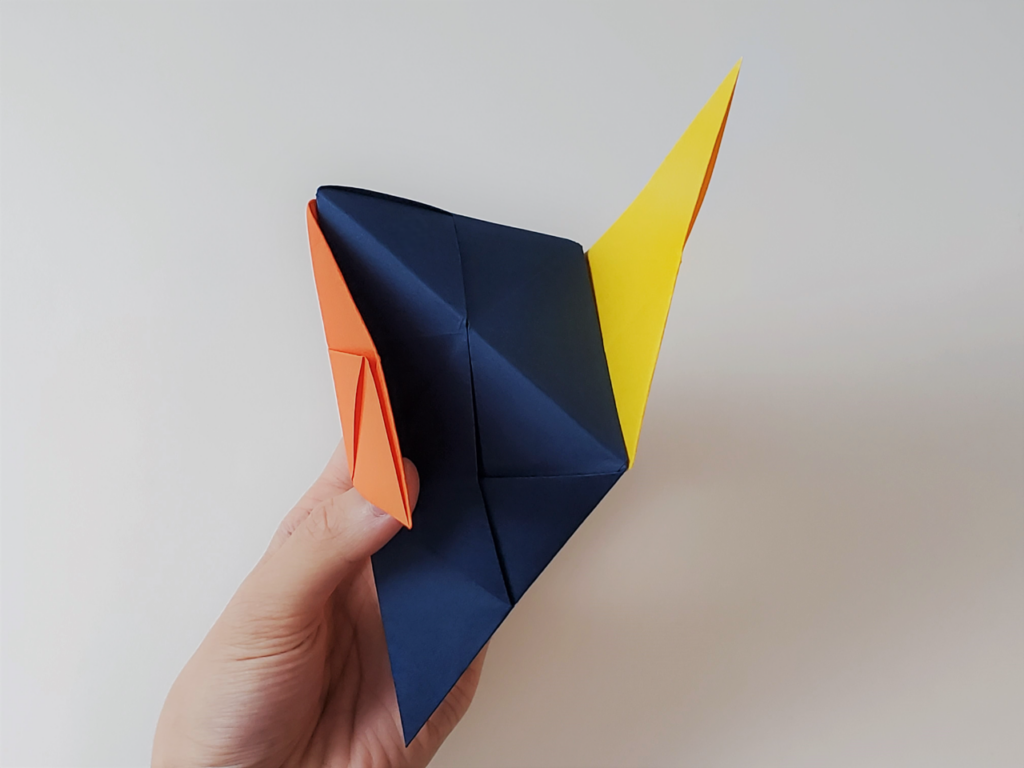
The pattern for these adorable chicks comes from chibigurumis_design, and the best part? It’s completely free! So, if you’re feeling inspired to make your own little chonky chick, you can start crafting right away.

Perfect Gift or Cute Companion

Whether you want to surprise a loved one with a handmade gift or you’re adding to your own collection of squishy friends, the Chonky Chick is the perfect companion. Its playful design makes it ideal for fun games, while its soft feel makes it an irresistible cuddle buddy. 🧡

You can find these plushies in my Etsy shop here, where they’ve already been a hit with fans of all things cute and cuddly. Want to make your own? Check out my Crochet Supplies page for all the materials you’ll need to get started.

I can’t wait for you to meet your new chonky chick friends! 😊 Head to the shop today and add a little extra warmth and charm to your home.

Hop to It! A Fun and Easy Origami Jumping Frog Tutorial

Are you ready for a leap into the world of origami? I’m excited to introduce our latest YouTube tutorial on how to make an origami jumping frog! This project is not just a paper-folding adventure—it’s interactive, easy to make, and perfect for all ages. Whether you’re looking for a fun activity with the kids or just want to relax and create something playful, this jumping frog will bring joy to everyone. 🐸

Why You’ll Love This Tutorial 😍

  • A Classic: The origami jumping frog is a timeless project that’s been enjoyed for generations.
  • Fun and Interactive: The best part about this origami frog? It jumps! Fold it up, press its back, and watch it hop. Challenge your friends to a jumping contest or create a whole family of frogs.
  • Easy to Make: We’ve designed this tutorial to be beginner-friendly, so even if you’re new to origami, you’ll find it easy to follow along.
  • Great for All Ages: Whether you’re a kid or just a kid at heart, this project is a fantastic way to spend some creative time.

What You’ll Need

  • A square piece of origami tant paper (or any square paper you have on hand)
    • If you don’t have tant paper on hand, no worries—you can grab a pack here! The paper’s vibrant colors and sturdy texture make it ideal for this project.
  • A flat surface to fold on
  • A little bit of patience and a whole lot of enthusiasm!

Get Started Now

Ready to start folding? Watch the tutorial here, follow along, and you’ll have a jumping frog in no time! 😊

Summer Crafts | Flutter Your Wings: Make an Origami Flapping Butterfly!

Get ready to spread your wings (or rather, your butterfly’s wings) with our super fun and easy origami tutorial! 🦋 Watch your creation come to life as you fold, crease, and flap your way to butterfly bliss. It’s like magic but with paper!

Whether you’re a seasoned paper folder or just starting your origami adventure, this project is your ticket to a world of whimsy. Gather your supplies, grab a friend (or a pet, they love paper too!), and let’s turn ordinary paper into extraordinary art.

What You’ll Need:

  • A square piece of origami paper in any color you like.
    • I used Japanese washi origami origami paper. The vibrant colors and beautiful patterns added an extra touch of magic to our butterflies. It’s the perfect paper for unleashing your creativity and creating something truly special.
  • A little patience and a lot of imagination!

Why You’ll Love This Project:

  • Fun and Engaging: A delightful activity for families and friends.
  • Easy to Follow: Simple instructions for beginners.
  • Endless Possibilities: Customize your butterfly with different colors and patterns.
  • Educational: Learn about origami and nature.

Ready to transform into a butterfly expert? Click this link here to start flapping! 😊

Paper Magic: Learn to Make an Infinitely Turning Origami Flexagon

Have you ever wanted to create something that moves on its own, seemingly without end In this blog post, we’ll dive into the world of origami and show you how to make a mesmerizing rotating flexagon! ♾️

A flexagon is a fascinating shape that can be folded in different ways to reveal hidden faces. But a rotating flexagon takes it to a whole new level. Once assembled, it continuously spins around, creating a hypnotic visual effect. 😵

To bring this amazing creation to life, watch this fantastic YouTube tutorial here! The tutorial provides clear instructions and helpful visuals, making it suitable for both origami beginners and experienced folders.

What You’ll Need:

  • Three pieces of origami paper in any color you like. I prefer using tant origami paper or thin cardstock for added sturdiness.
  • A little patience and a lot fun vibes!

Benefits Beyond Fun:

Making an origami flexagon isn’t just about the end result. The process itself offers numerous benefits:

  • Stress Relief: Folding paper can be a calming and meditative activity.
  • Improved Motor Skills: The precise folds involved help develop fine motor skills, especially in children.
  • Brain Boost: Figuring out the folding patterns enhances problem-solving and spatial reasoning abilities.

Grab some paper and let’s get started! If you rather have an already-made flexagon check out this Etsy link here! 😊

Summer Crafts | Beat Boredom with an Origami Puzzle Ball: Fun and Easy Tutorial!

Midsummer is in full swing, and it’s time to unplug and unleash your creativity! Introducing the origami puzzle ball – a captivating craft that’s as addictive as it is impressive. Whether you’re a seasoned paper folder or just starting your origami journey, this project is guaranteed to keep you and your family entertained for hours. 🌟

Why You’ll Love This Origami Puzzle Ball:

  • Easy-to-follow tutorial: My step-by-step guide makes it simple for beginners and experts alike.
  • Endless possibilities: Experiment with different colors, sizes, and paper types to create unique designs.
  • Addictive gameplay: Pass the puzzle ball around and see who can keep it together the longest!
  • Brain booster: Folding origami has been shown to improve focus, problem-solving skills, and fine motor skills.

How to Make Your Own Origami Puzzle Ball:

My new YouTube tutorial breaks down the process into easy-to-follow steps. From choosing the right paper to mastering the folding techniques, I’ve got you covered. Once you’ve created your puzzle ball, the fun really begins! Challenge your friends to a game of hot potato, or simply admire your handiwork. 🥔

What You’ll Need:

  • Six pieces of square origami paper. Look for tant origami paper or thin cardstock for best results.
  • Patience – Don’t get discouraged if your first attempt isn’t flawless.
  • Creativity – Add stickers, glitter, or markers to personalize your puzzle ball. 🎨

Ready to dive into this exciting summer craft? Click this link here to watch the tutorial and start creating your very own origami puzzle ball today! You can also grab a puzzle ball made by me here!

Happy folding! 😊

Summer Crafts | Learn How to Make an Origami Flapping Crane!

Looking for a fun summer project that everyone can enjoy? Origami flapping cranes are a perfect choice! Whether you’re crafting with kids or seeking a relaxing solo activity, these cranes bring joy with every fold. 🕊️

Origami is more than just paper folding—it’s creating something interactive and delightful. Flapping cranes add extra fun with wings that move when you gently pull their tails.

What You’ll Need:

  • You can use any square sheet of paper you have on hand, but for vibrant colors and sturdy folds like those seen in my tutorial, consider using Double-Sided Japanese Chiyogami Designed Paper. It’s available here.
  • Easy Tutorial: Follow along with my step-by-step YouTube guide here to craft your very own flapping crane.

Ready-Made Option

If you’re looking for immediate results, explore my selection of ready-made flapping cranes here. These cranes are perfect for instant decoration or thoughtful gifts. 🎁

Ready to get started? Watch the tutorial here and let your creativity take flight! 🛩️

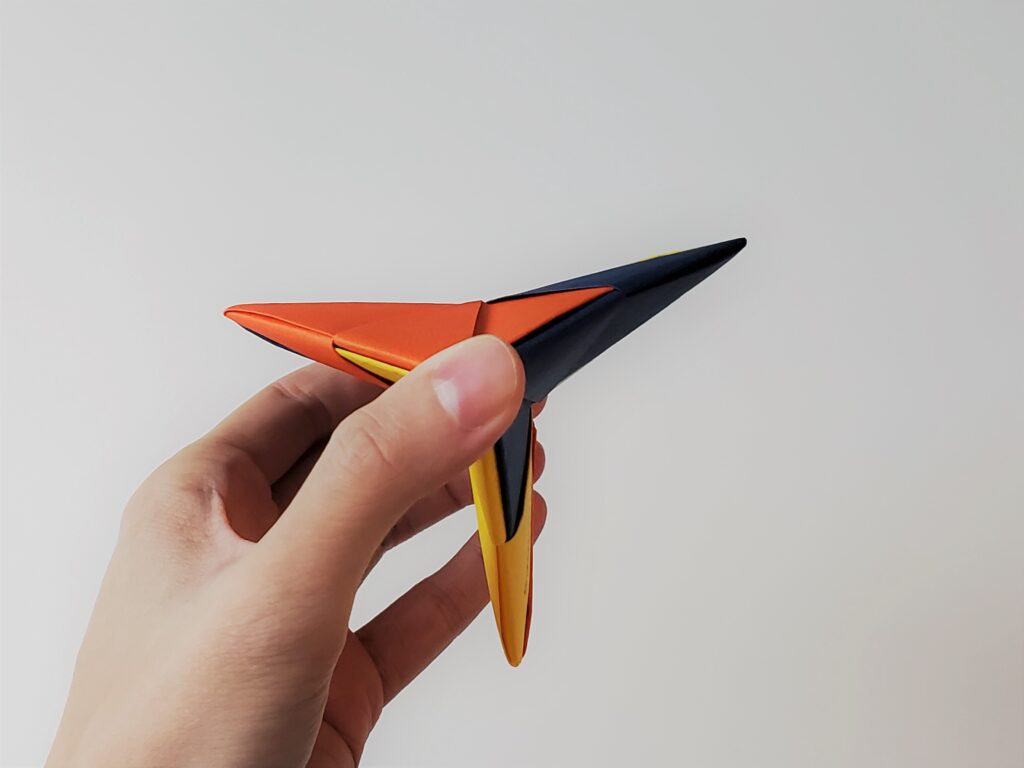
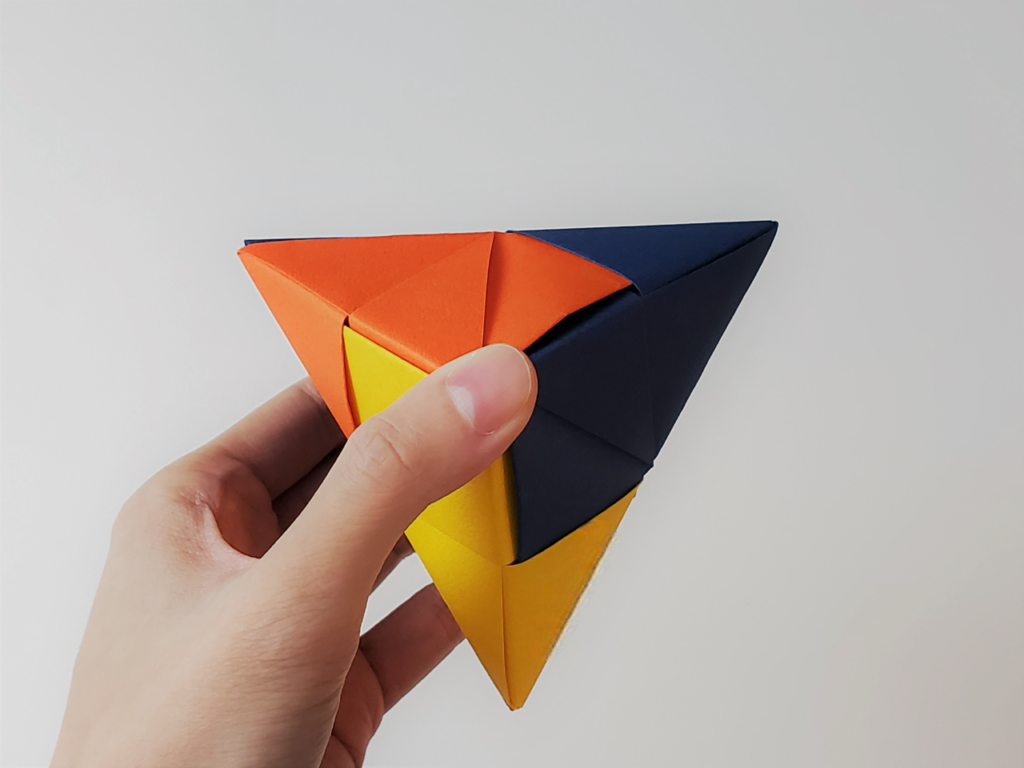
Summer Crafts | Learn How to Make a Modular Origami Pop-It Fidget Spinner Toy!

Get ready for some hands-on fun! Check out our latest YouTube tutorial here and dive into the excitement of creating your very own origami pop-it fidget spinner!

What makes this spinner special? It’s made from three separate pieces of origami paper, creating an interactive toy that lets you pop and flick away to your heart’s content. Not only is it a super fun craft project ✂️, but it’s also a stress reliever for all ages—perfect for kids, teens, and adults alike!

💼 Fun Fact: I fulfilled a special request from an IT Cloud consulting and services firm for their logo and colors to be incorporated into this fidget spinner for a tradeshow. They absolutely loved it! Crafting kits for their guests to take home and create their own spinners was an exciting experience.

🎆 Celebrate July 4th with a bang! With Independence Day just around the corner, this DIY project is the ultimate way to celebrate. Imagine sitting outside, enjoying the summer sun, and making these vibrant spinners. Whether you’re at a picnic, a family barbecue, or just hanging out in the backyard, this craft is perfect for adding a touch of fun and creativity to your festivities. Use red, white, and blue paper for a patriotic touch, or mix it up with your favorite colors! 🌟 This is one of those easy 4th of July crafts for kids and everyone will enjoy!

🎨 Feeling adventurous? Scroll down for the written step-by-step instructions and get crafting!

🛍️ Not into DIY? No problem! Check out this Etsy listing for a ready-made option.

📝 Want to use the same paper I did? Link to the origami paper used here!

What you’ll need:

  • 3 sheets of 6 in x 6 in origami paper (in this case, I used orange, yellow, and blue)

Folding the Units Instructions:

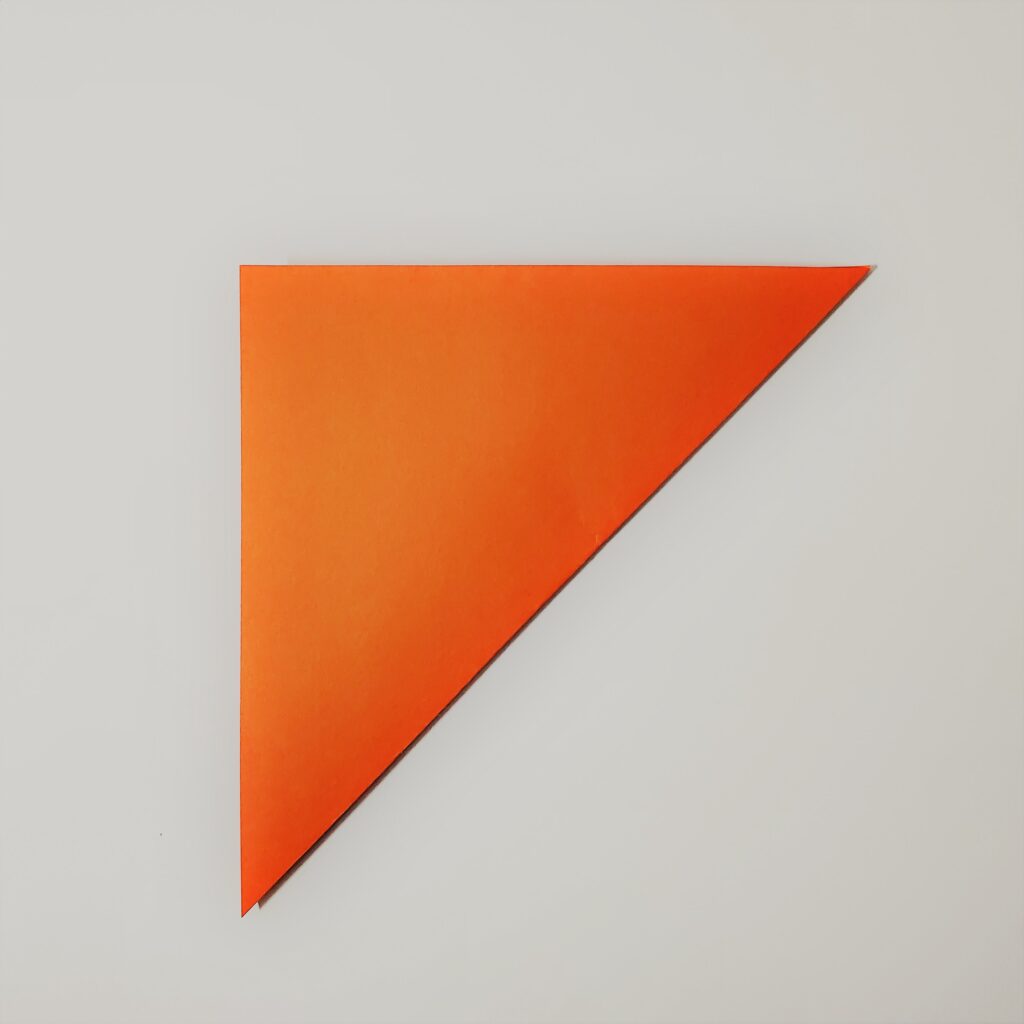
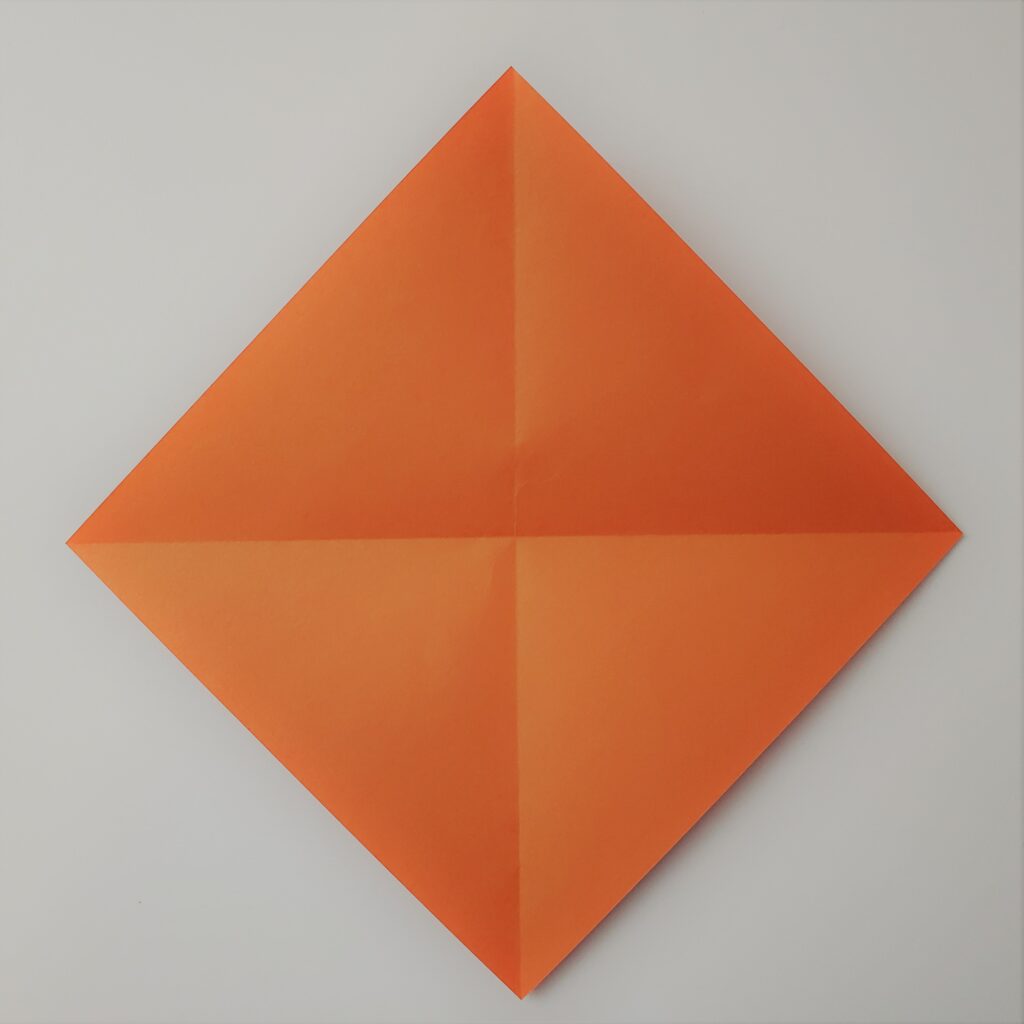
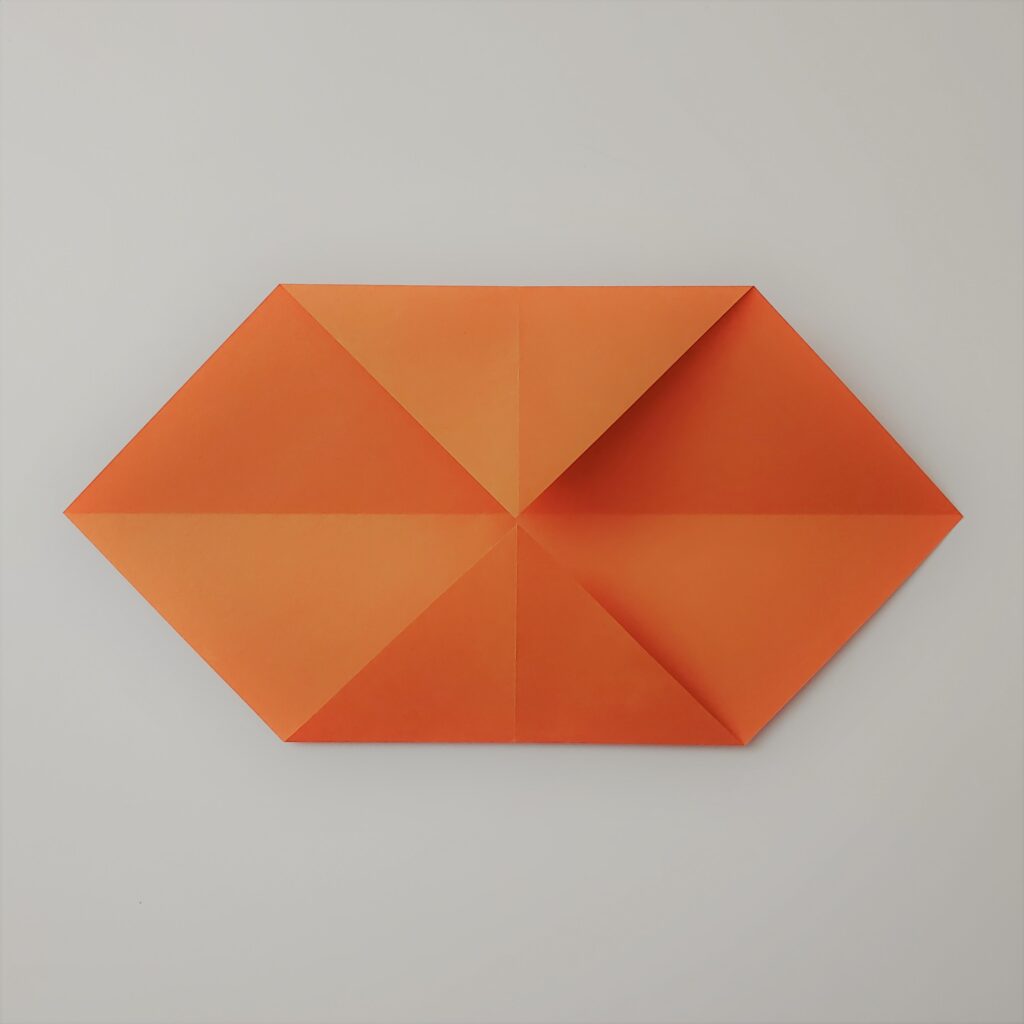
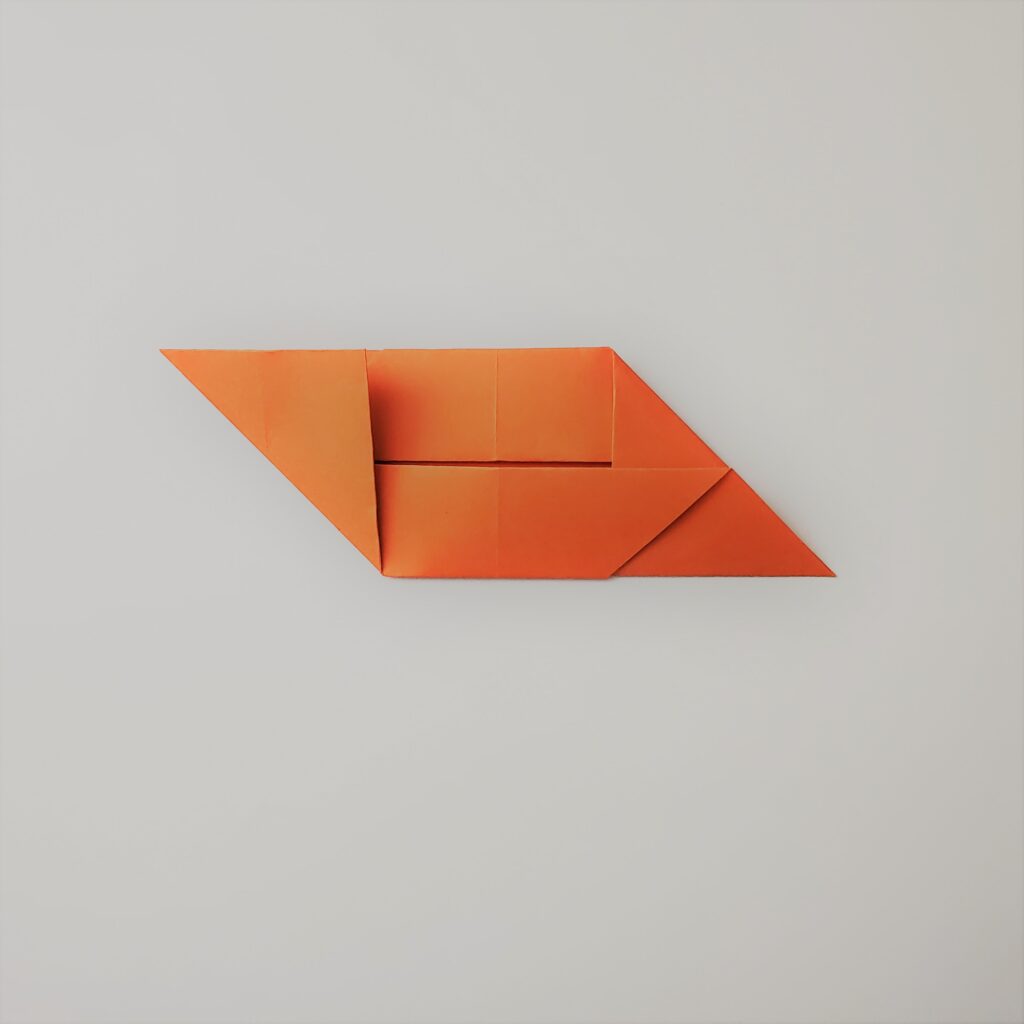
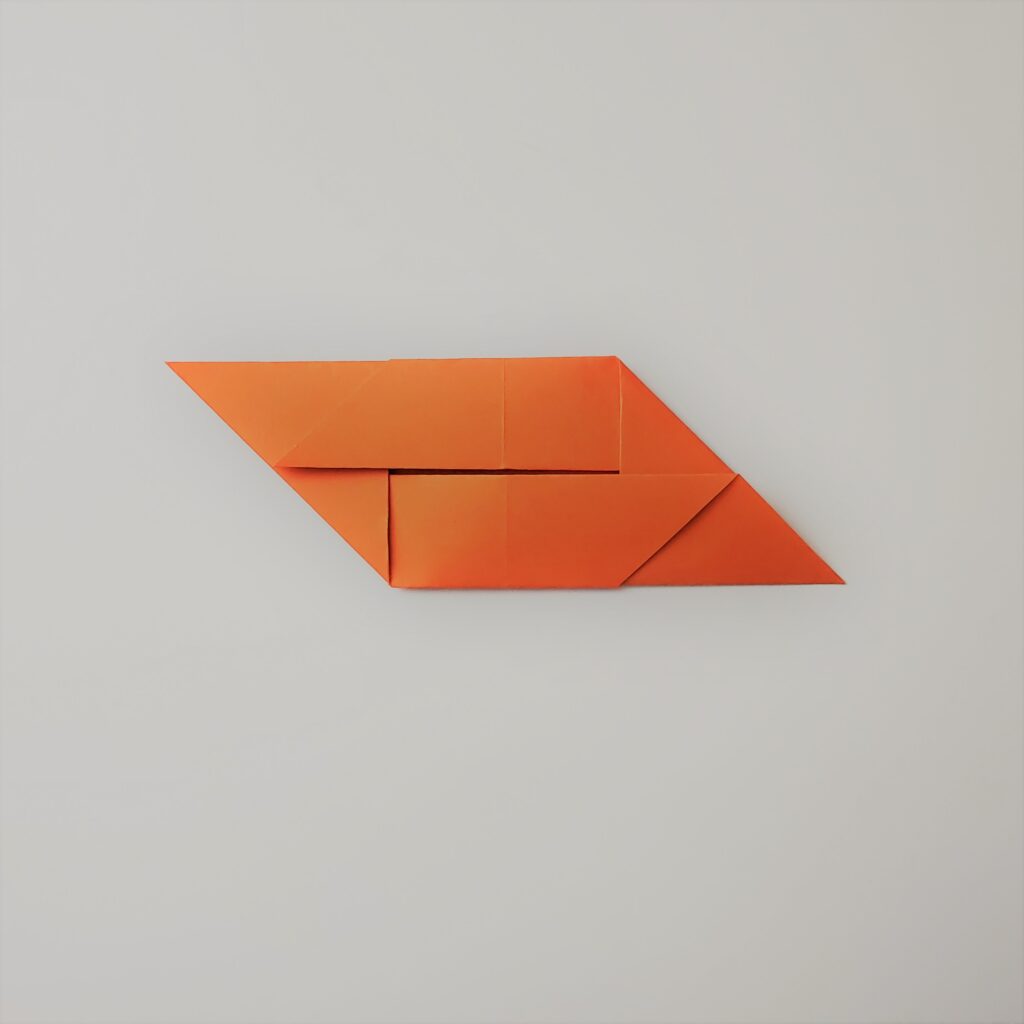
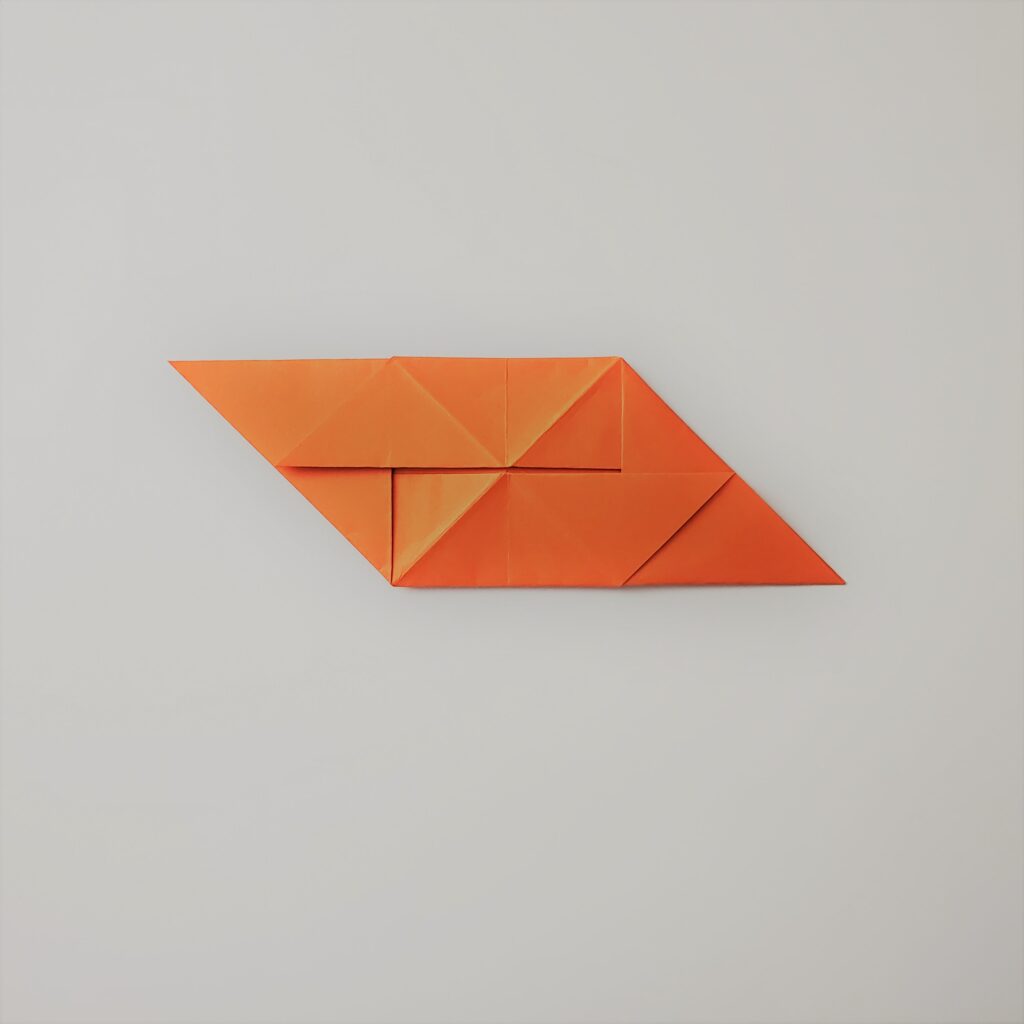
  1. Take one piece of colored origami paper, and fold it diagonally.
  2. Rotate the origami paper and fold it diagonally.
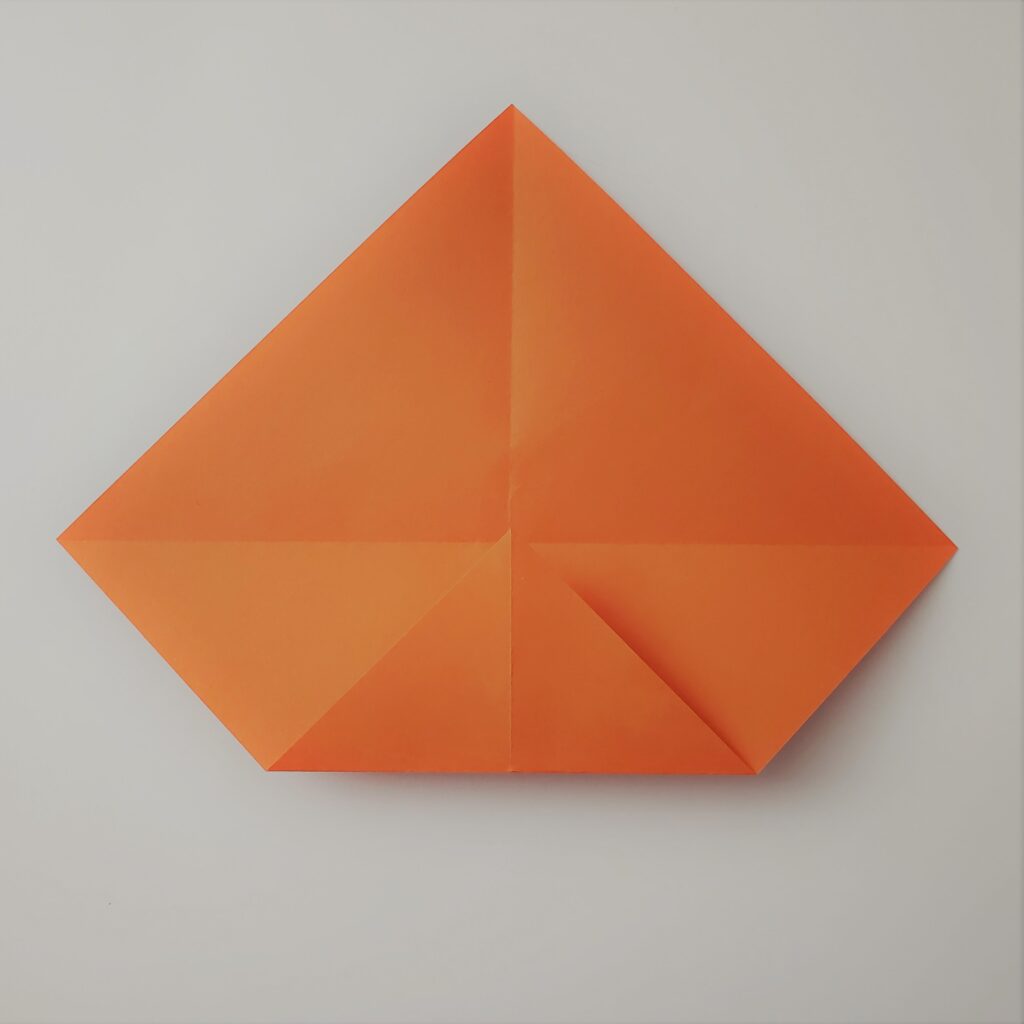
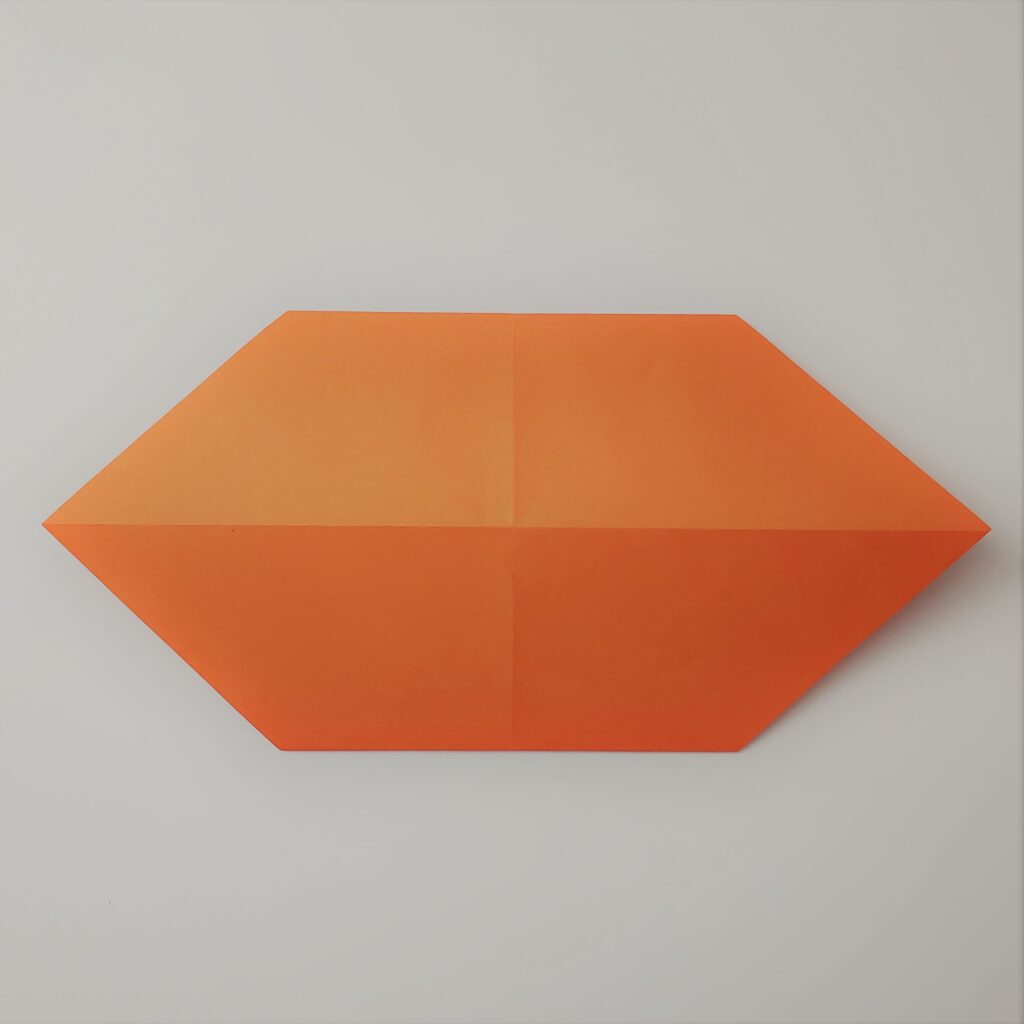
  1. Take the bottom flap point and fold it to the creased middle line.
  2. Take the top flap point and fold it to the creased middle line.
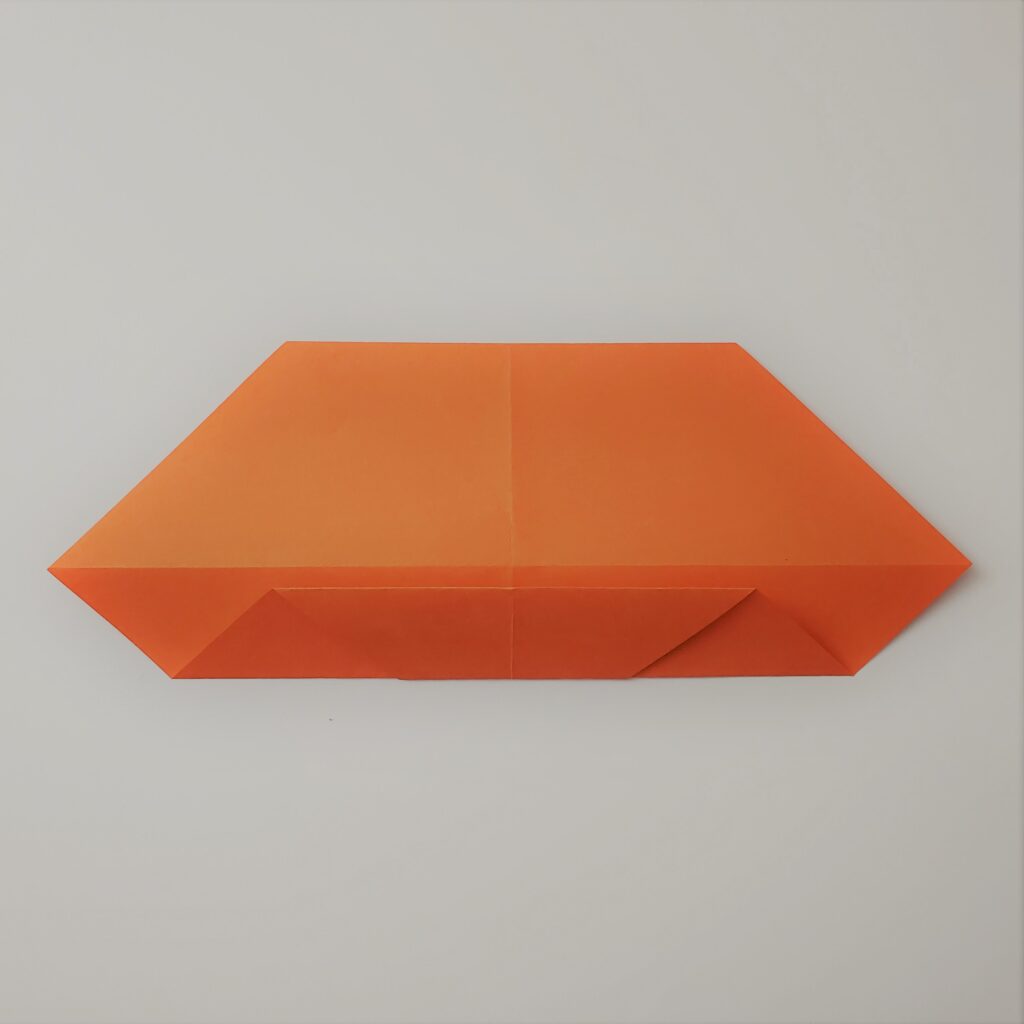
  1. Flip the origami paper over.
  1. Take the bottom flap edge and fold it against the creased middle line.
  2. Take the top flap edge and fold it against the creased middle line.
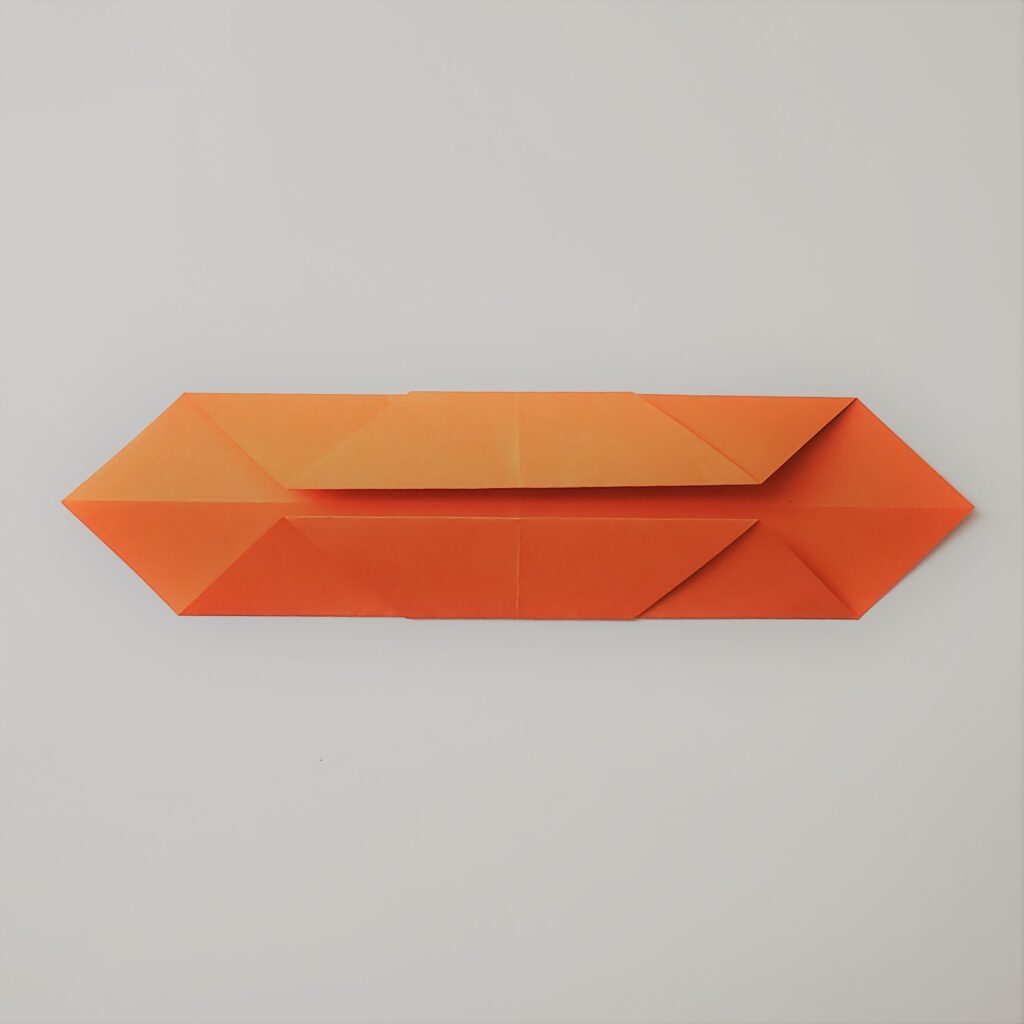
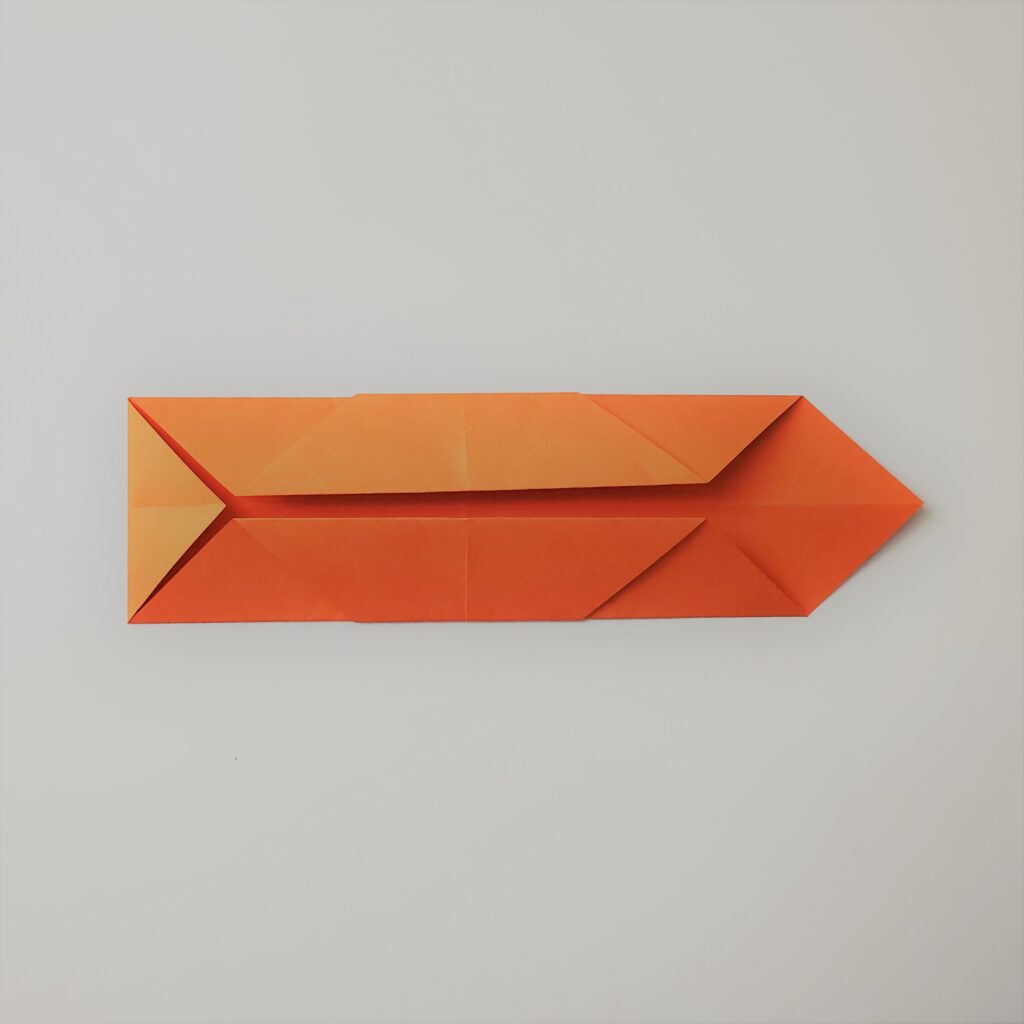
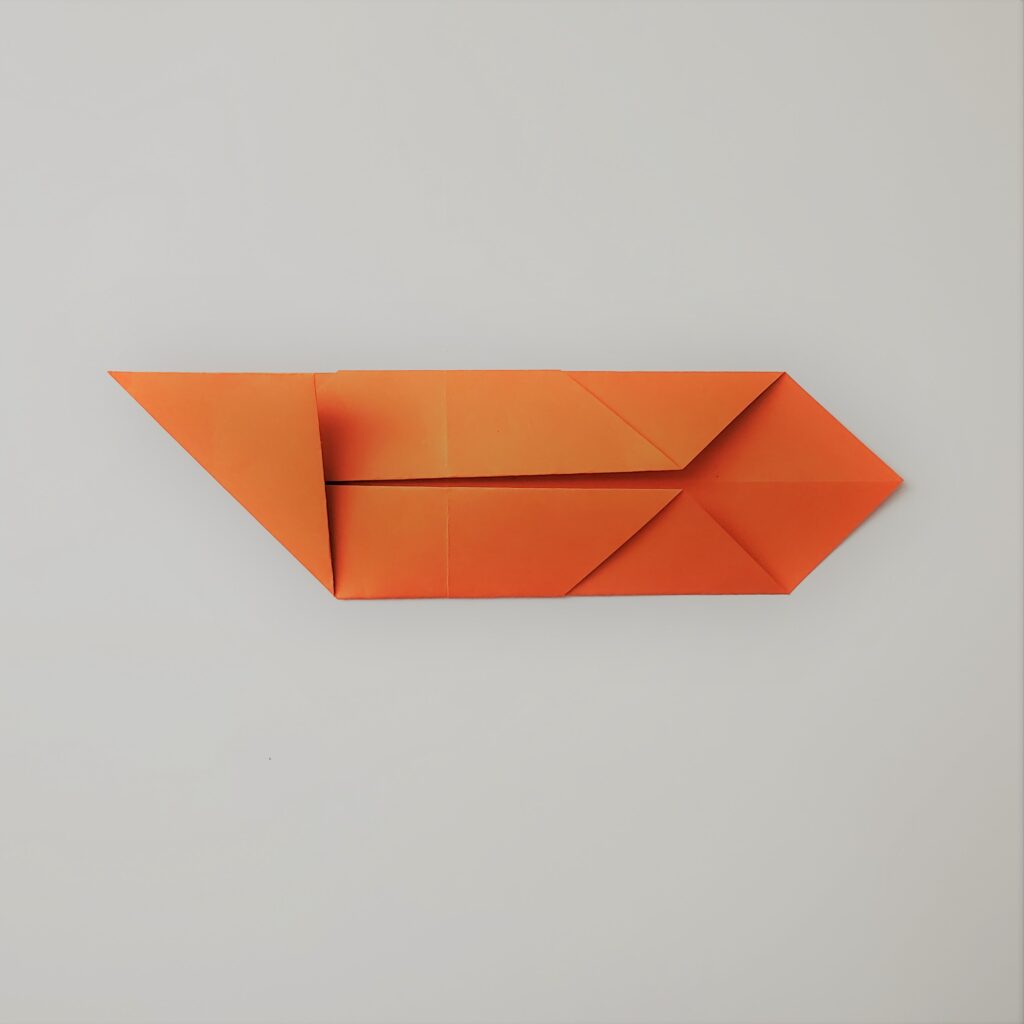
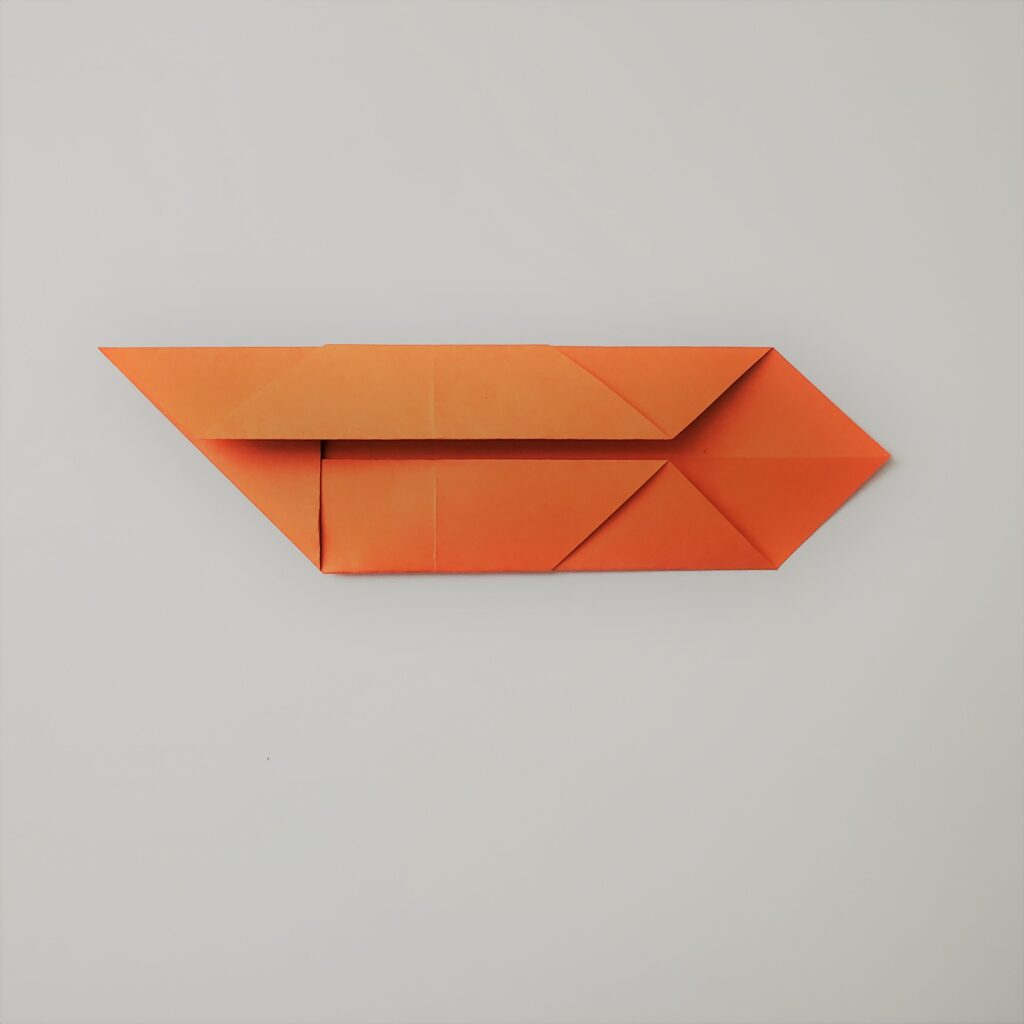
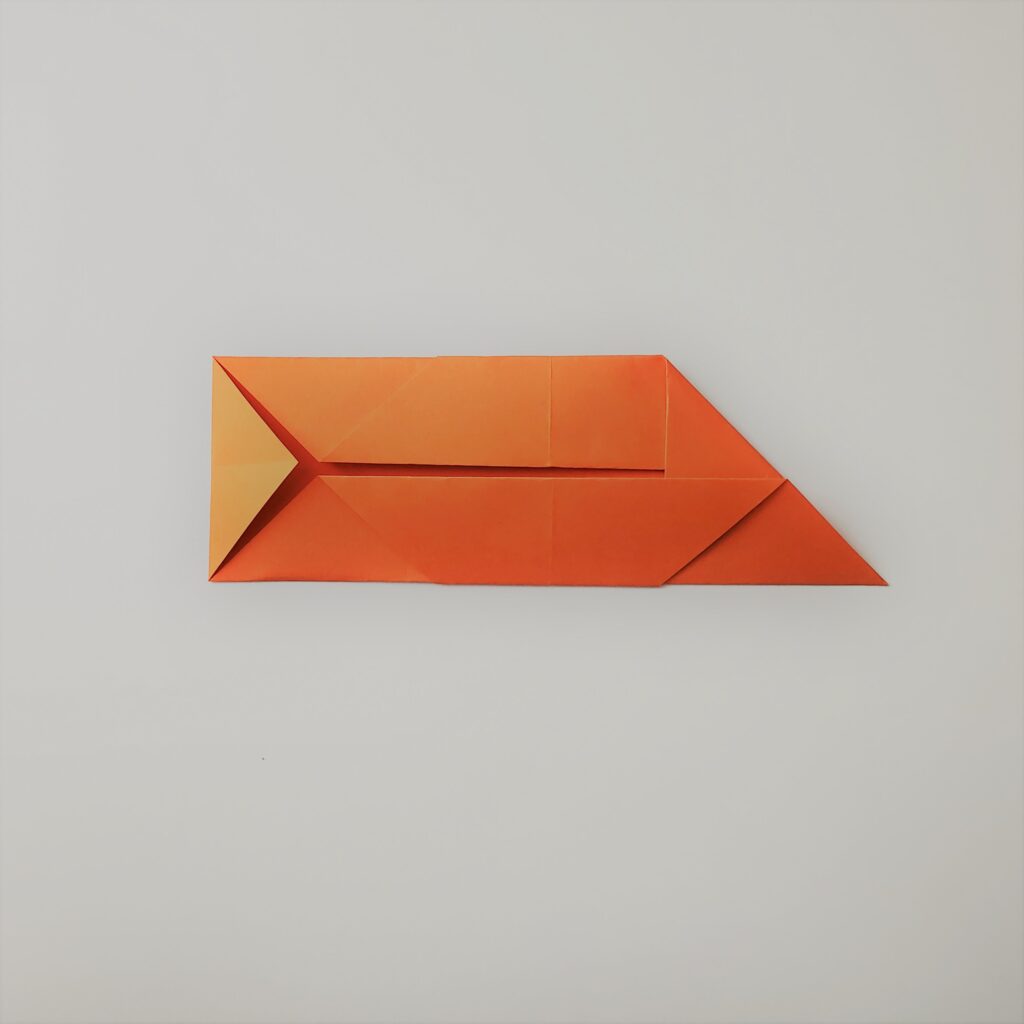
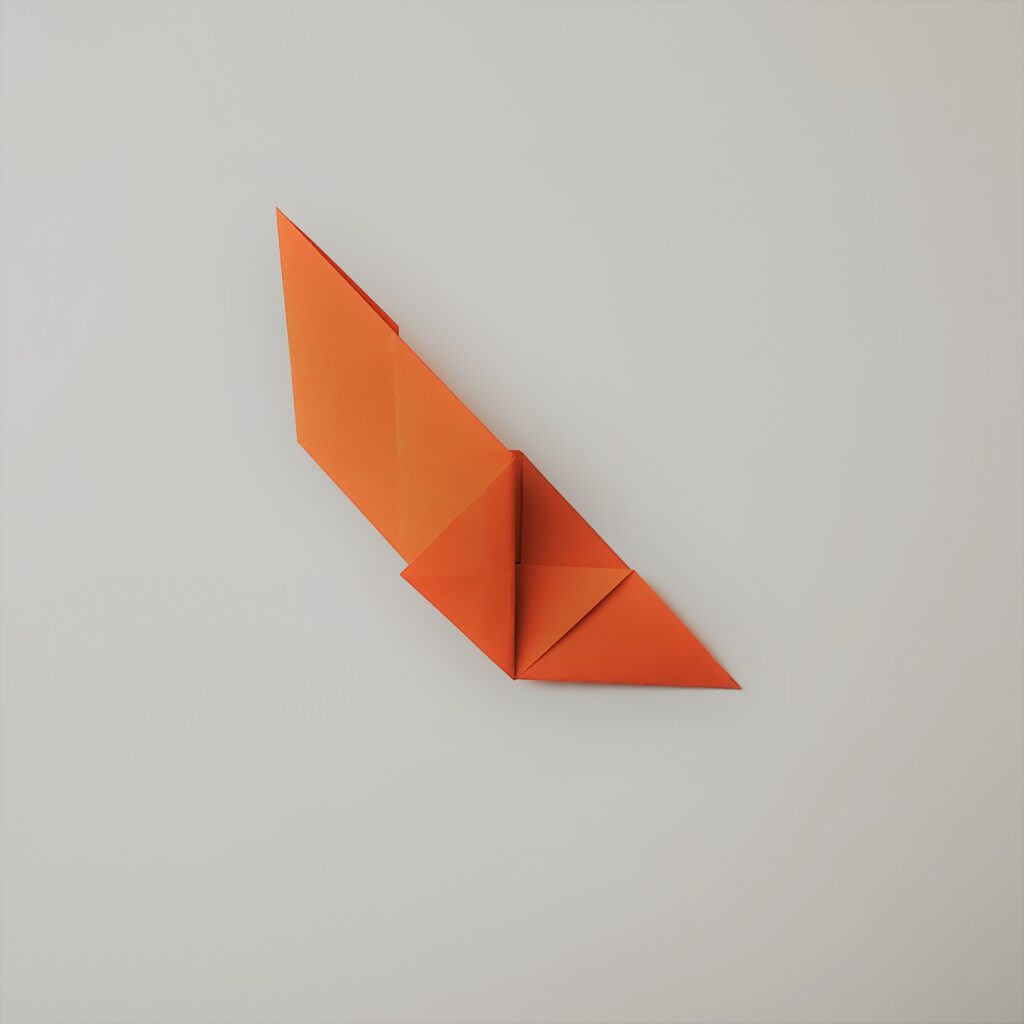
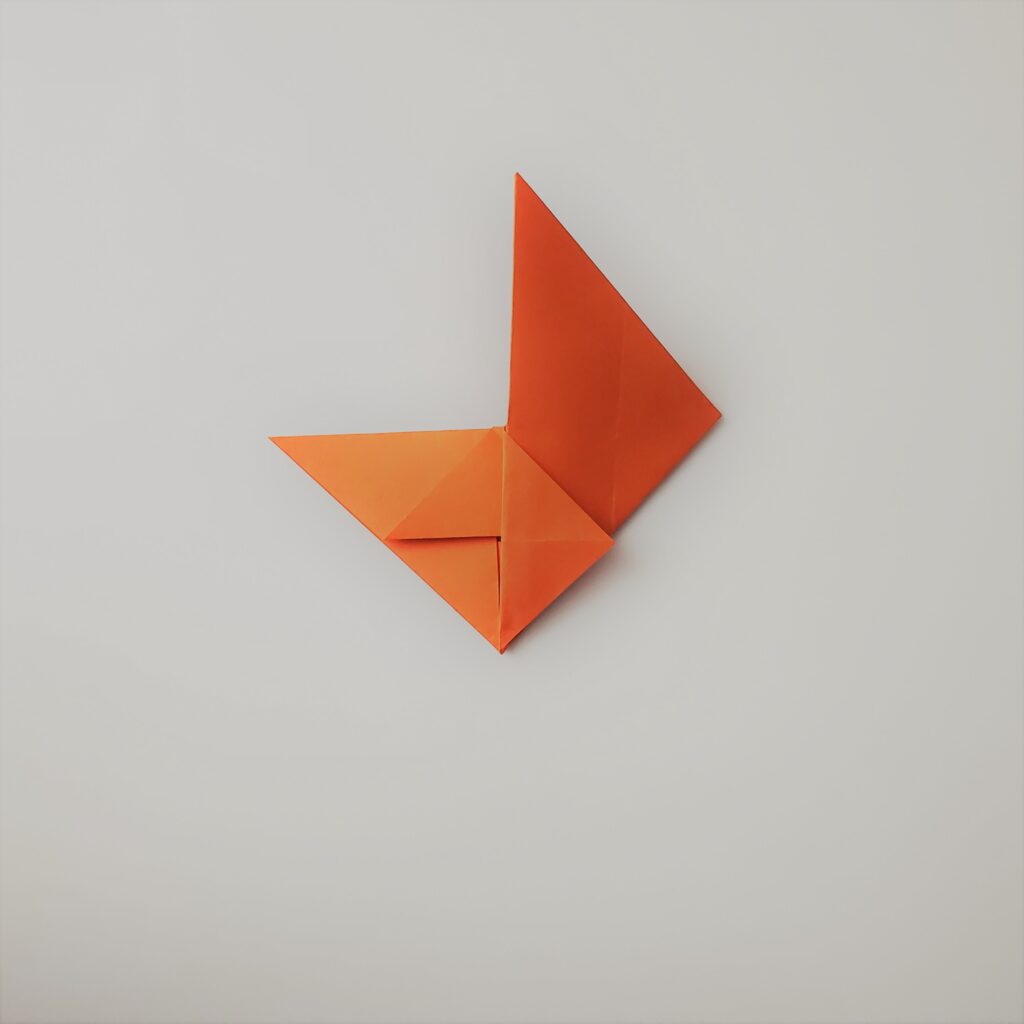
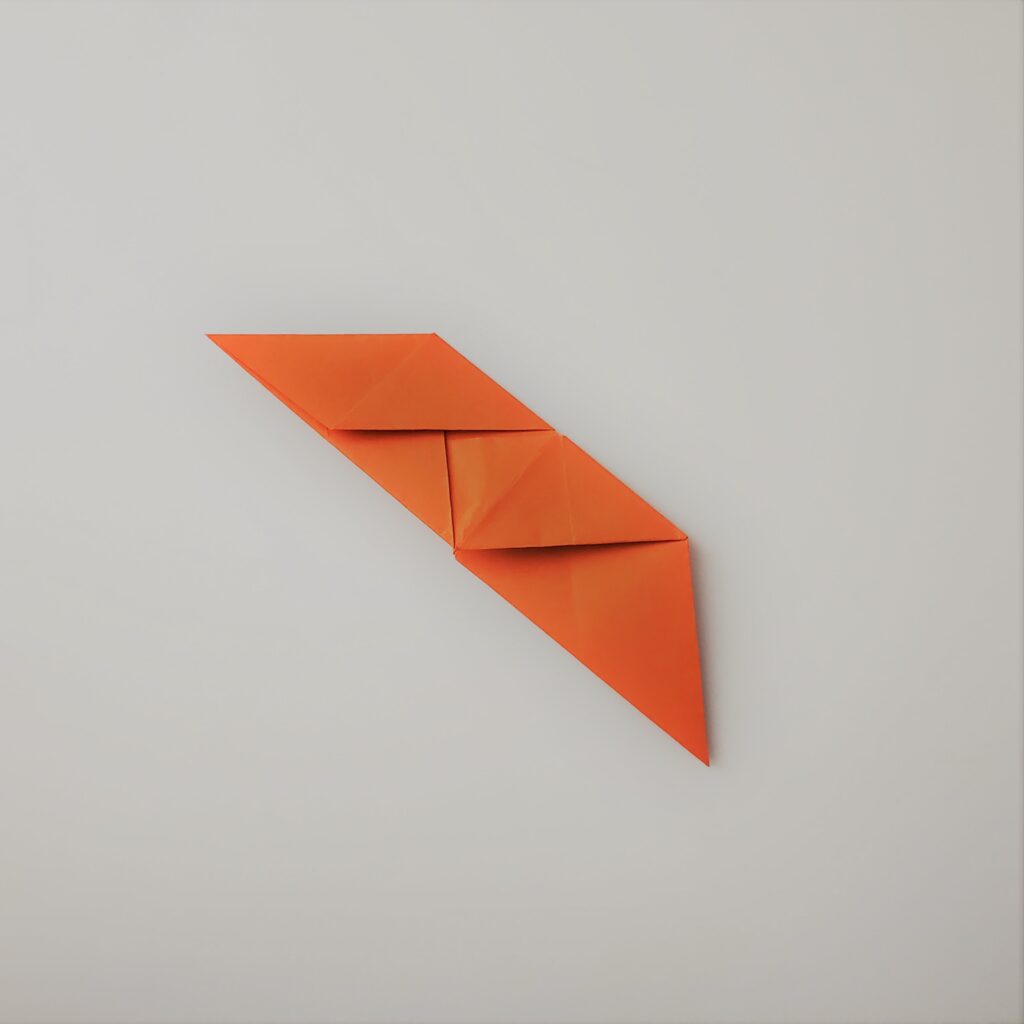
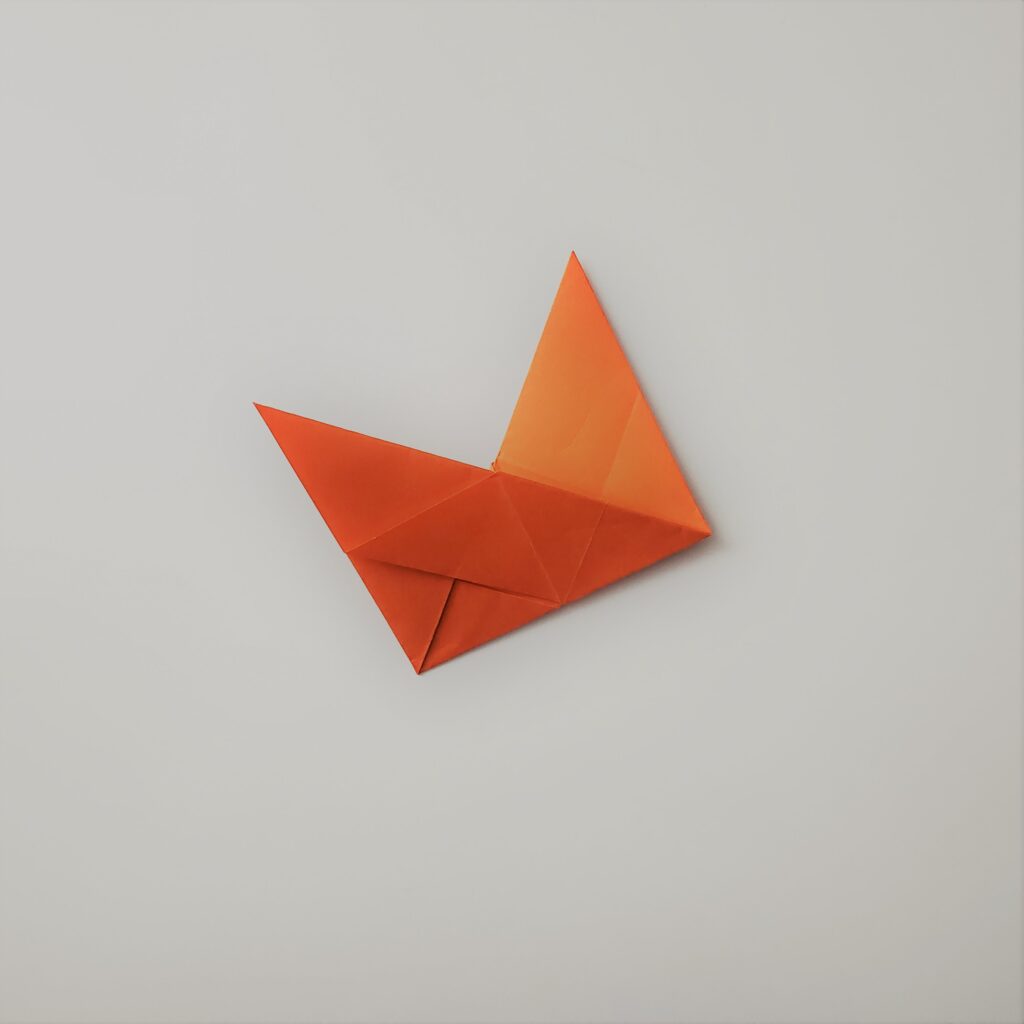
  1. Fold the left side flap to form a triangle.
  2. Take the bottom left side corner and fold it upwards to form a 90° triangle.
  3. Tuck the 90° triangle under the top flap.
  1. Rotate the origami paper and repeat steps 8-10.
  1. Fold the bottom left corner to the top right corner and unfold. Then fold the bottom right corner up towards the top left and unfold. This should form an X crease.
  1. Flip the origami paper over. Fold the origami paper diagonally twice (similar to the previous step), forming an X crease. This will help sturdy the creases.
  1. Repeat steps 1-13 to fold 2 additional units with the remaining colored origami paper.

Assembly Instructions:

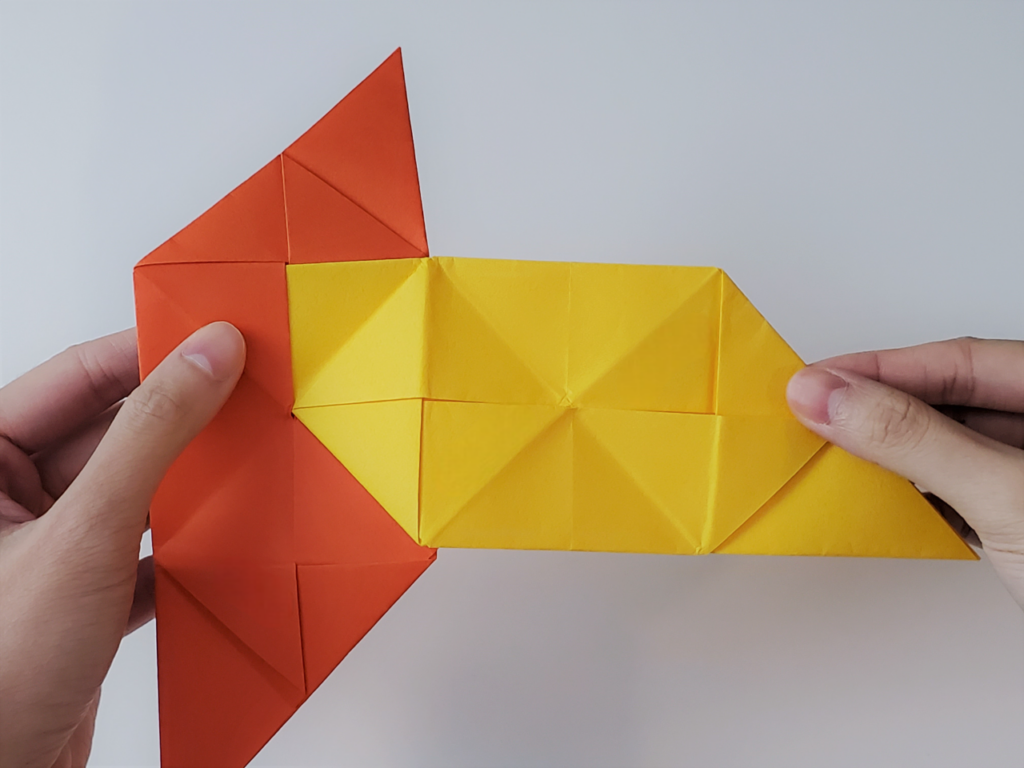
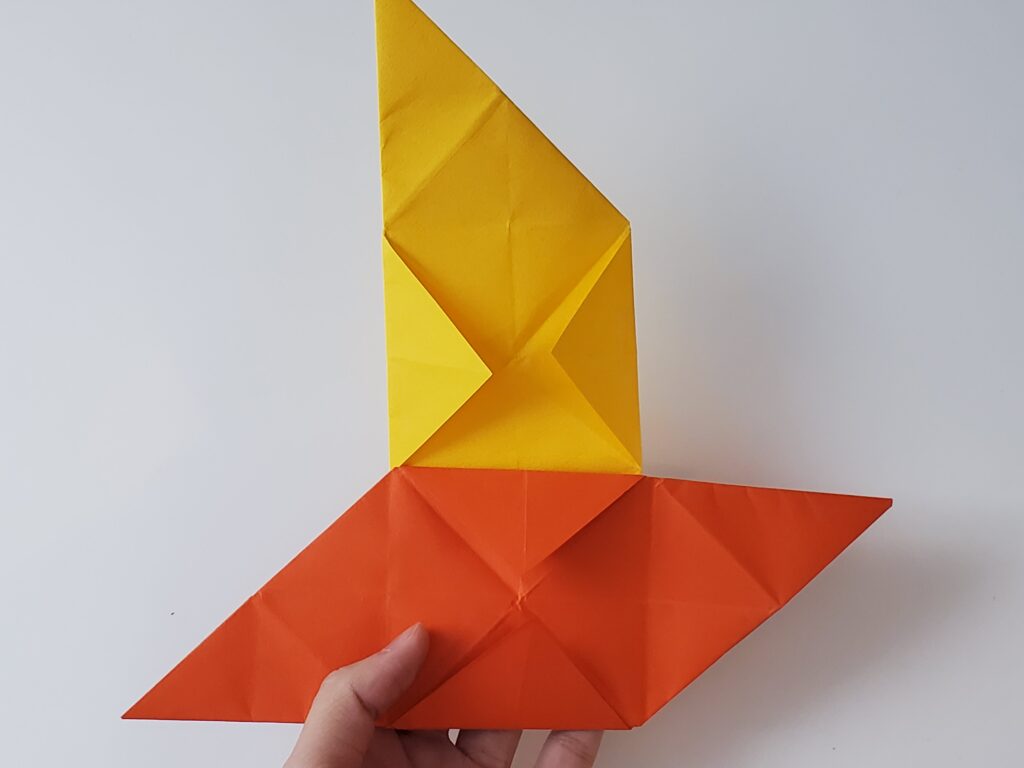
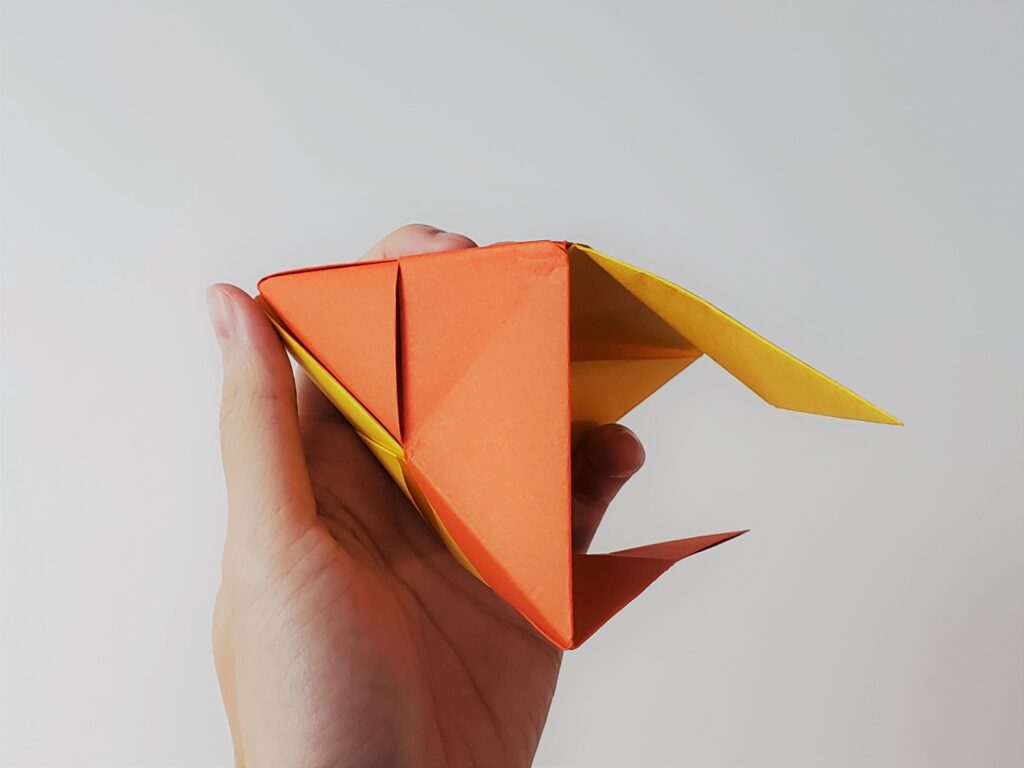
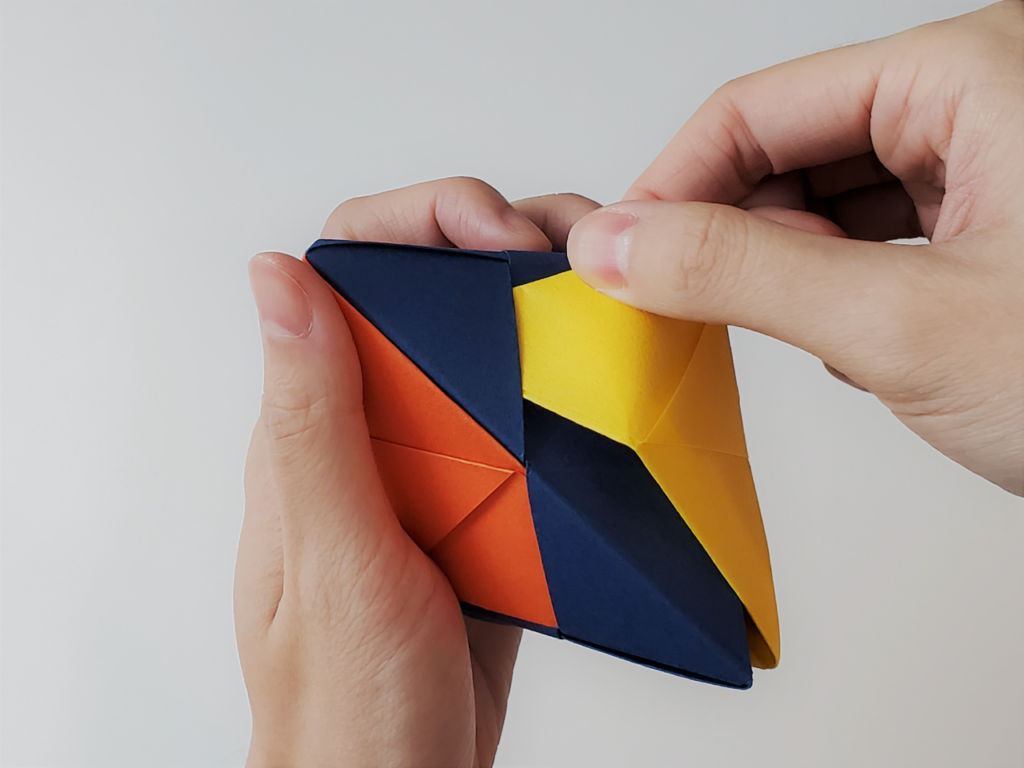
  1. Have the Orange unit vertically in your left hand and the Yellow unit horizontally in your right hand. Take the Yellow unit’s left corner and insert it in the Orange unit’s inner triangle panel on the top left.
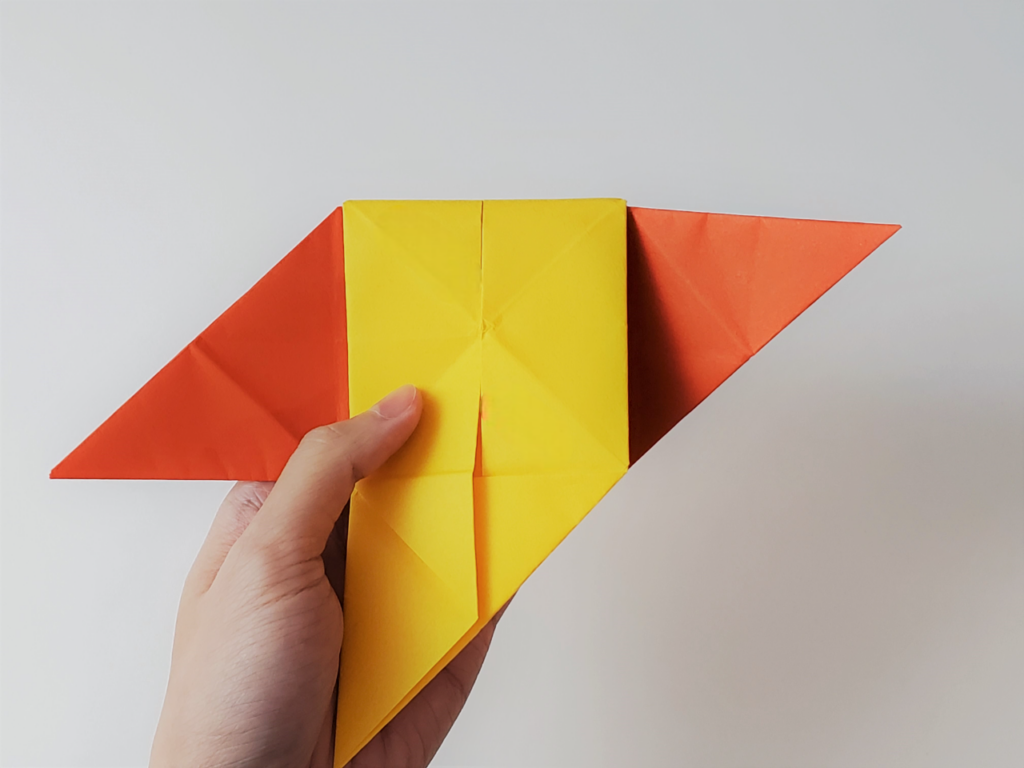
  1. Flip the combined unit over and rotate to have the Yellow unit at the top.
  1. Fold the Yellow unit’s remaining flap down towards you. Using the Orange unit’s left corner, insert it in the Yellow unit’s inner triangle panel on the bottom right. Pinch the sides to shape the combined unit.
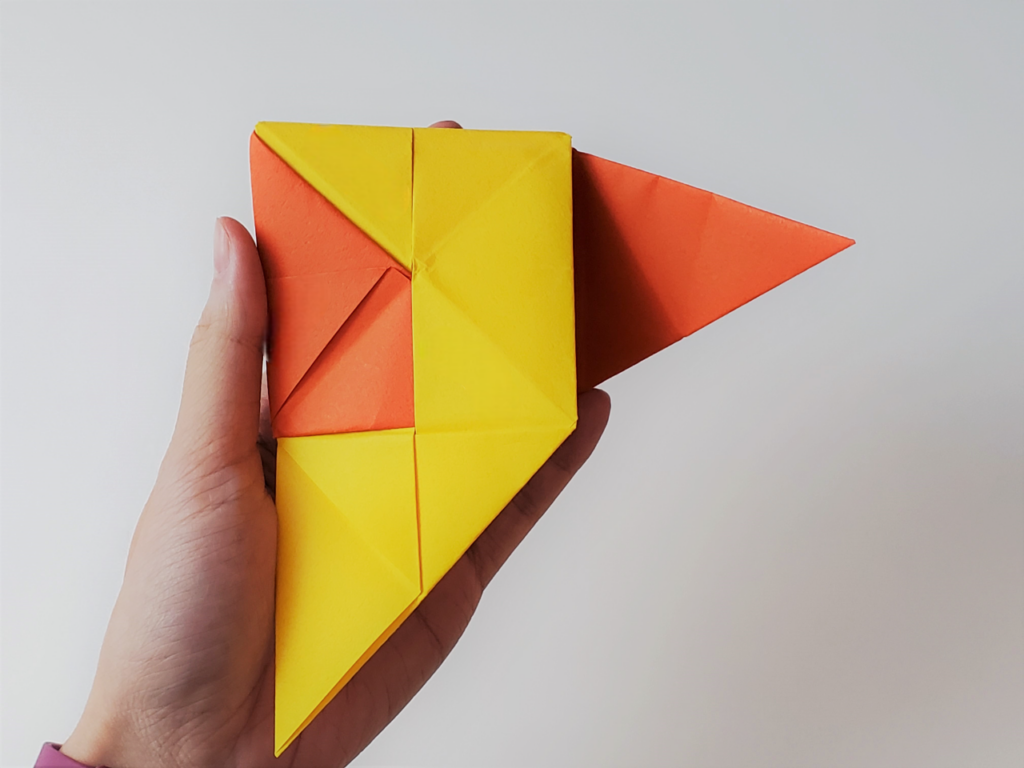
  1. Rotate the combined unit so you will see the inner bottom. The Orange unit should be on the left side and Yellow on the right side (should look somewhat like a pinwheel).
  1. Rotate the combined unit so you have a 90° triangle panel of the Orange unit facing you.
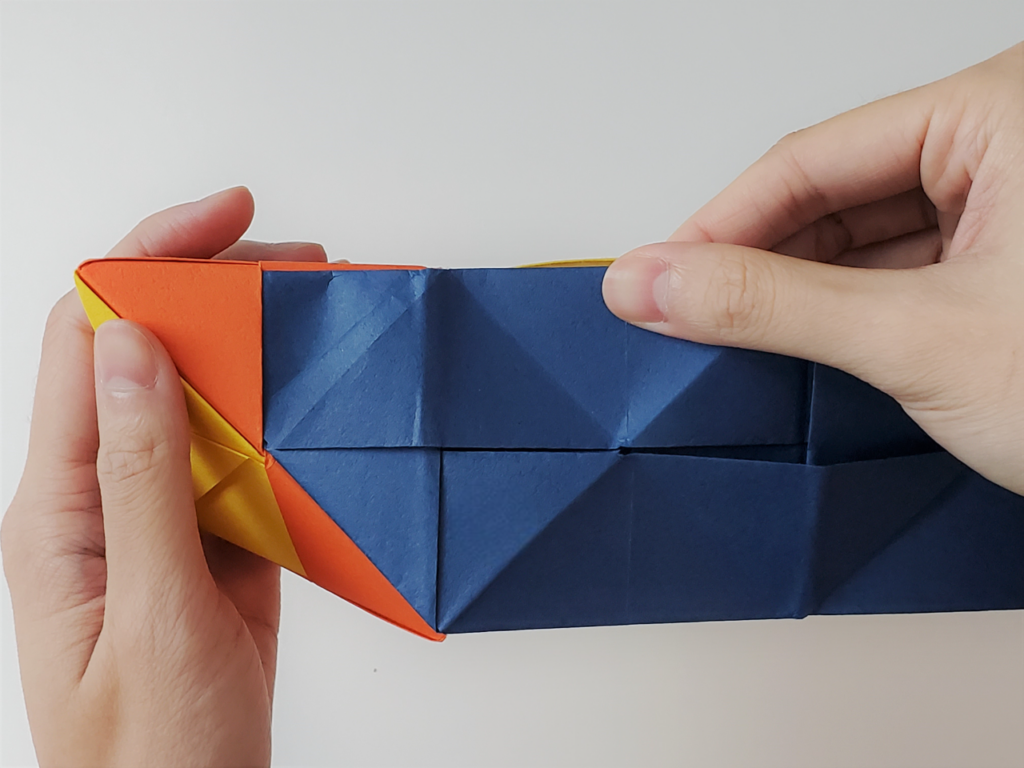
  1. Hold the Blue unit horizontally in your right hand and insert its left corner in the Orange unit’s inner triangle panel.
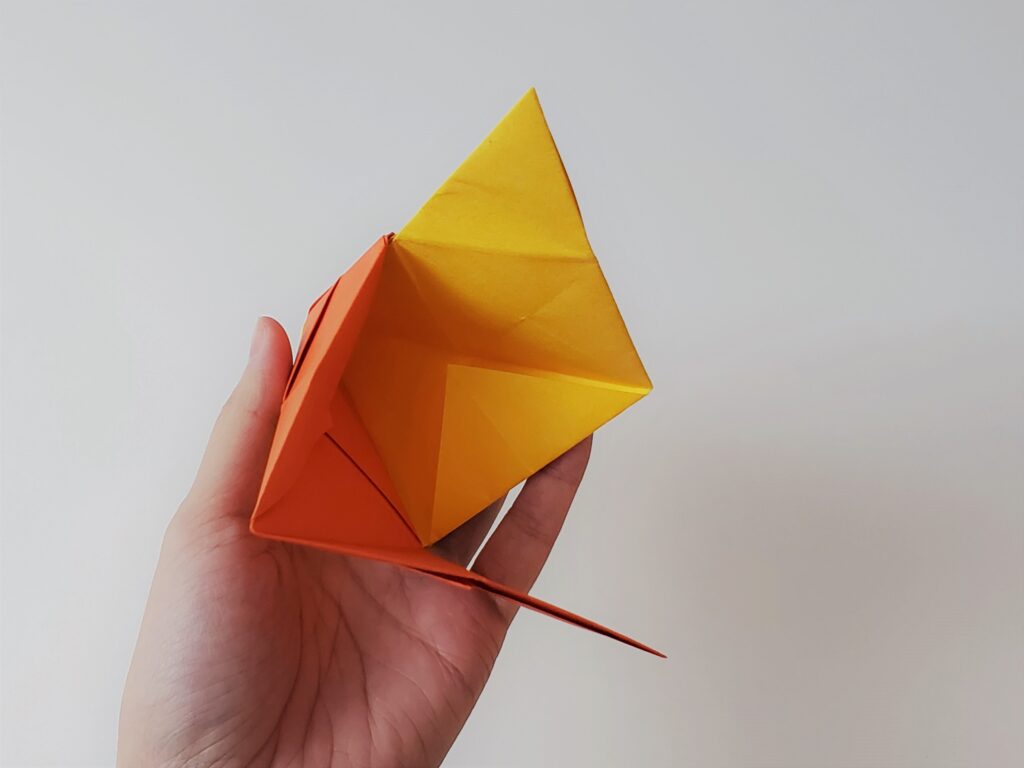
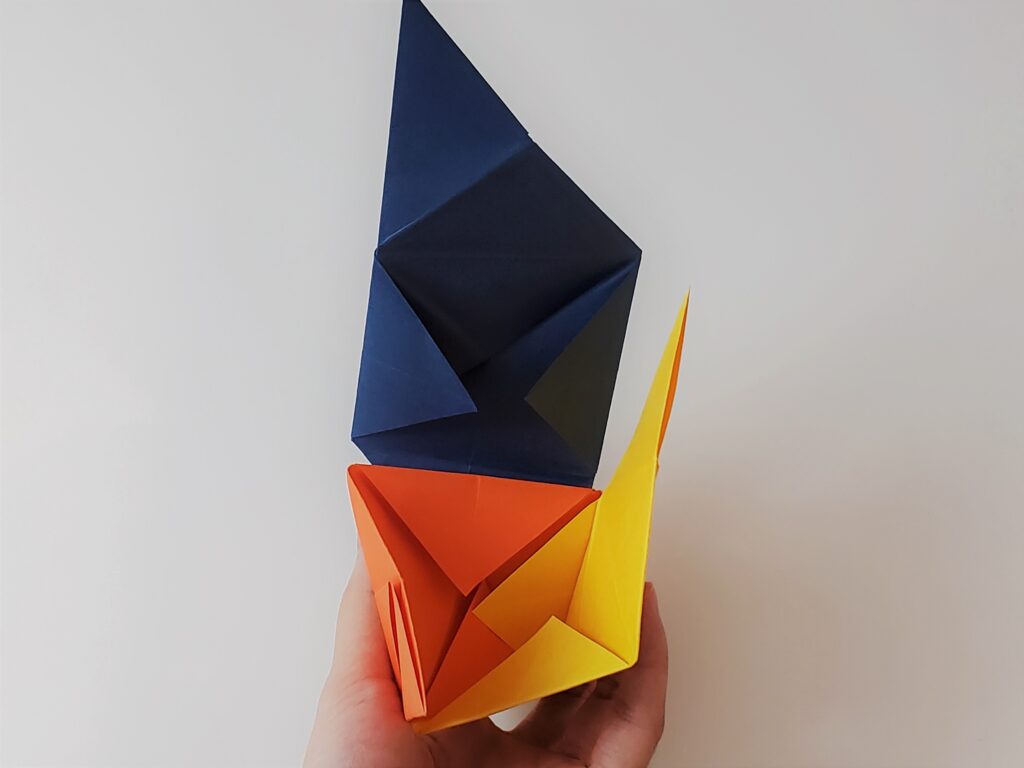
  1. Rotate the combined unit so you will see the inner bottom. The Blue unit should be on the top, the Orange unit on the left side, and the Yellow unit on the right side (should look somewhat like a pinwheel).
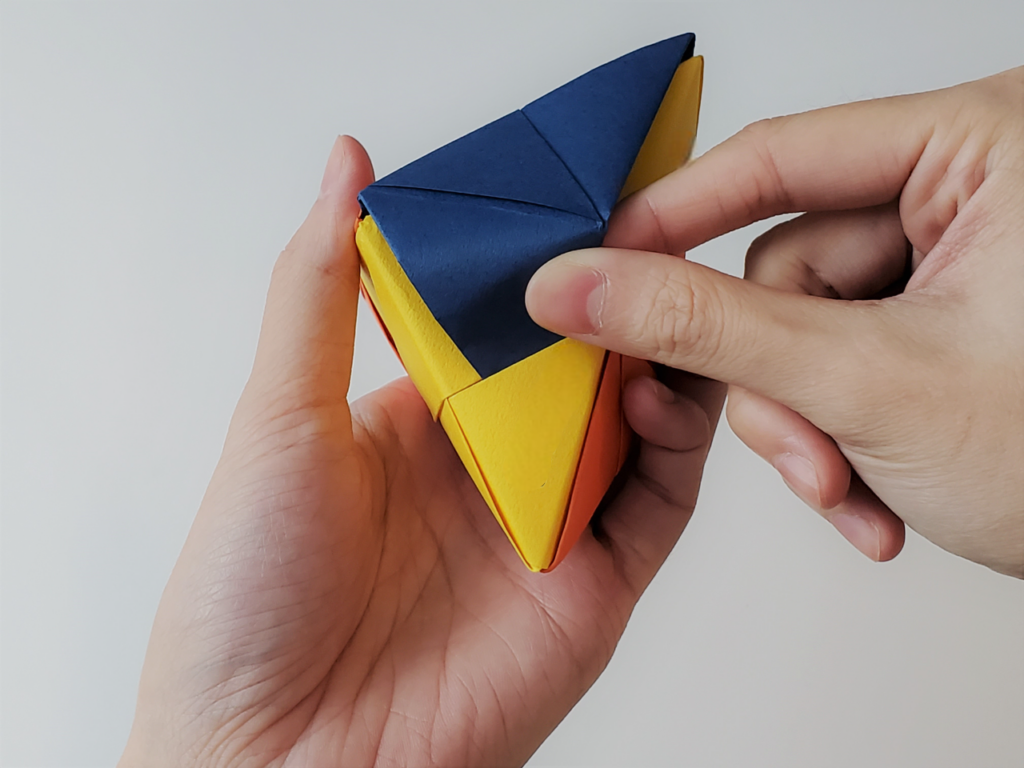
  1. Fold the Blue unit’s remaining flap down towards you. Using the Orange unit’s corner, insert it in the Blue unit’s inner triangle panel on the bottom right. Pinch the sides to shape the combined unit.
  1. Using the Yellow unit’s corner, insert it in the Blue unit’s inner triangle panel on the top left. Pinch the sides to shape the combined unit.
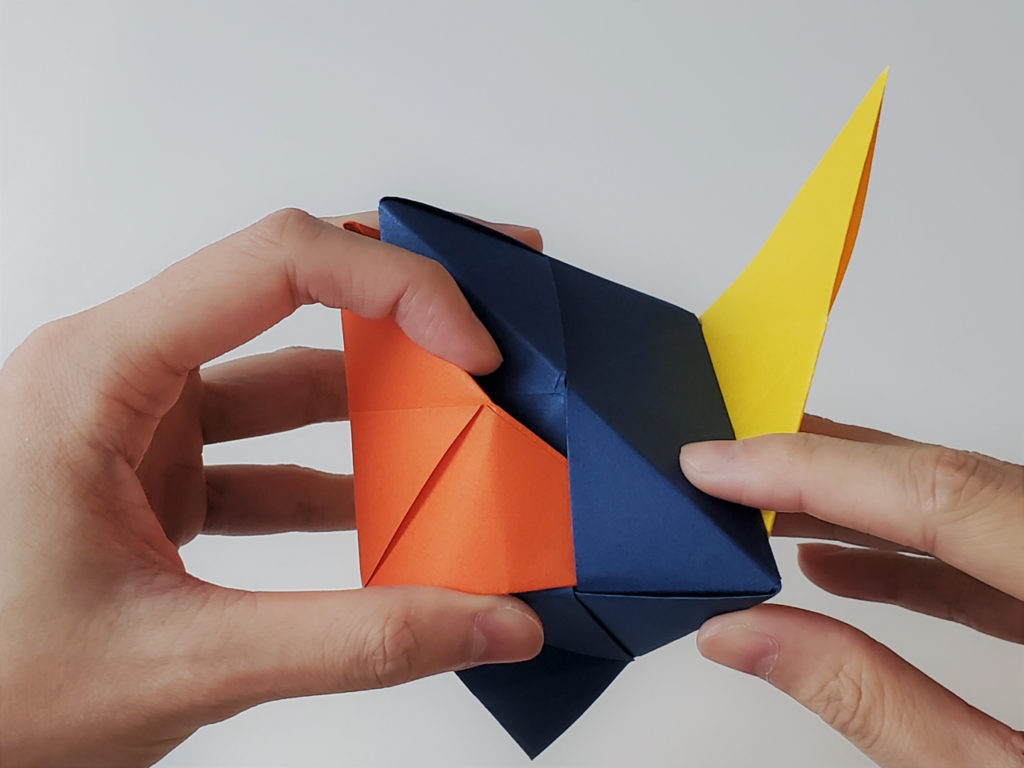
  1. Using the Blue unit’s corner, insert it in the Yellow unit’s inner triangle panel on the bottom. Pinch the sides to shape the combined unit.
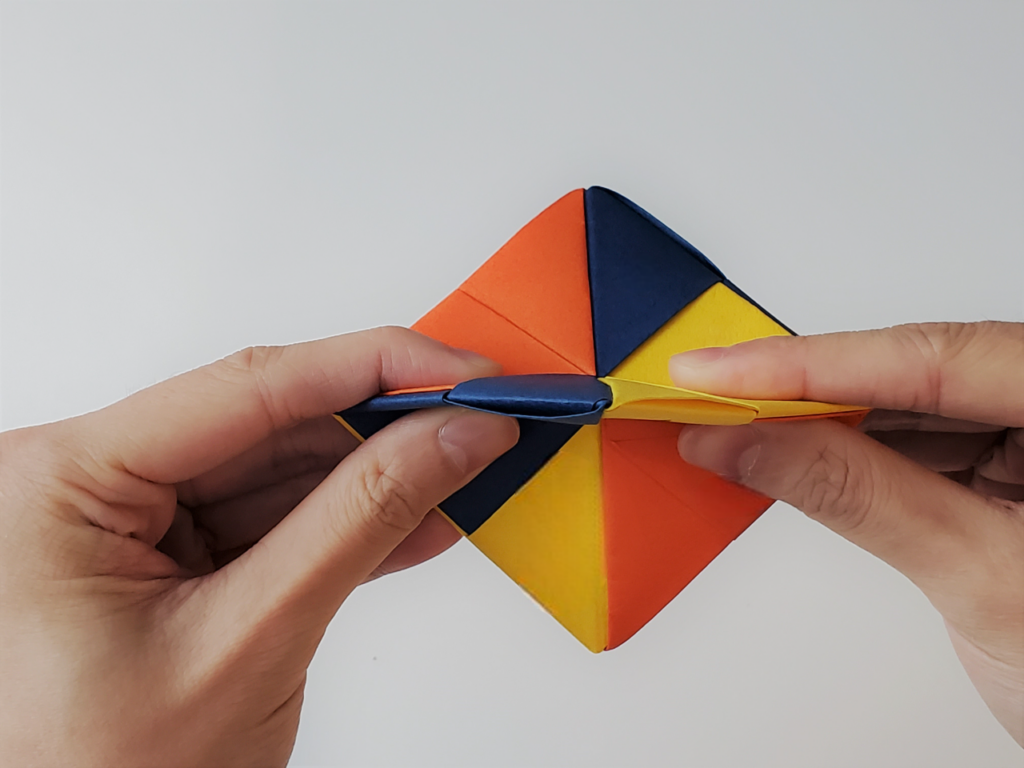
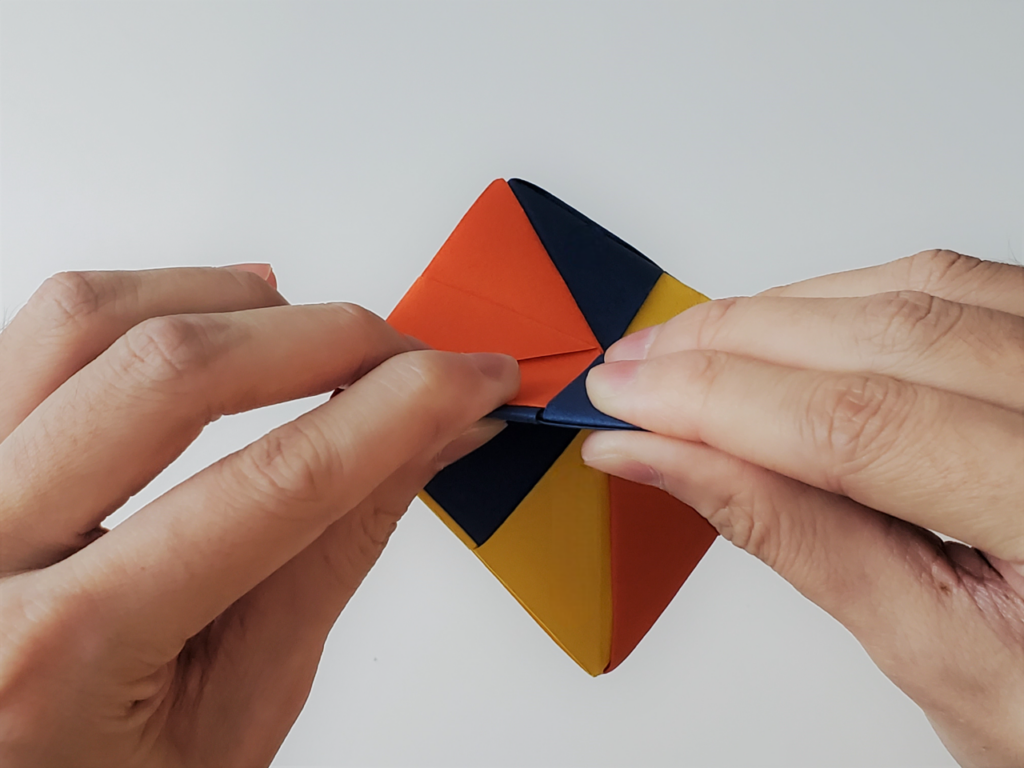
  1. Shape the combined unit more by folding the sides towards each other until flat. Repeat for each side until flat.
  1. To “pop” the fidget toy, place your thumb on its top point and another finger underneath, the bottom point. Add pressure and the fidget toy will pop. Repeat steps 11 and 12, 3-4x to have it pop easier.

🎨 Voila! You’ve made your very own pop-it fidget spinner! Enjoy the fun and satisfaction of your handmade creation. Happy crafting, and have a fantastic Fourth of July! ✨