
Get ready for some hands-on fun! Check out our latest YouTube tutorial here and dive into the excitement of creating your very own origami pop-it fidget spinner!
✨ What makes this spinner special? It’s made from three separate pieces of origami paper, creating an interactive toy that lets you pop and flick away to your heart’s content. Not only is it a super fun craft project ✂️, but it’s also a stress reliever for all ages—perfect for kids, teens, and adults alike!
💼 Fun Fact: I fulfilled a special request from an IT Cloud consulting and services firm for their logo and colors to be incorporated into this fidget spinner for a tradeshow. They absolutely loved it! Crafting kits for their guests to take home and create their own spinners was an exciting experience.
🎆 Celebrate July 4th with a bang! With Independence Day just around the corner, this DIY project is the ultimate way to celebrate. Imagine sitting outside, enjoying the summer sun, and making these vibrant spinners. Whether you’re at a picnic, a family barbecue, or just hanging out in the backyard, this craft is perfect for adding a touch of fun and creativity to your festivities. Use red, white, and blue paper for a patriotic touch, or mix it up with your favorite colors! 🌟 This is one of those easy 4th of July crafts for kids and everyone will enjoy!
🎨 Feeling adventurous? Scroll down for the written step-by-step instructions and get crafting!
🛍️ Not into DIY? No problem! Check out this Etsy listing for a ready-made option.
📝 Want to use the same paper I did? Link to the origami paper used here!
What you’ll need:
- 3 sheets of 6 in x 6 in origami paper (in this case, I used orange, yellow, and blue)
Folding the Units Instructions:
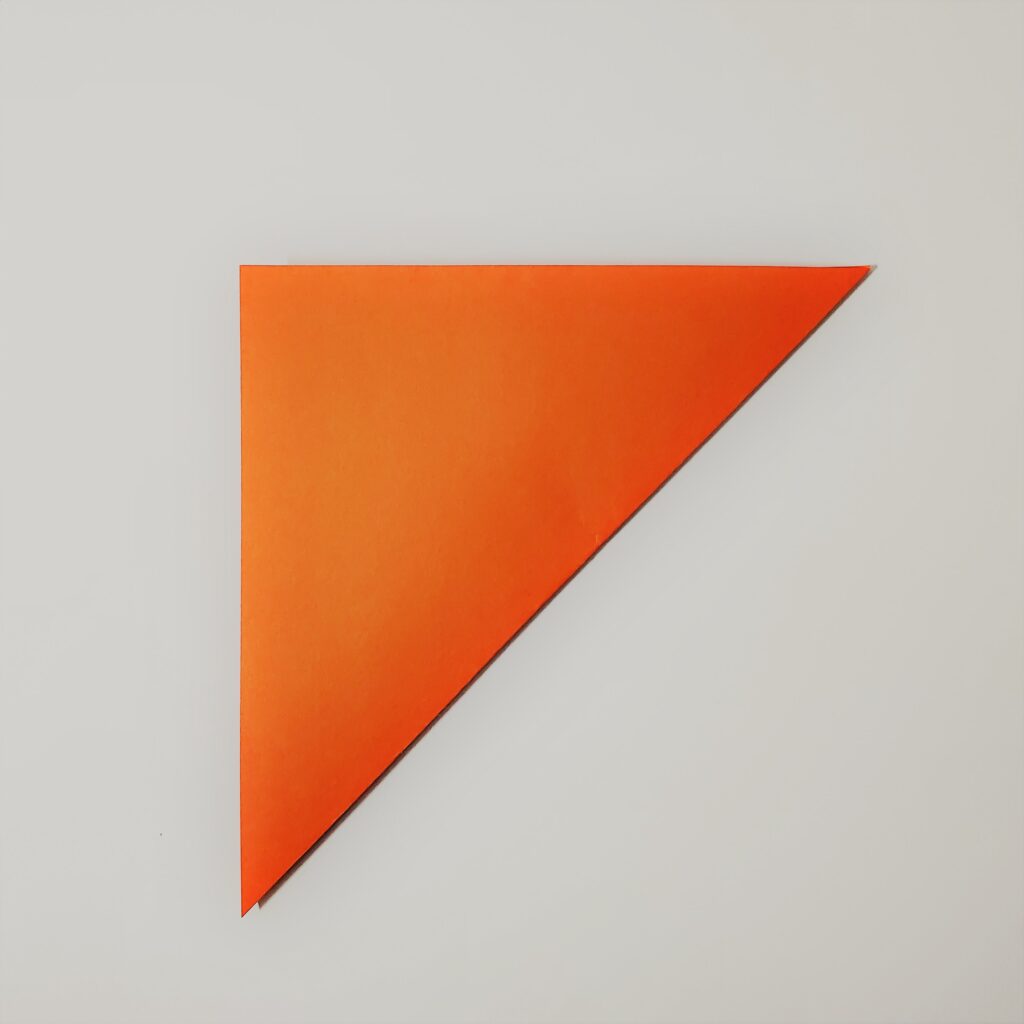
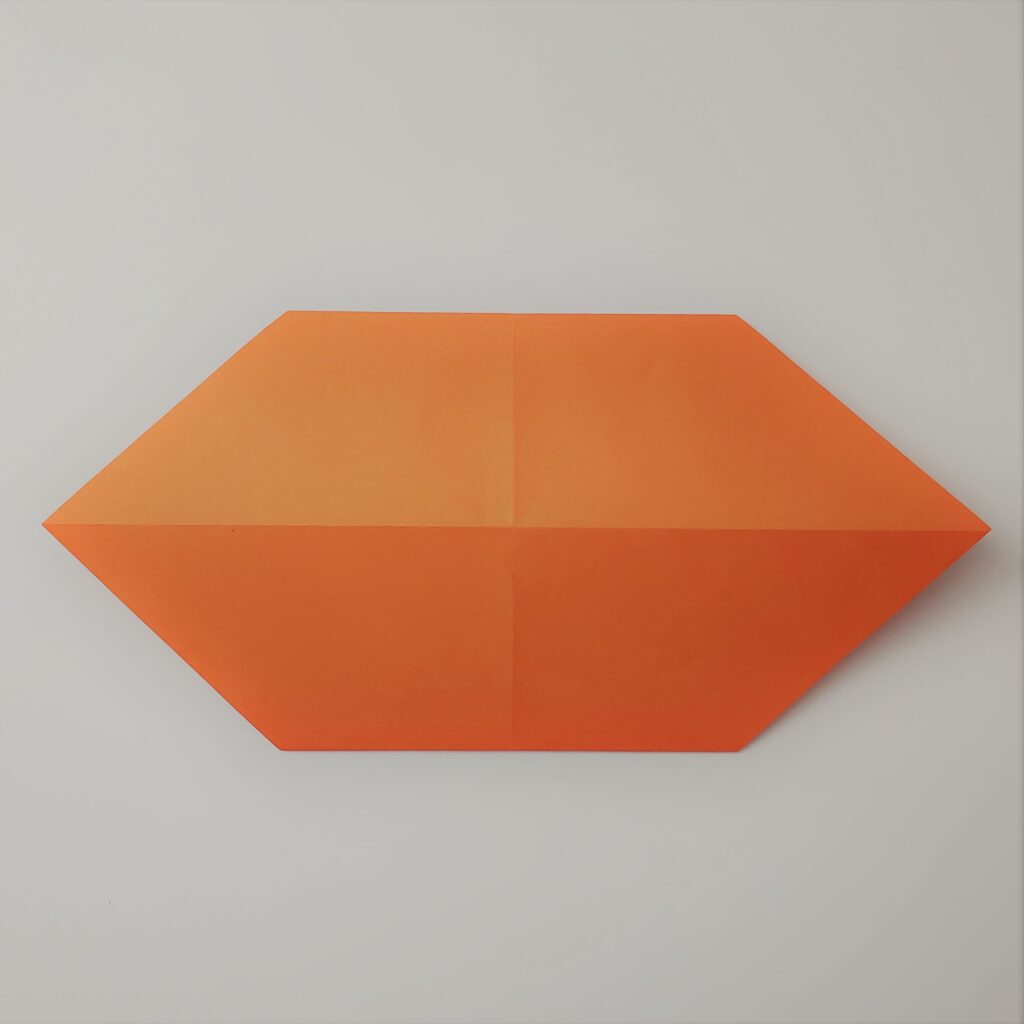
- Take one piece of colored origami paper, and fold it diagonally.
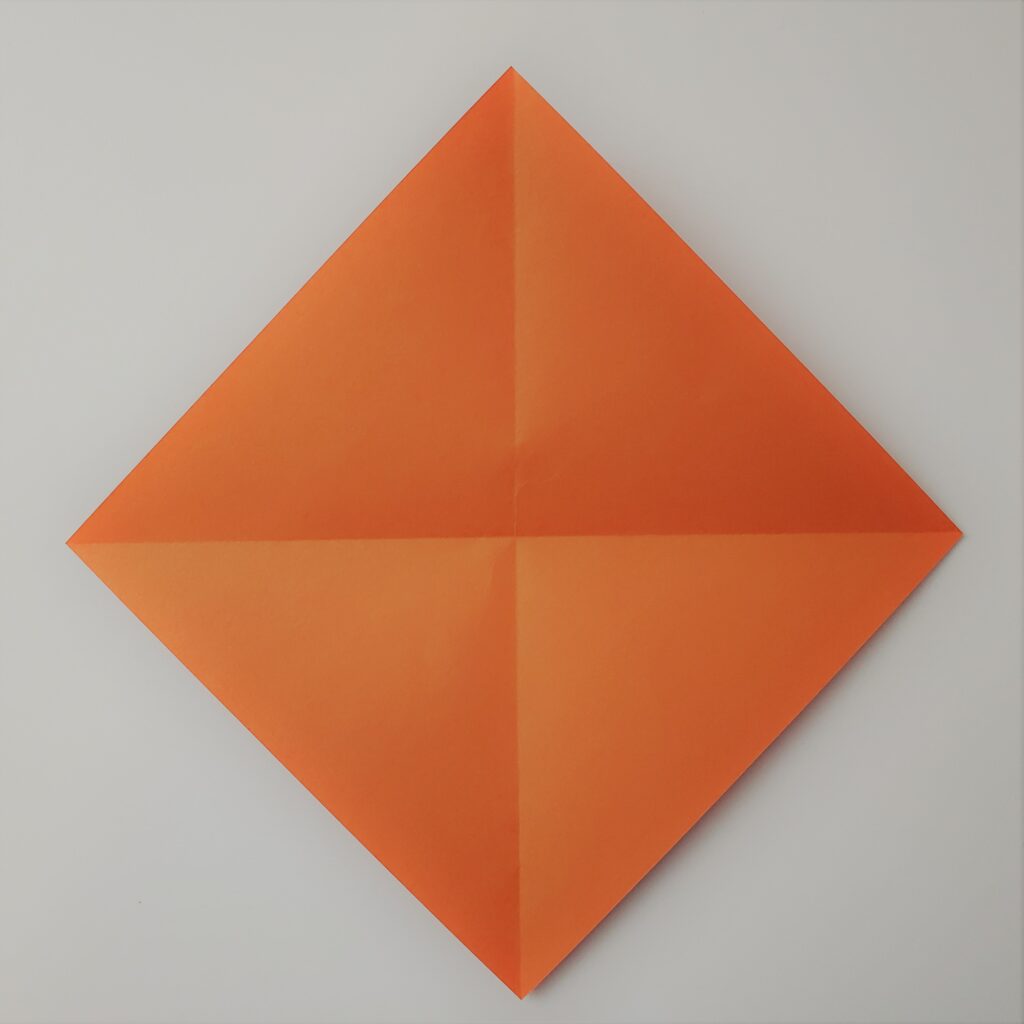
- Rotate the origami paper and fold it diagonally.
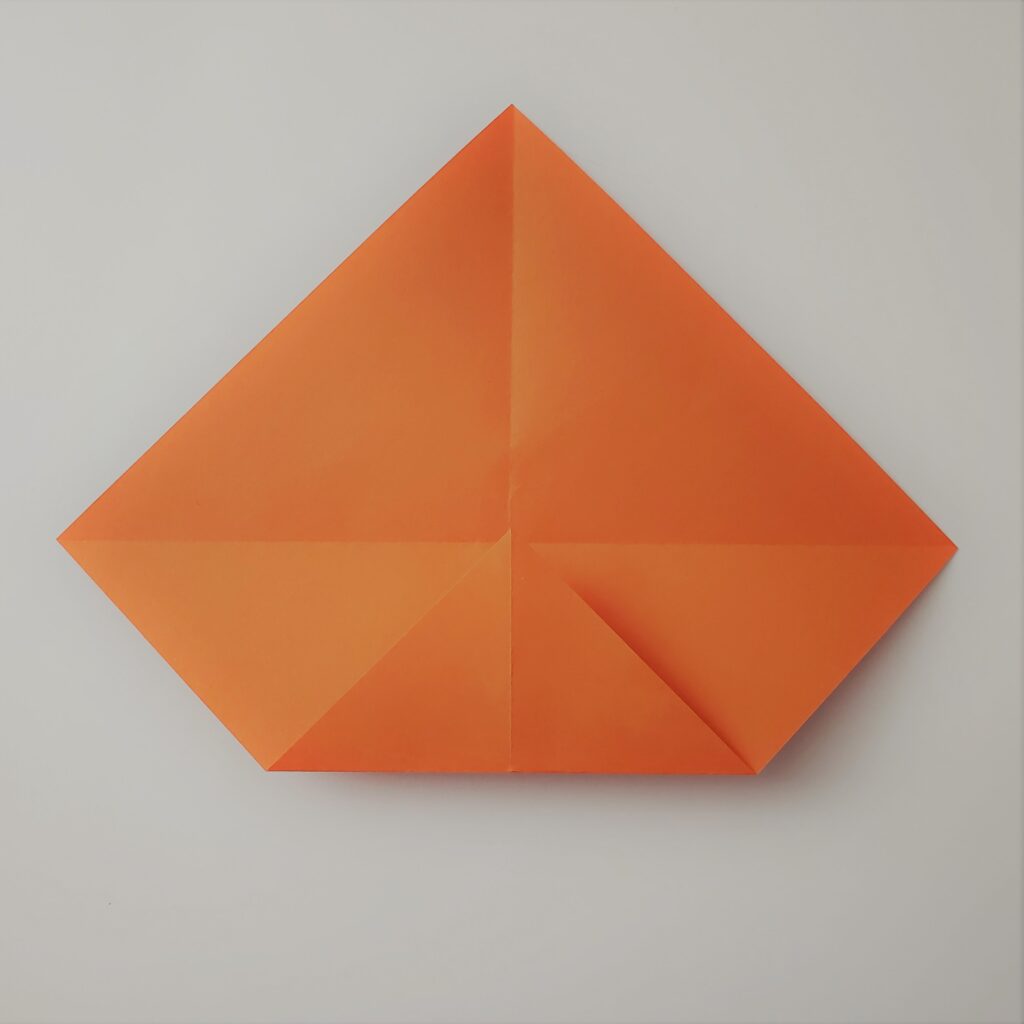
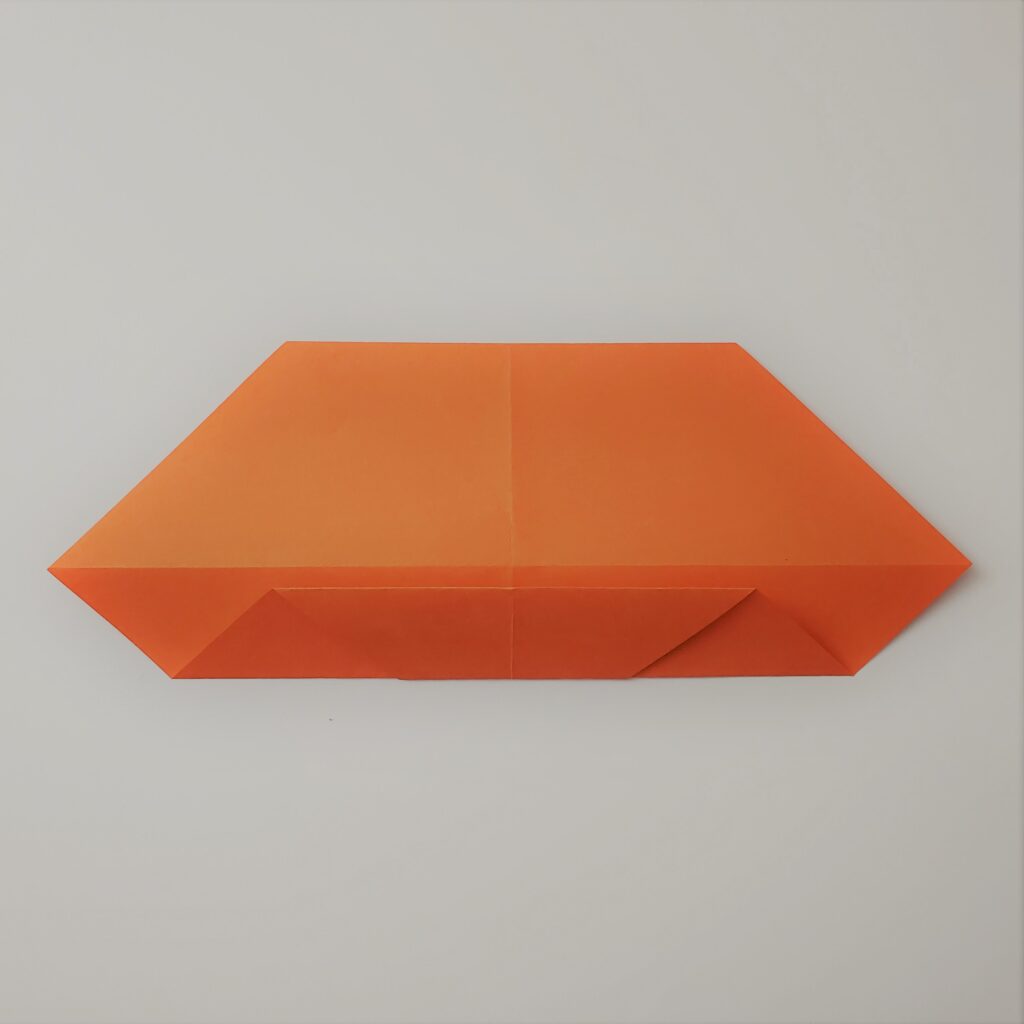
- Take the bottom flap point and fold it to the creased middle line.
- Take the top flap point and fold it to the creased middle line.
- Flip the origami paper over.
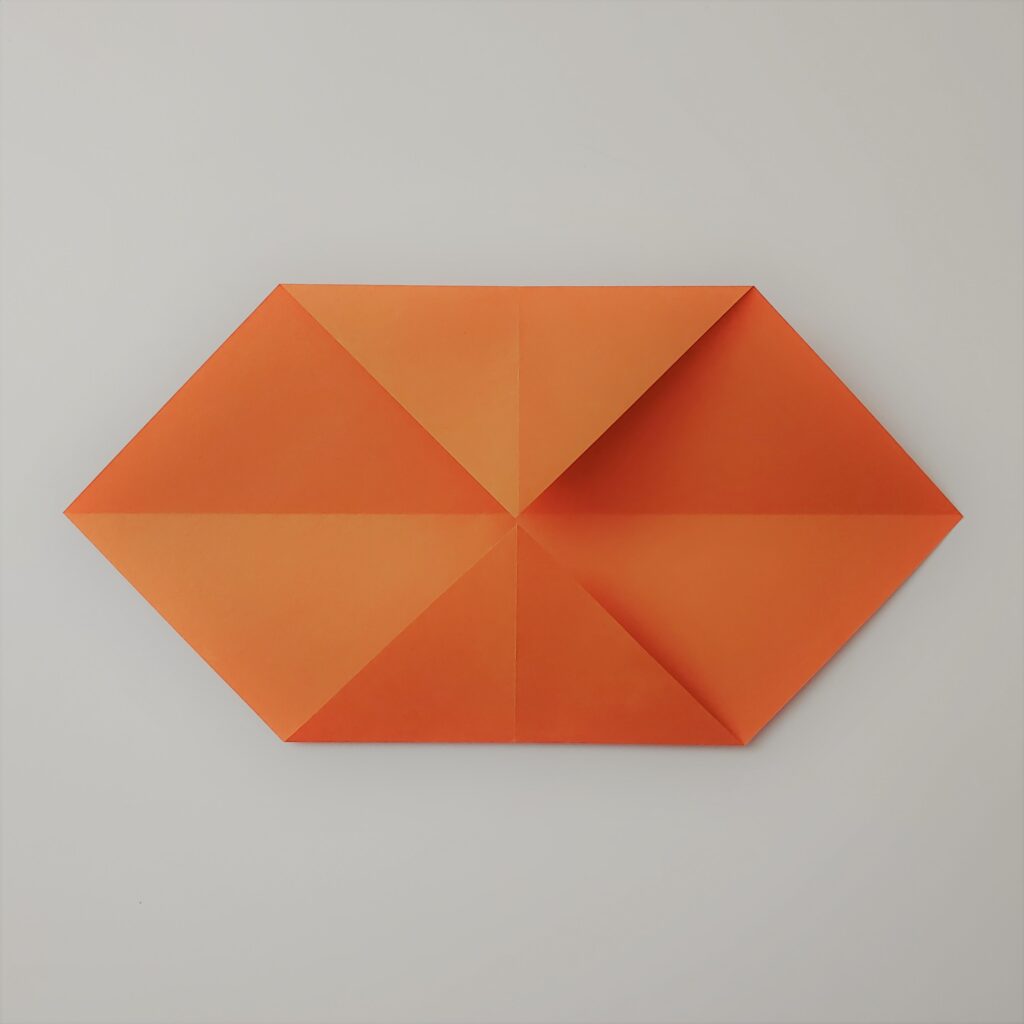
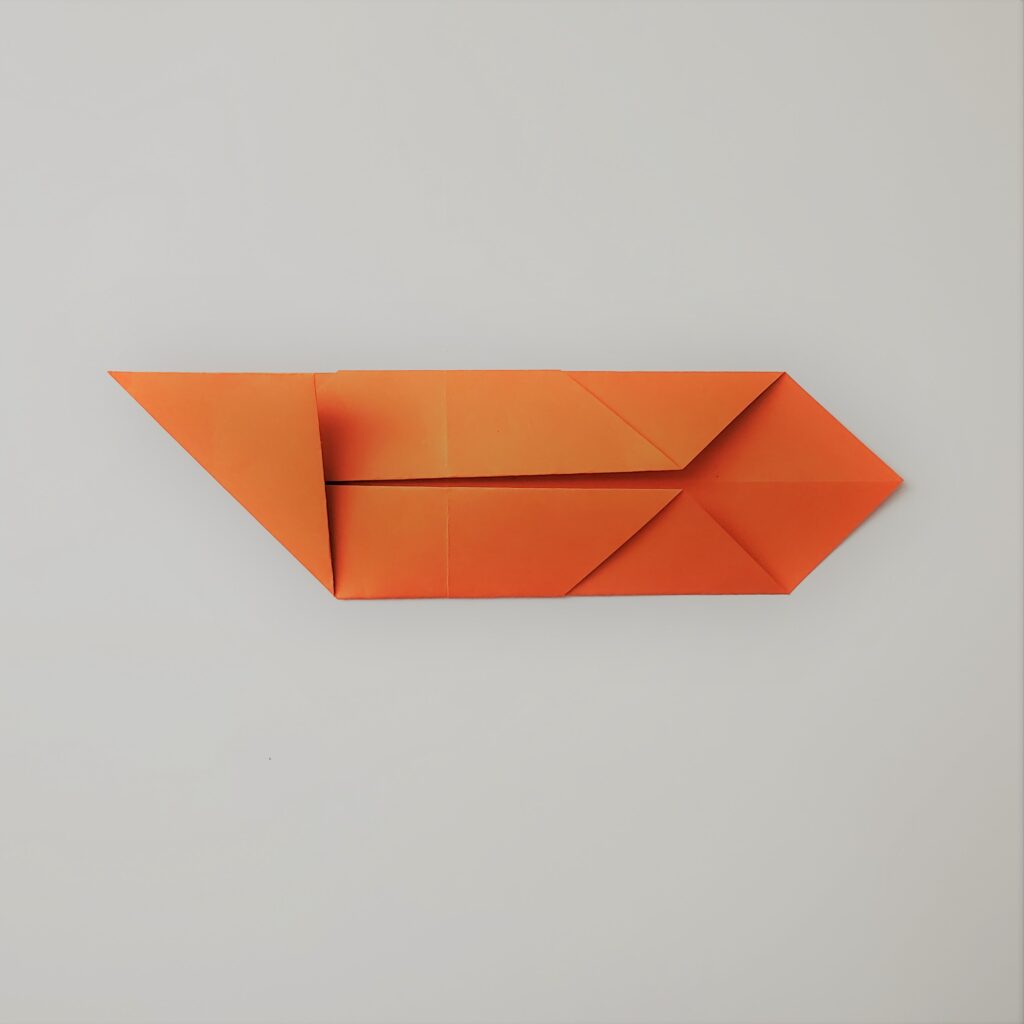
- Take the bottom flap edge and fold it against the creased middle line.
- Take the top flap edge and fold it against the creased middle line.
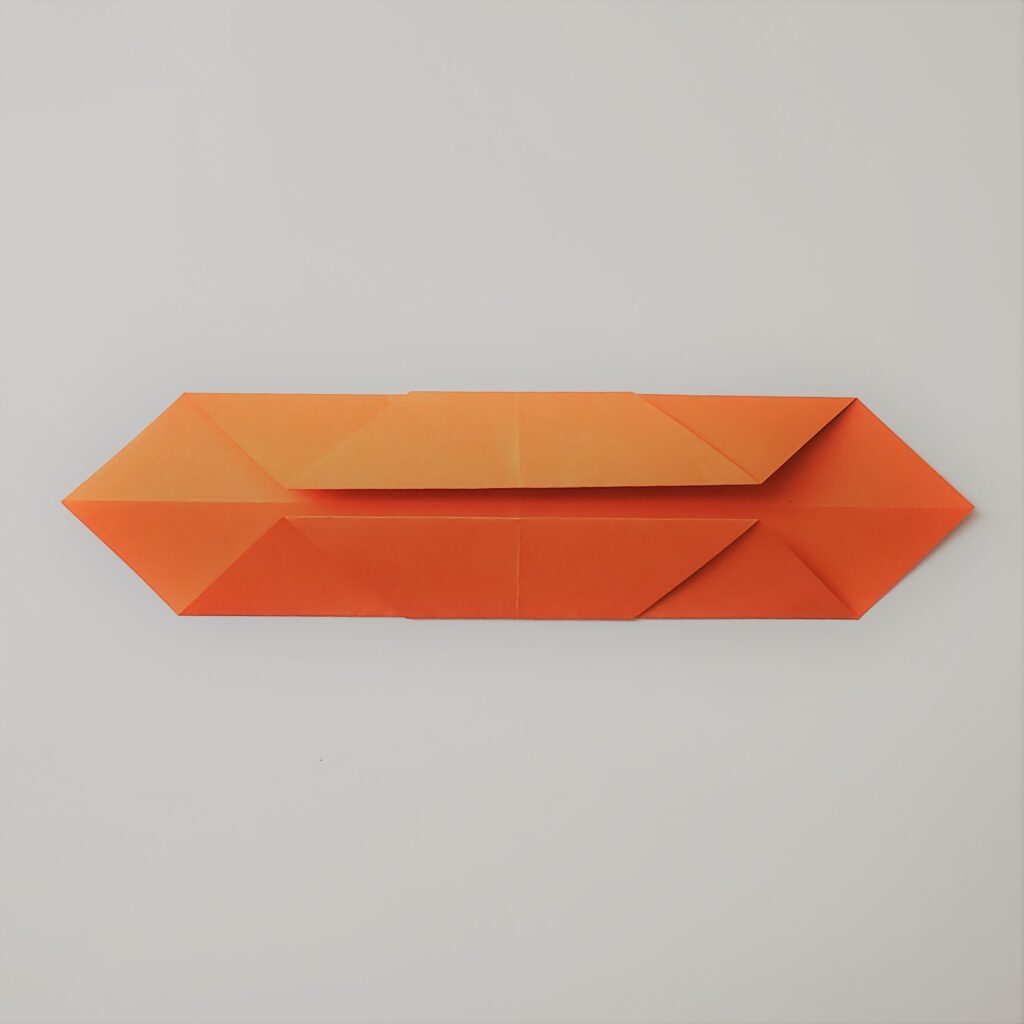
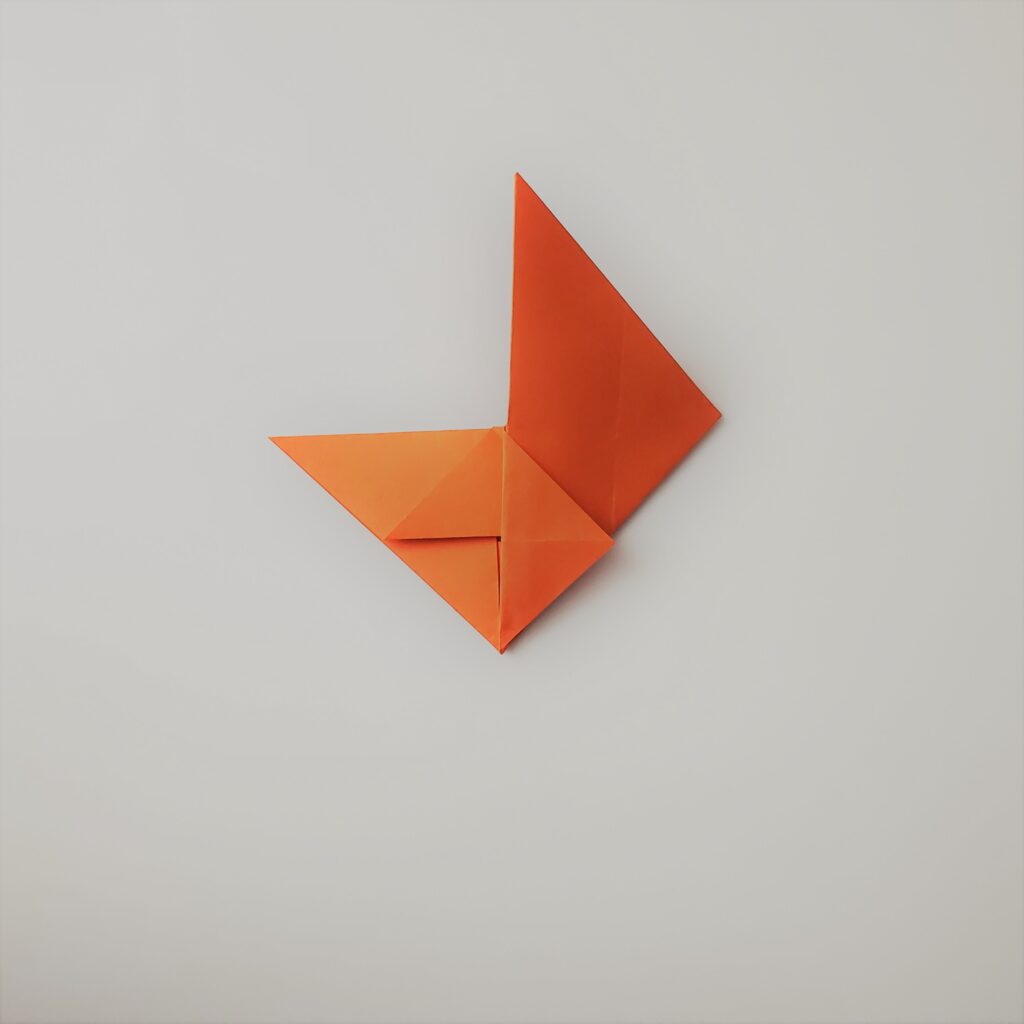
- Fold the left side flap to form a triangle.
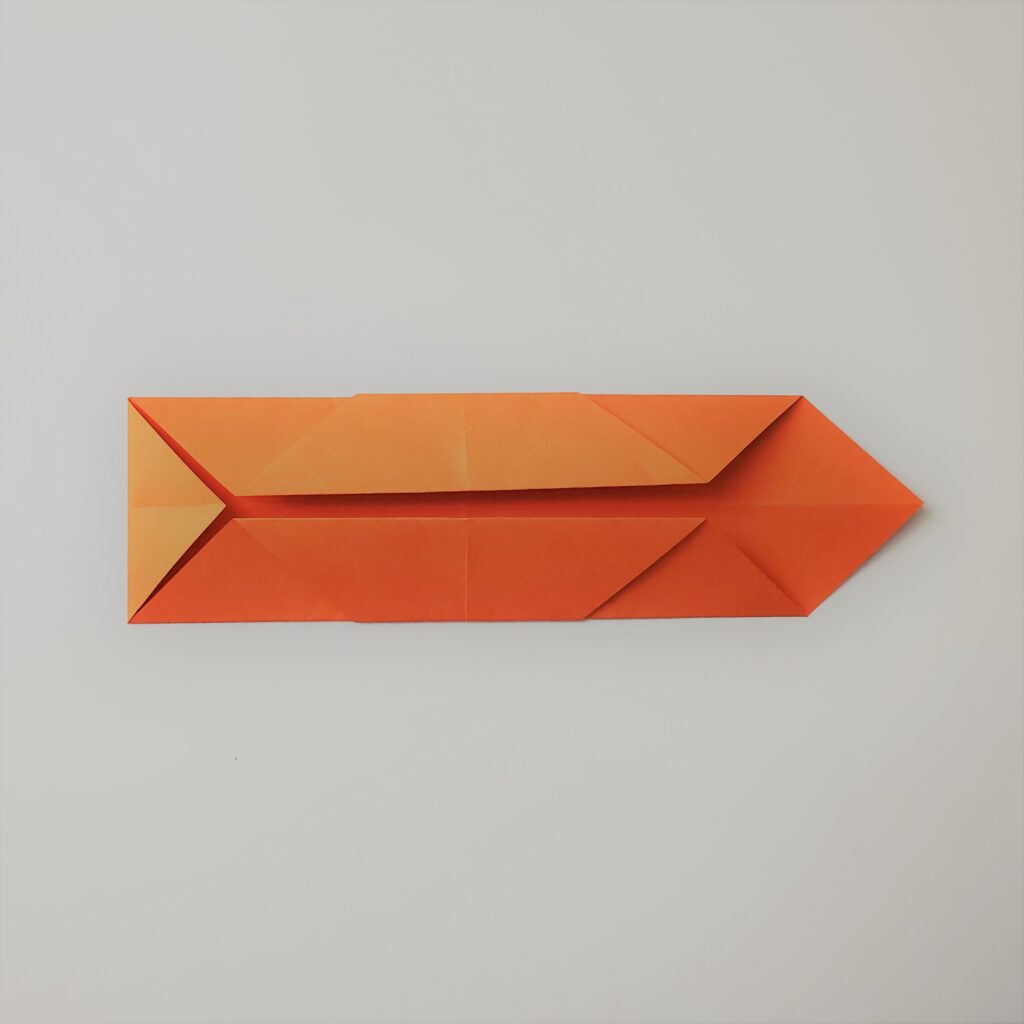
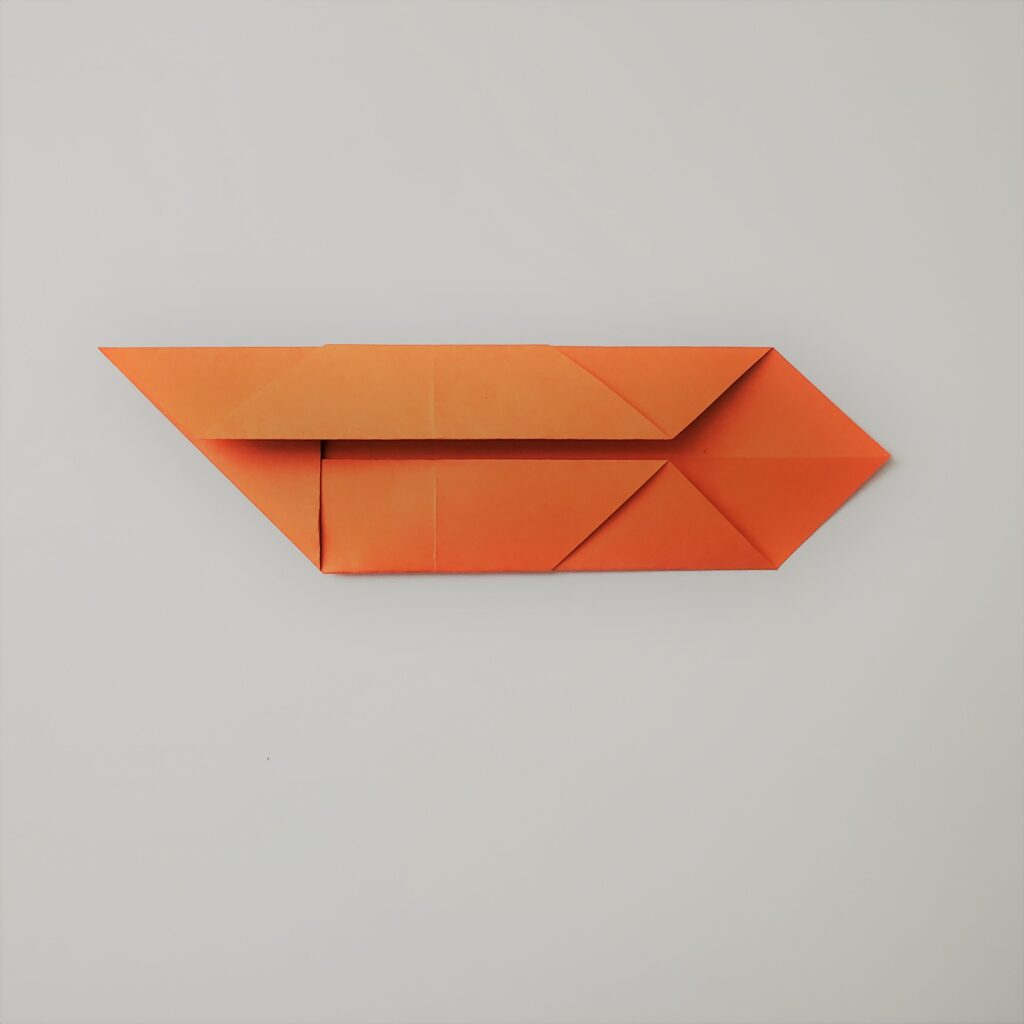
- Take the bottom left side corner and fold it upwards to form a 90° triangle.
- Tuck the 90° triangle under the top flap.
- Rotate the origami paper and repeat steps 8-10.
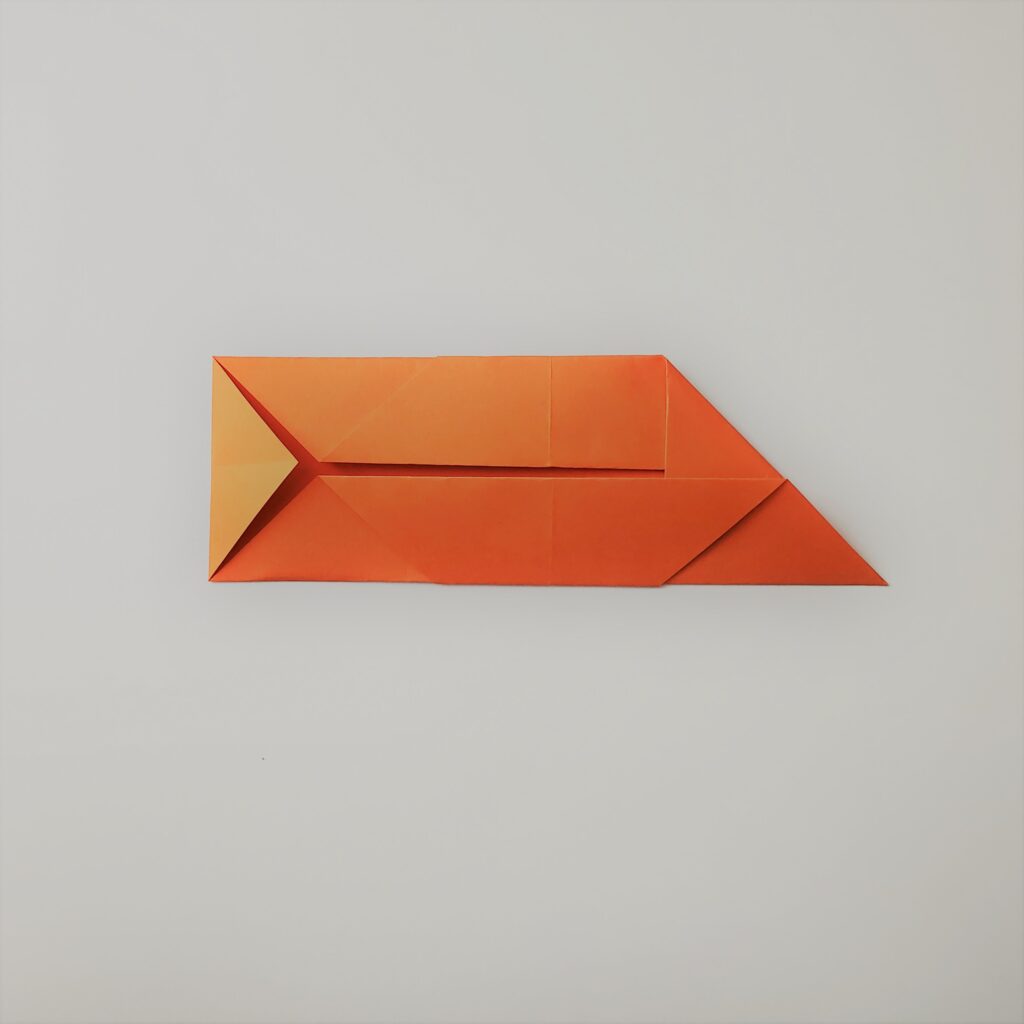

- Fold the bottom left corner to the top right corner and unfold. Then fold the bottom right corner up towards the top left and unfold. This should form an X crease.
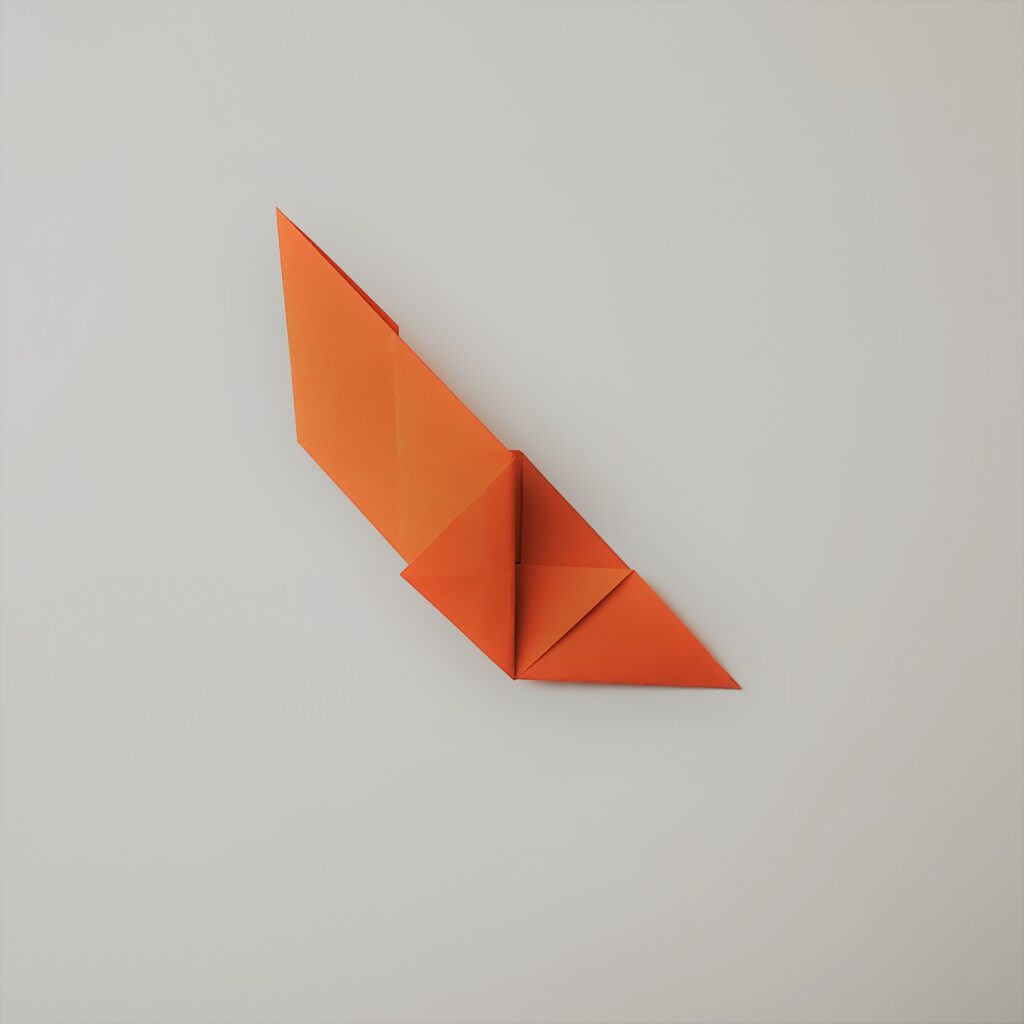
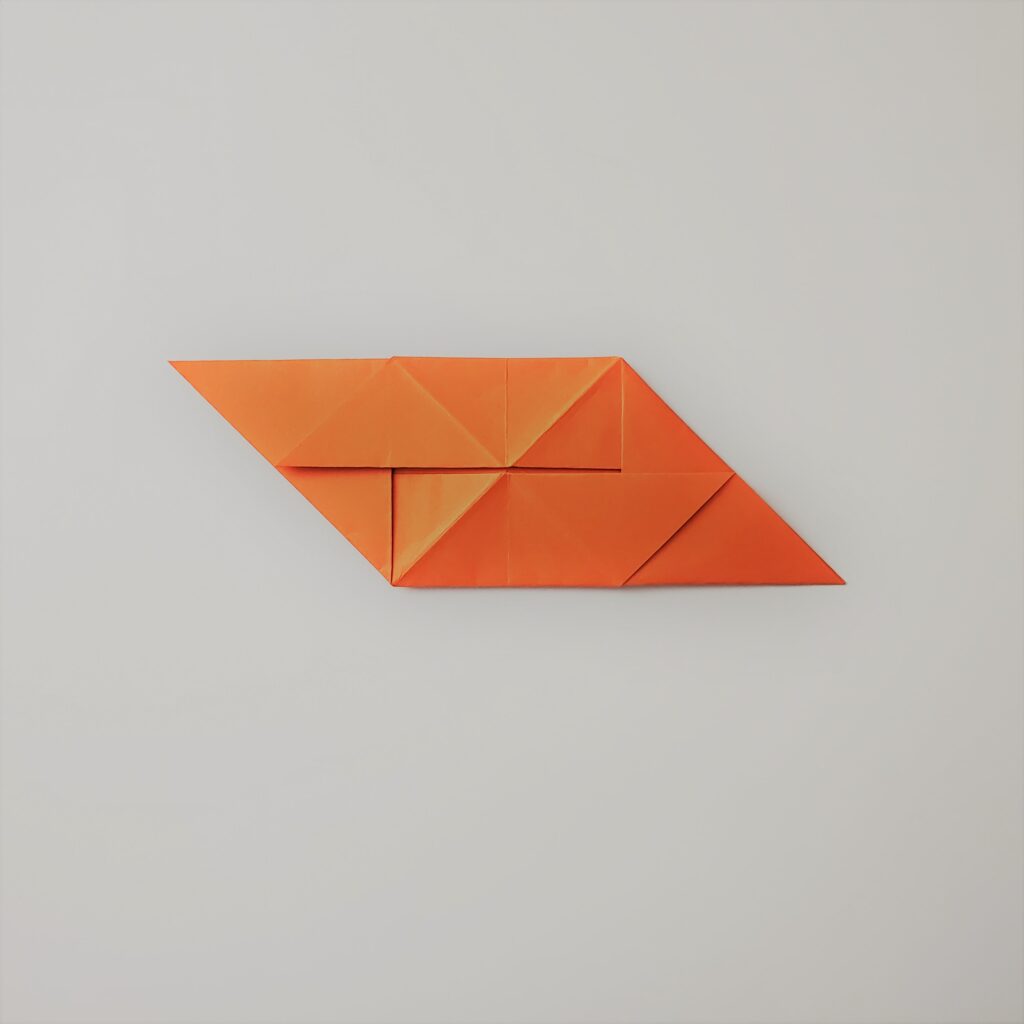
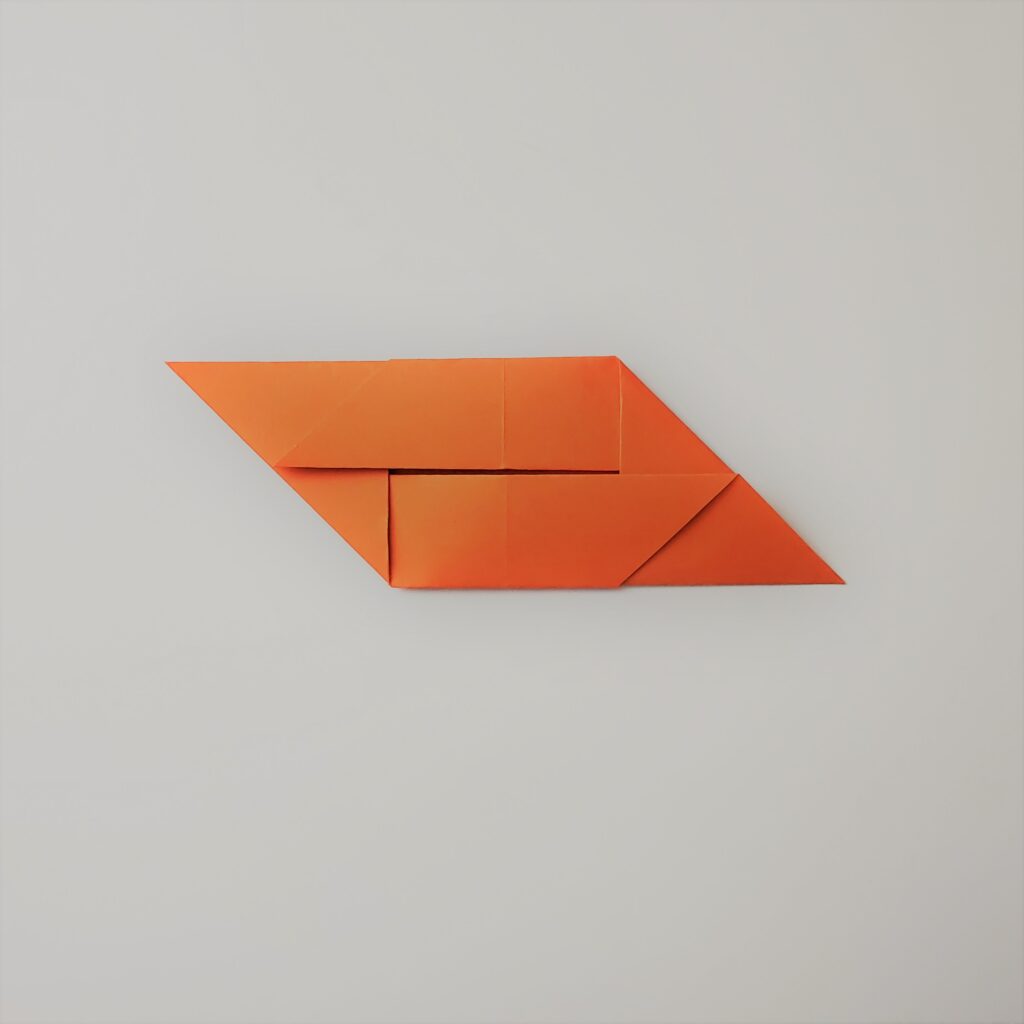
- Flip the origami paper over. Fold the origami paper diagonally twice (similar to the previous step), forming an X crease. This will help sturdy the creases.
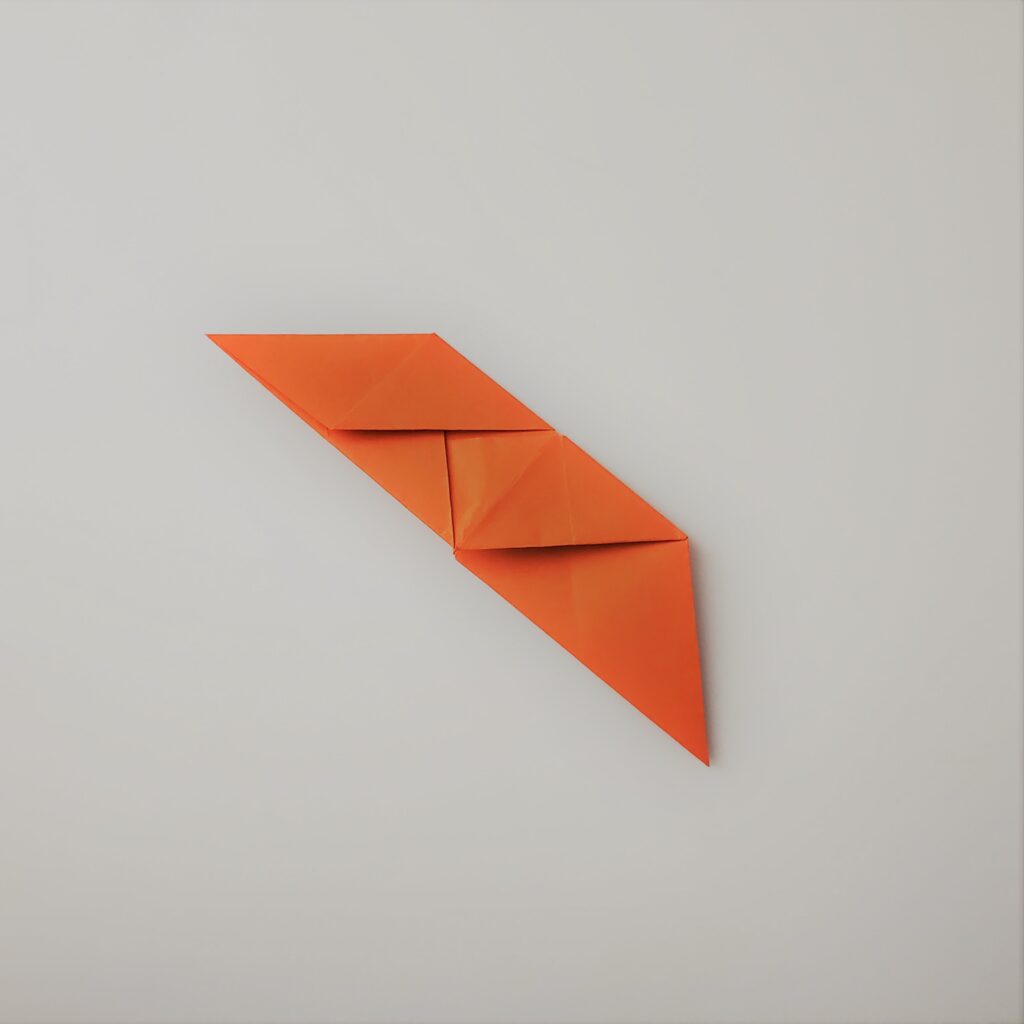

- Repeat steps 1-13 to fold 2 additional units with the remaining colored origami paper.
Assembly Instructions:
Note: View the video tutorial for easier assembly.
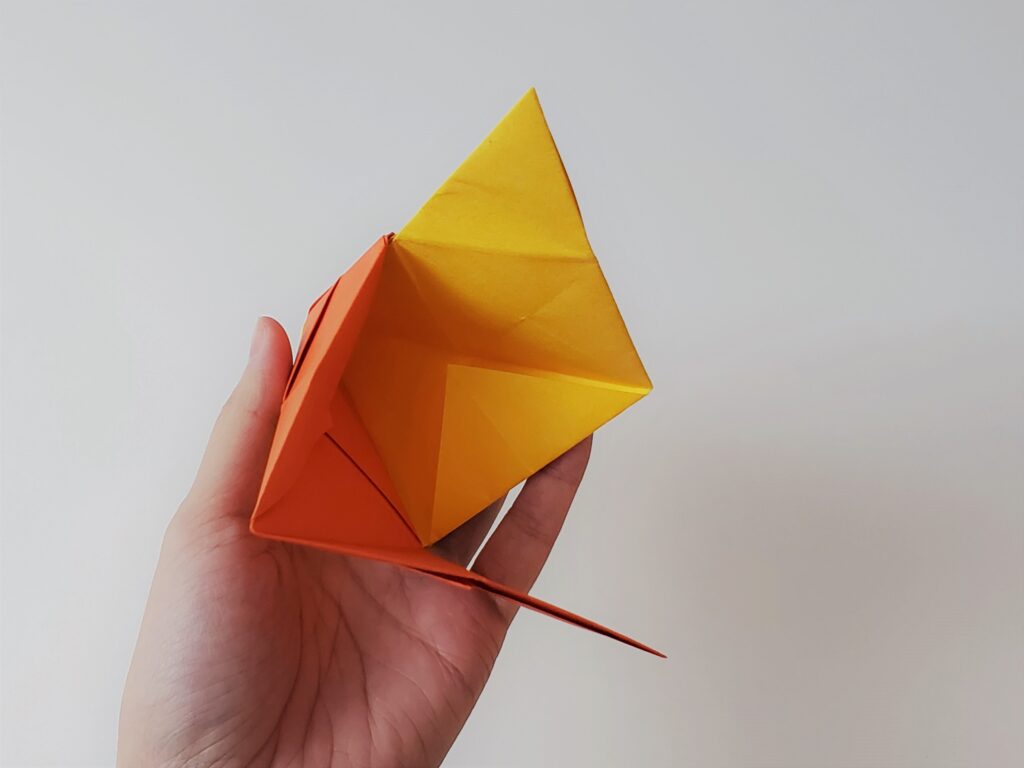
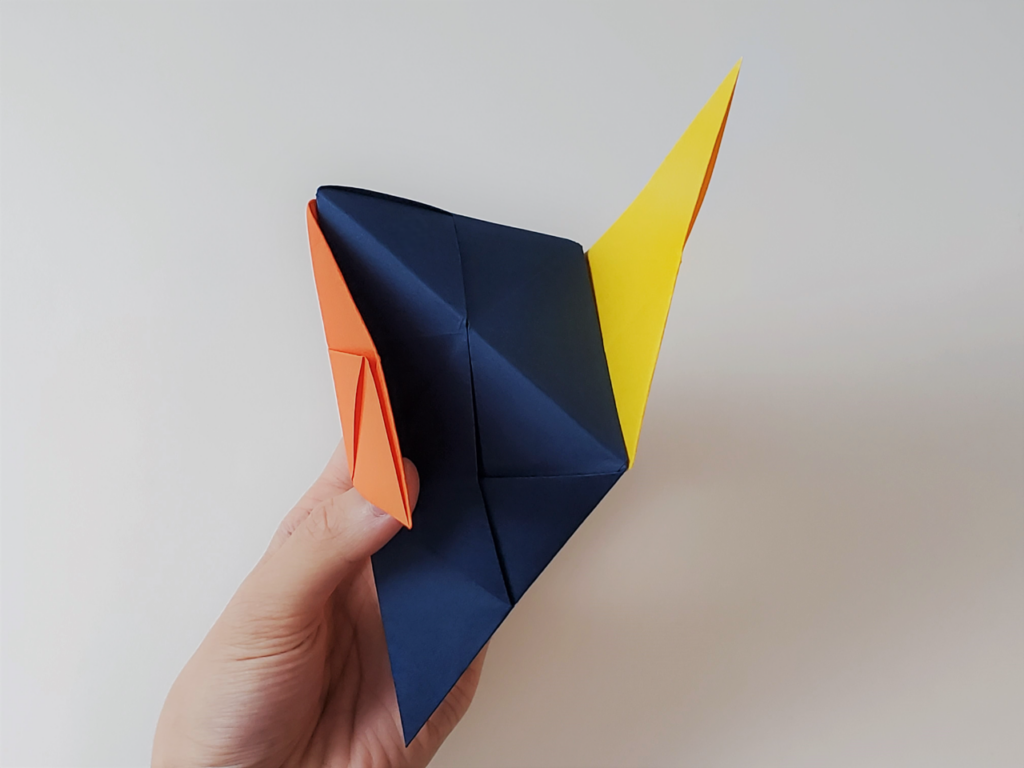
- Have the Orange unit vertically in your left hand and the Yellow unit horizontally in your right hand. Take the Yellow unit’s left corner and insert it in the Orange unit’s inner triangle panel on the top left.
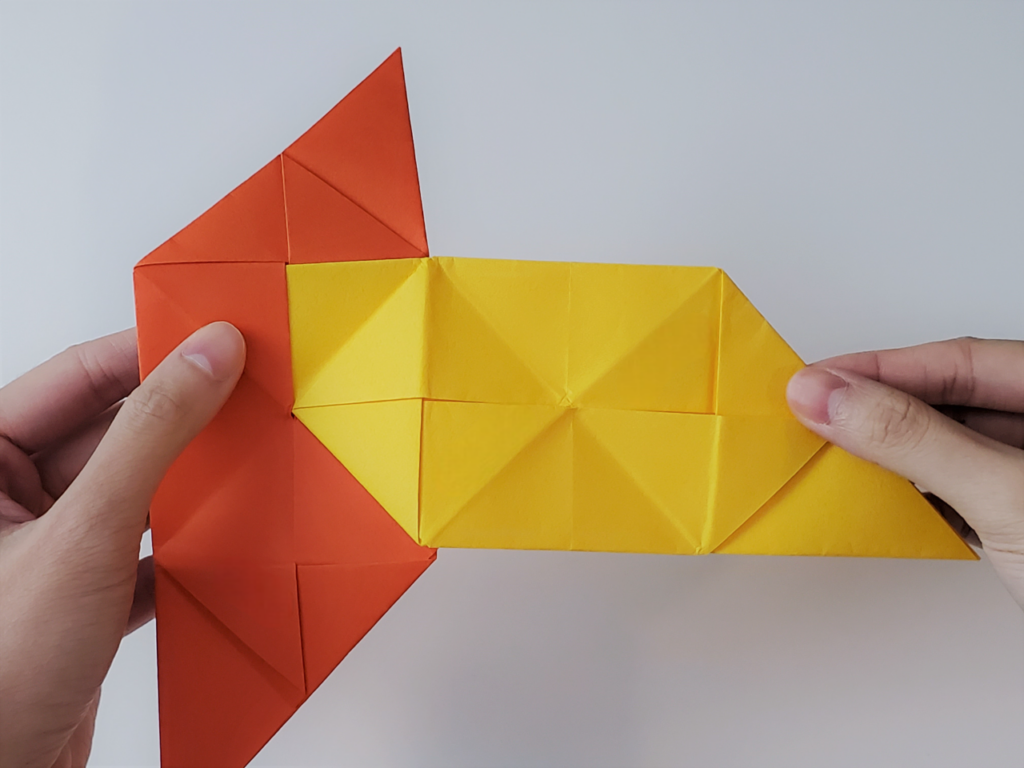
- Flip the combined unit over and rotate to have the Yellow unit at the top.
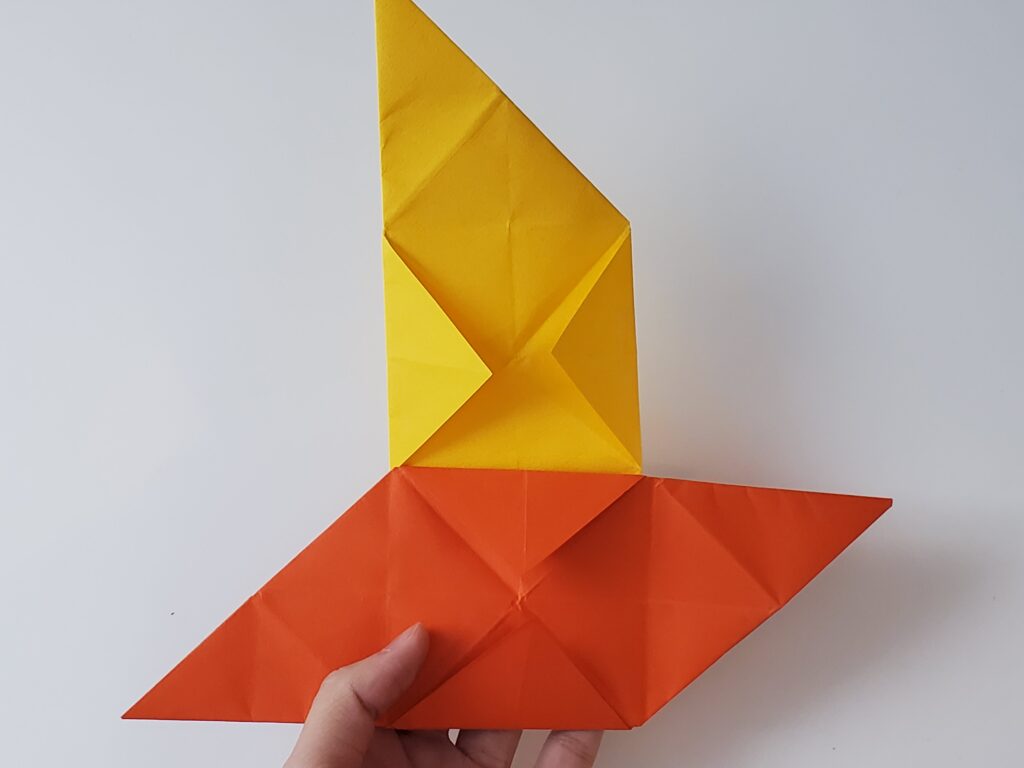
- Fold the Yellow unit’s remaining flap down towards you. Using the Orange unit’s left corner, insert it in the Yellow unit’s inner triangle panel on the bottom right. Pinch the sides to shape the combined unit.
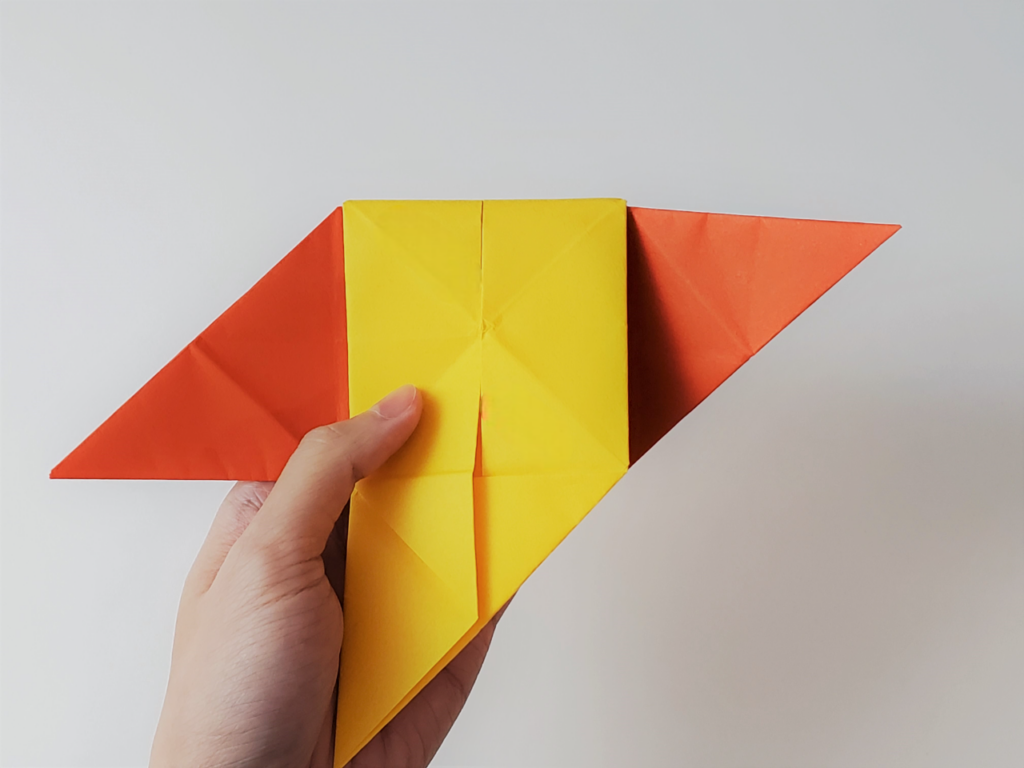
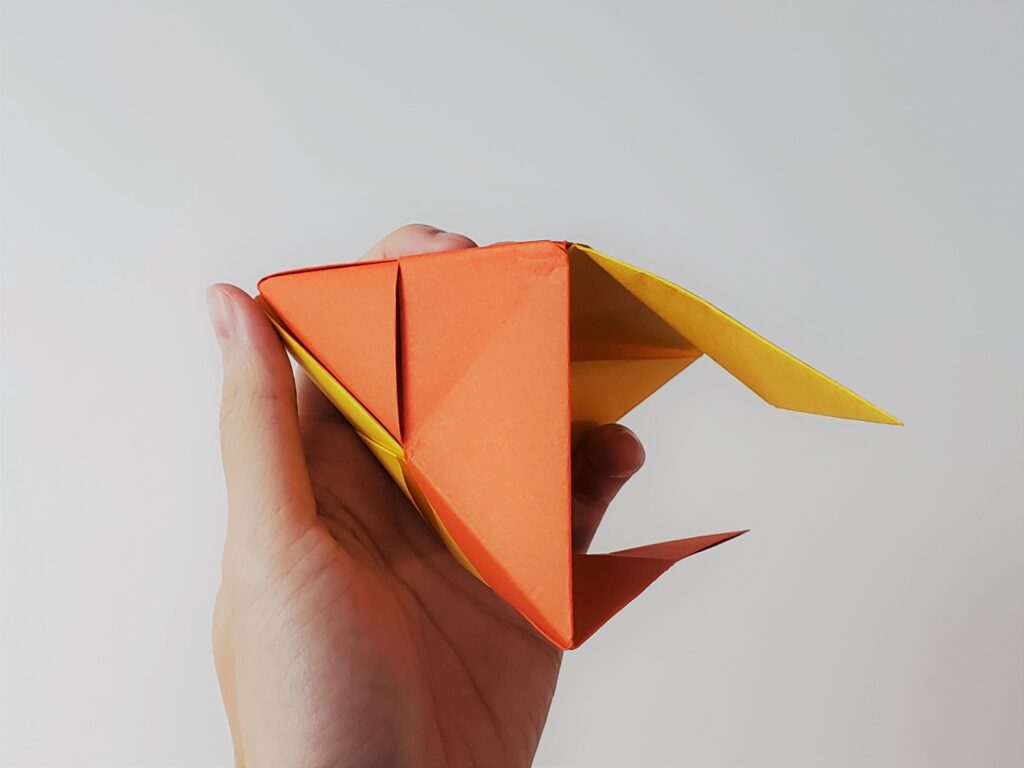
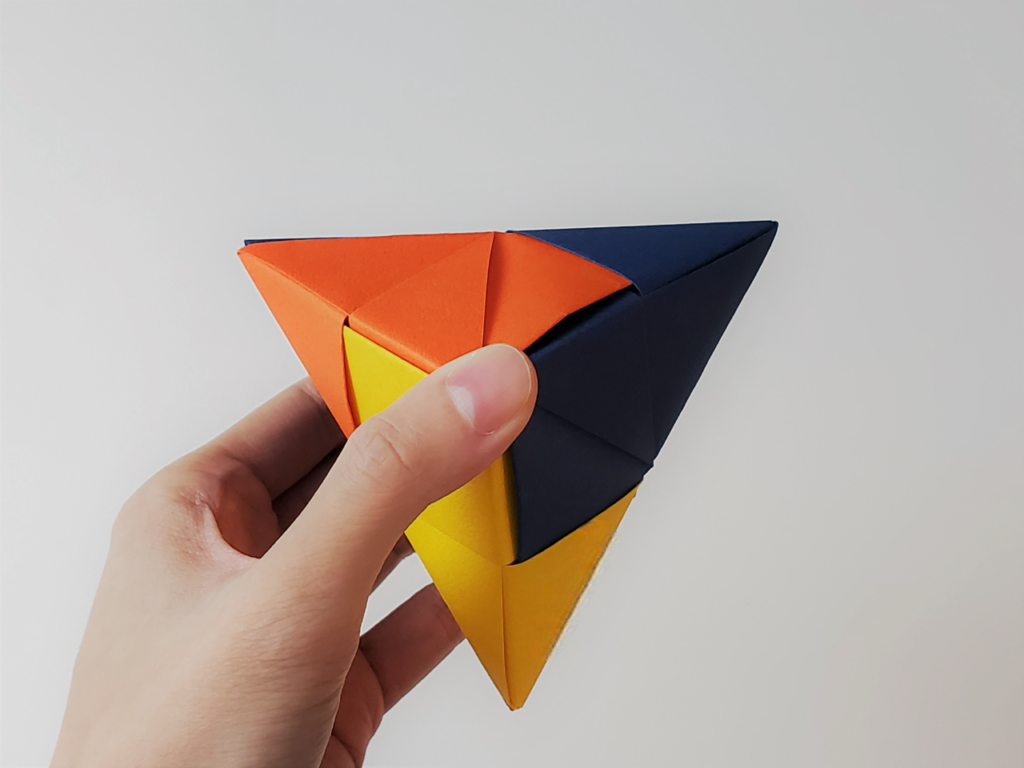
- Rotate the combined unit so you will see the inner bottom. The Orange unit should be on the left side and Yellow on the right side (should look somewhat like a pinwheel).
- Rotate the combined unit so you have a 90° triangle panel of the Orange unit facing you.
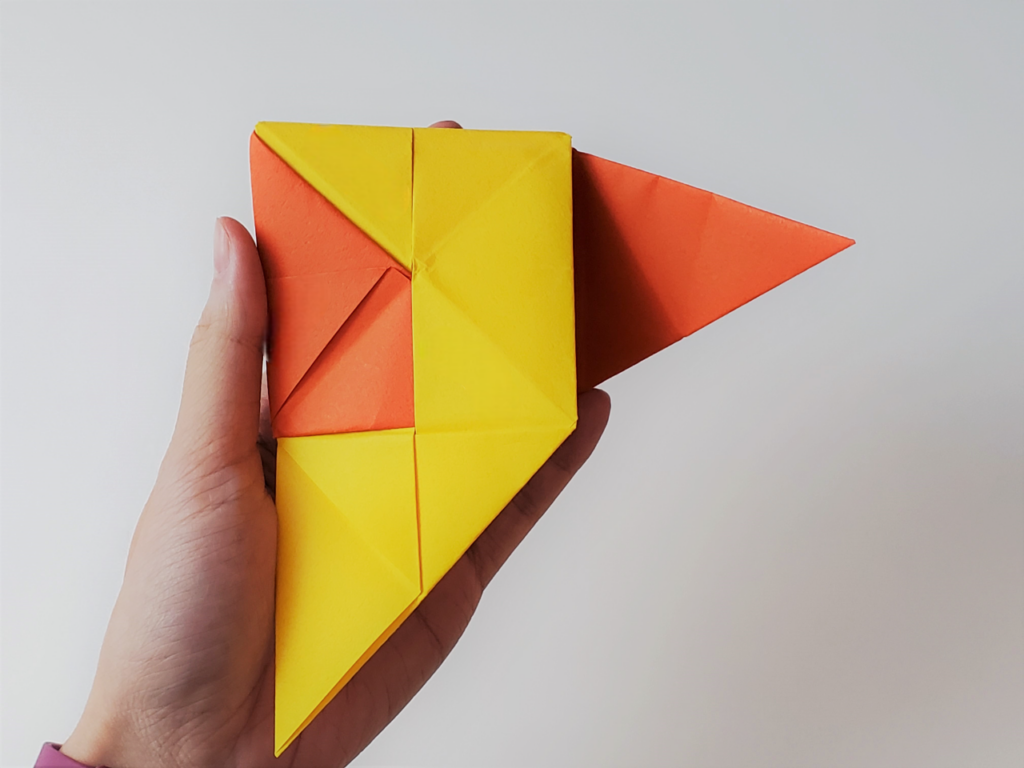
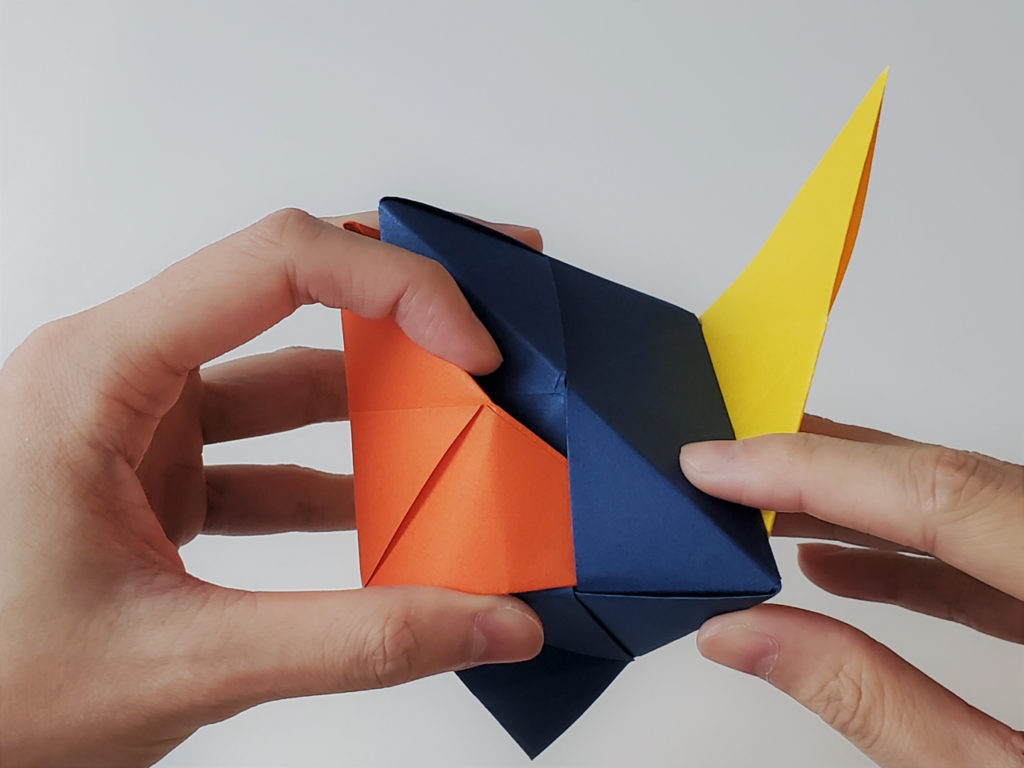
- Hold the Blue unit horizontally in your right hand and insert its left corner in the Orange unit’s inner triangle panel.
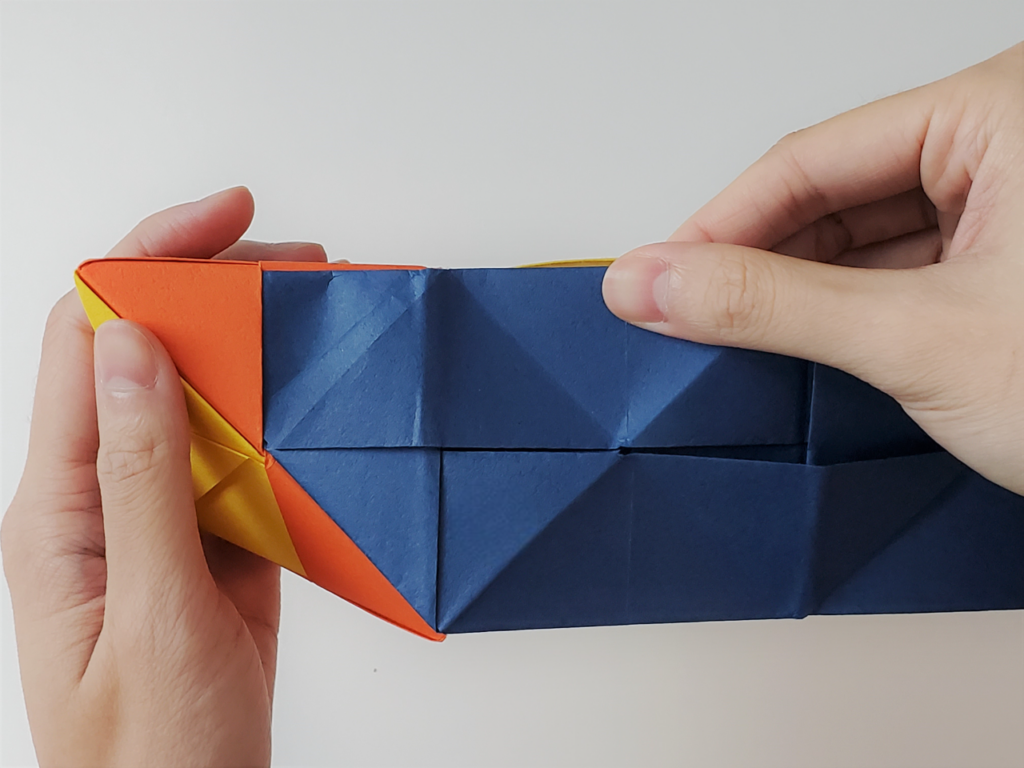
- Rotate the combined unit so you will see the inner bottom. The Blue unit should be on the top, the Orange unit on the left side, and the Yellow unit on the right side (should look somewhat like a pinwheel).
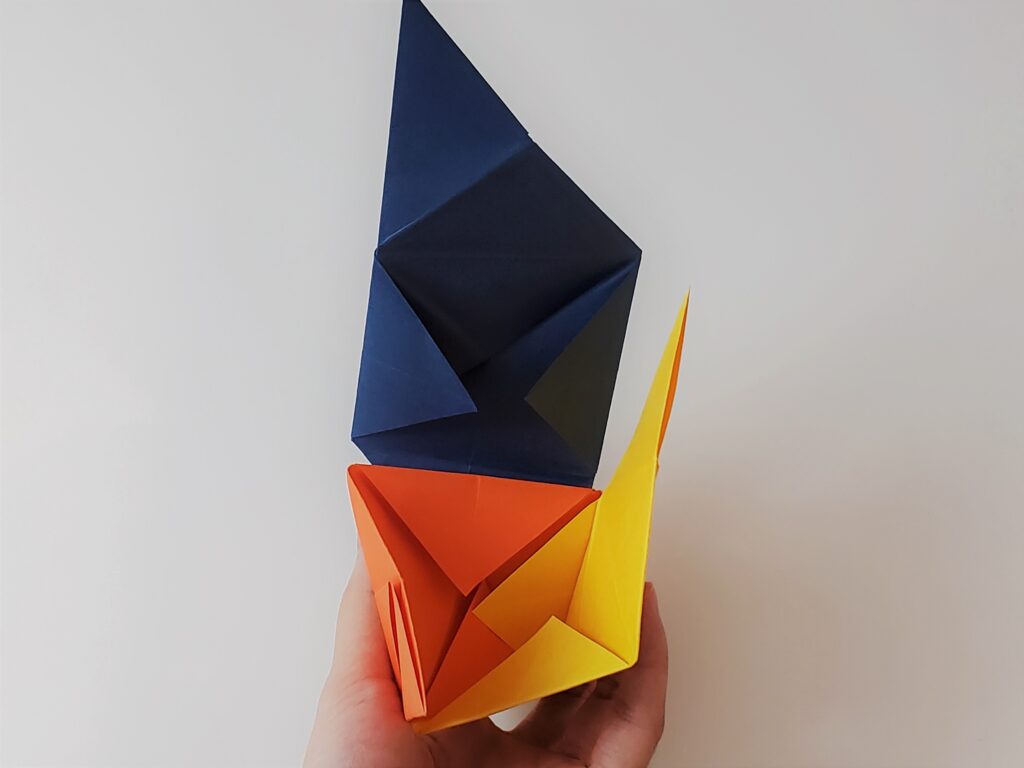
- Fold the Blue unit’s remaining flap down towards you. Using the Orange unit’s corner, insert it in the Blue unit’s inner triangle panel on the bottom right. Pinch the sides to shape the combined unit.
- Using the Yellow unit’s corner, insert it in the Blue unit’s inner triangle panel on the top left. Pinch the sides to shape the combined unit.
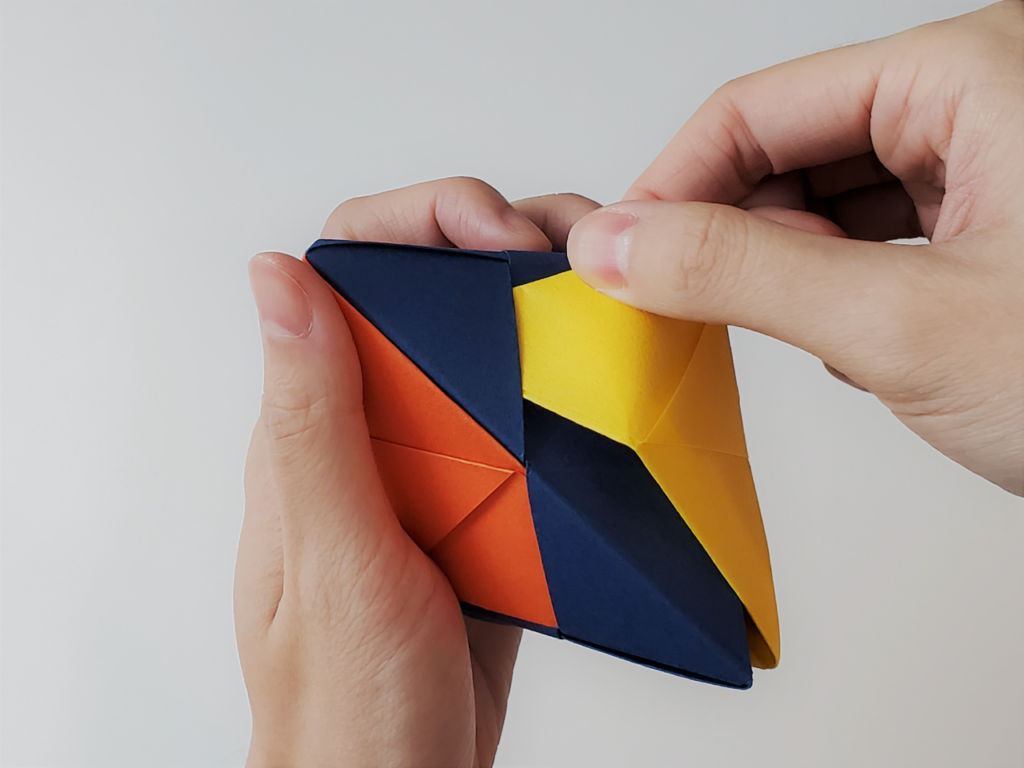
- Using the Blue unit’s corner, insert it in the Yellow unit’s inner triangle panel on the bottom. Pinch the sides to shape the combined unit.

- Shape the combined unit more by folding the sides towards each other until flat. Repeat for each side until flat.
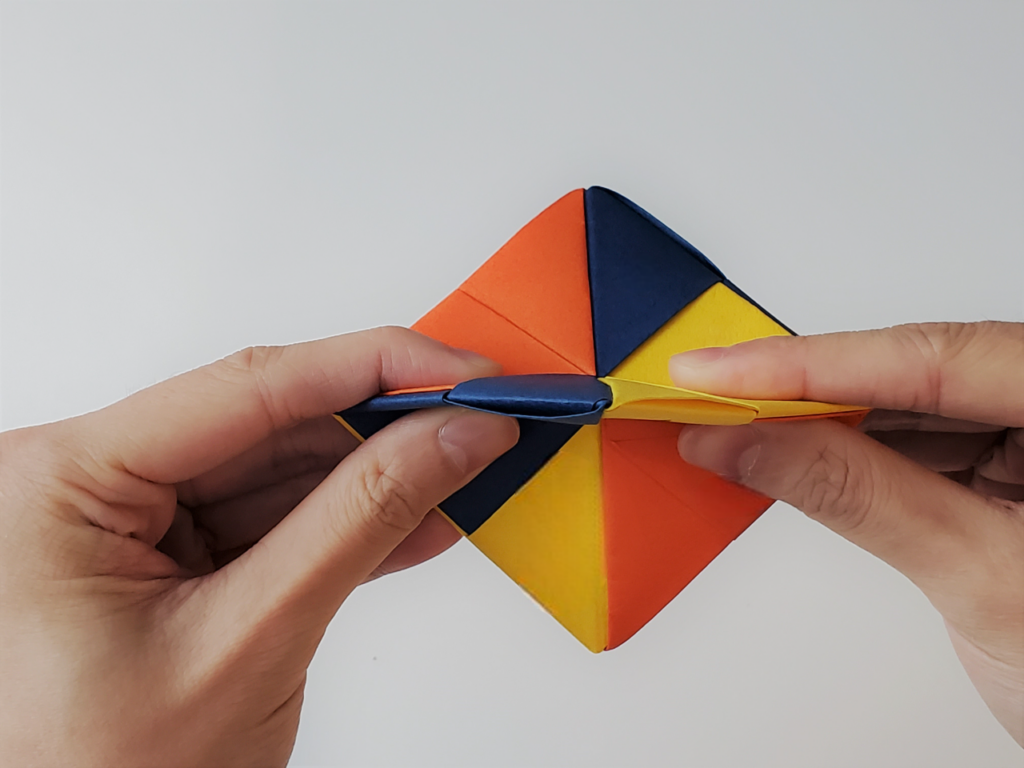
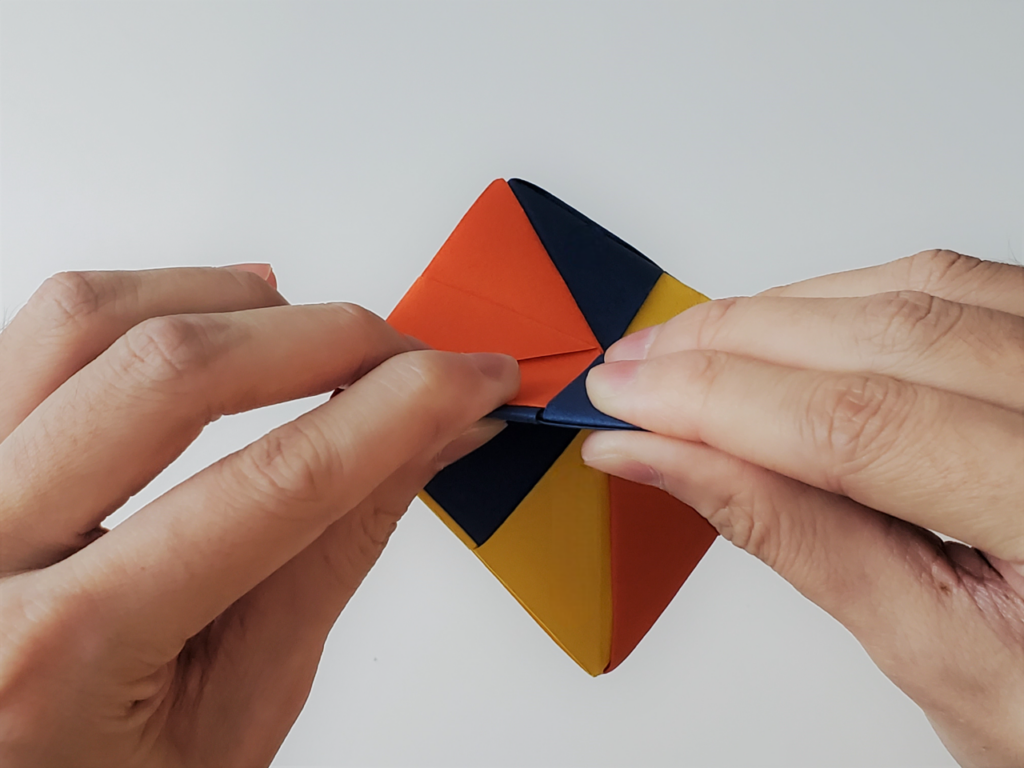
- To “pop” the fidget toy, place your thumb on its top point and another finger underneath, the bottom point. Add pressure and the fidget toy will pop. Repeat steps 11 and 12, 3-4x to have it pop easier.
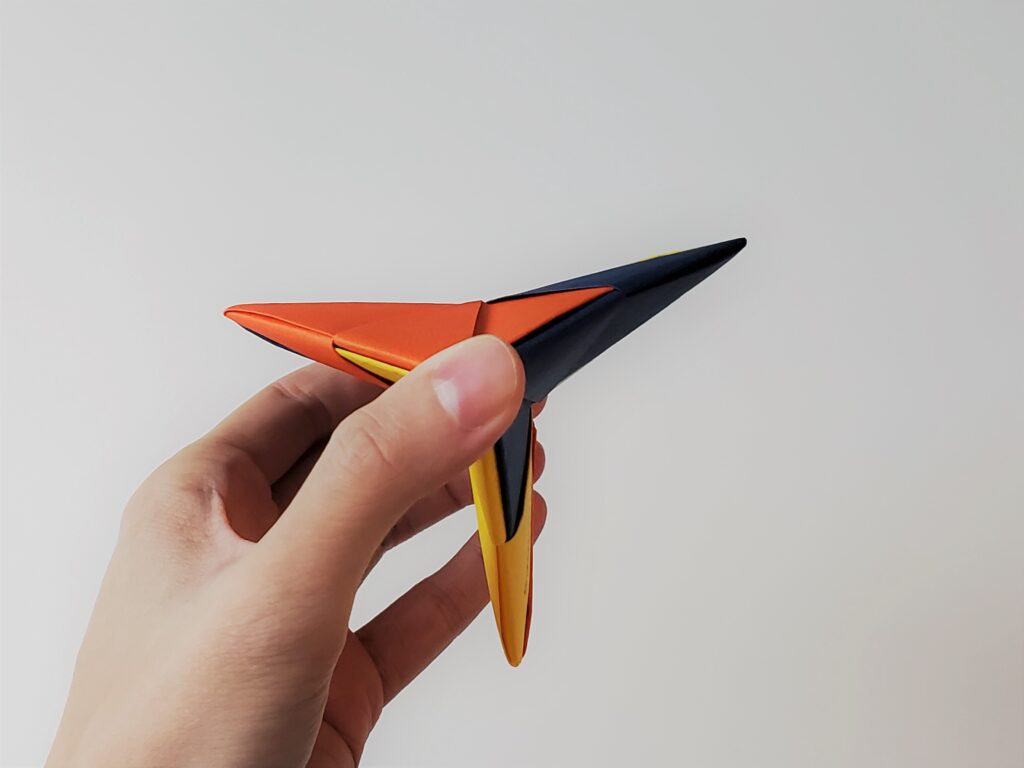
🎨 Voila! You’ve made your very own pop-it fidget spinner! Enjoy the fun and satisfaction of your handmade creation. Happy crafting, and have a fantastic Fourth of July! ✨